Building our new bathroom and lounge
We had a few deadlines approaching in 2016. We were expecting our second baby in September and our mortgage was due for renewal in August. So there were things we wanted to get done before the summer. At the beginning of the year, we started laying out plans for all the work we needed to do on the ground floor of our 3 storey Victorian terraced house in Hanover, Brighton.
We wanted a completely new bathroom and a completely new lounge and hallway. Our existing lounge was open plan, with the front door opening straight in to the room. This meant that it wasn't really a room, we couldn't use it as a spare bedroom, at least not one with any privacy, and all the open space meant that it was a bit colder. So we wanted to reinstate the original internal wall, creating a lounge and hallway. We'd also get the bonus of it being a room for guests to stay in with our sofa bed; which had the added advantage of the house then being classed as a 3 bed, which would increase value with little expense (most houses in Hanover with three storeys and a ground floor front room class that it as the third bedroom).
The original Estate Agent photos of the lounge and bathroom. Probably never looked so good as they of course didn't show any of the issues.
Planning
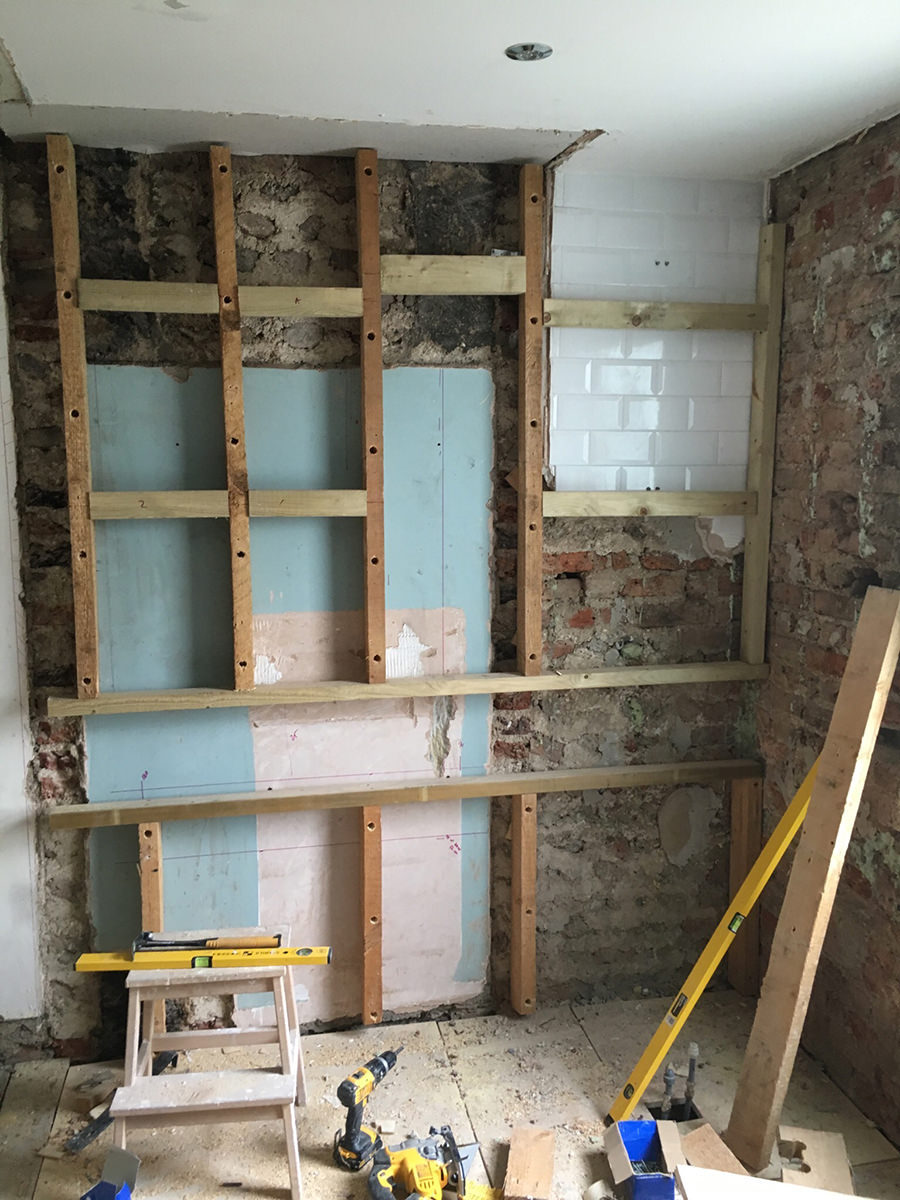
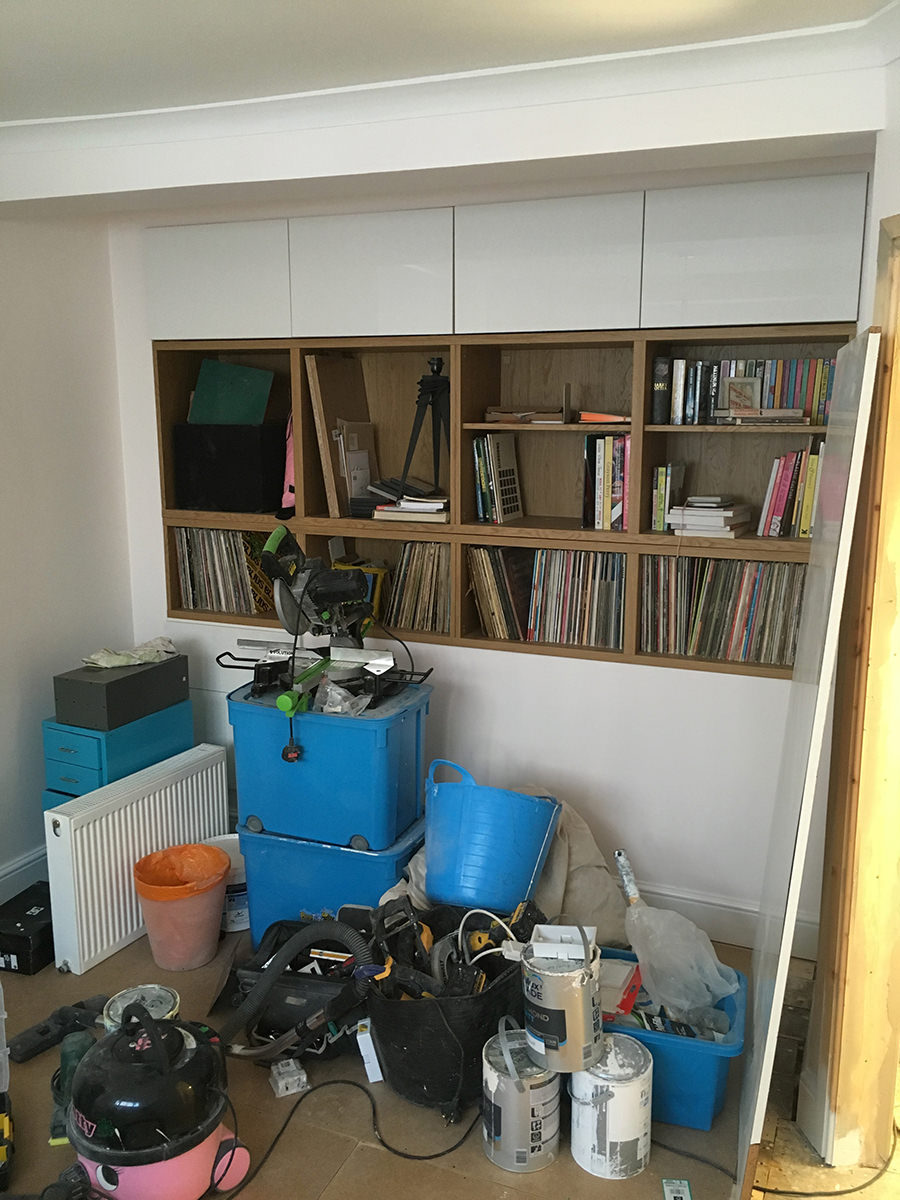
We had some clear ideas about what we wanted early on. Right across this floor we needed to maximise space and create storage wherever we could. By adding a hallway back in, the sense of space would be reduced so we needed to be smart with our plans. Some point early on I had the idea of creating a storage wall between the lounge and bathroom. Essentially, where space is not needed on one side the wall, it's used for storage on the other. So where we knew we would have a sofa in the lounge and that any shelving behind it would be inaccessible - that would then determine the height of storage on the other side. Initially we got some quotes for a bespoke build but it was clear the costs would be far too high. So I planned around using IKEA units which more or less came out at a third of the price.
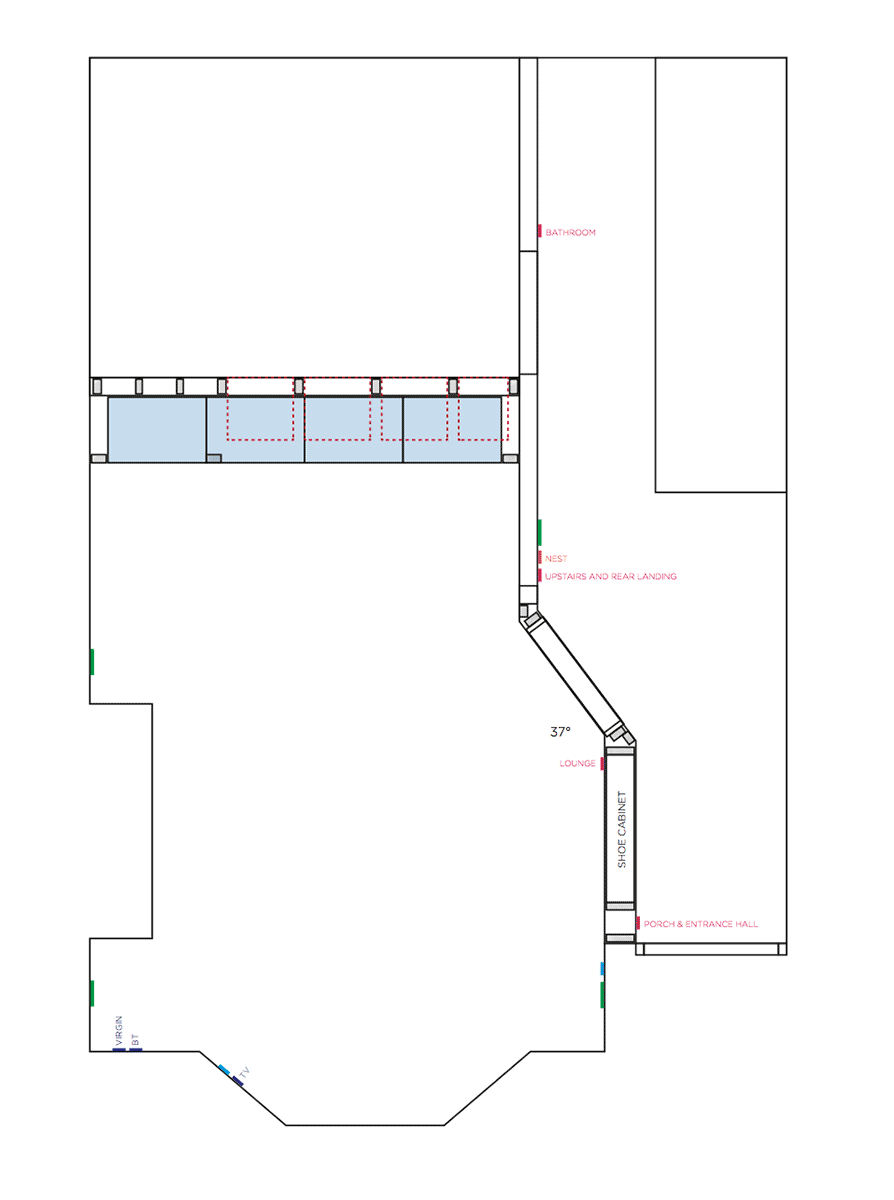
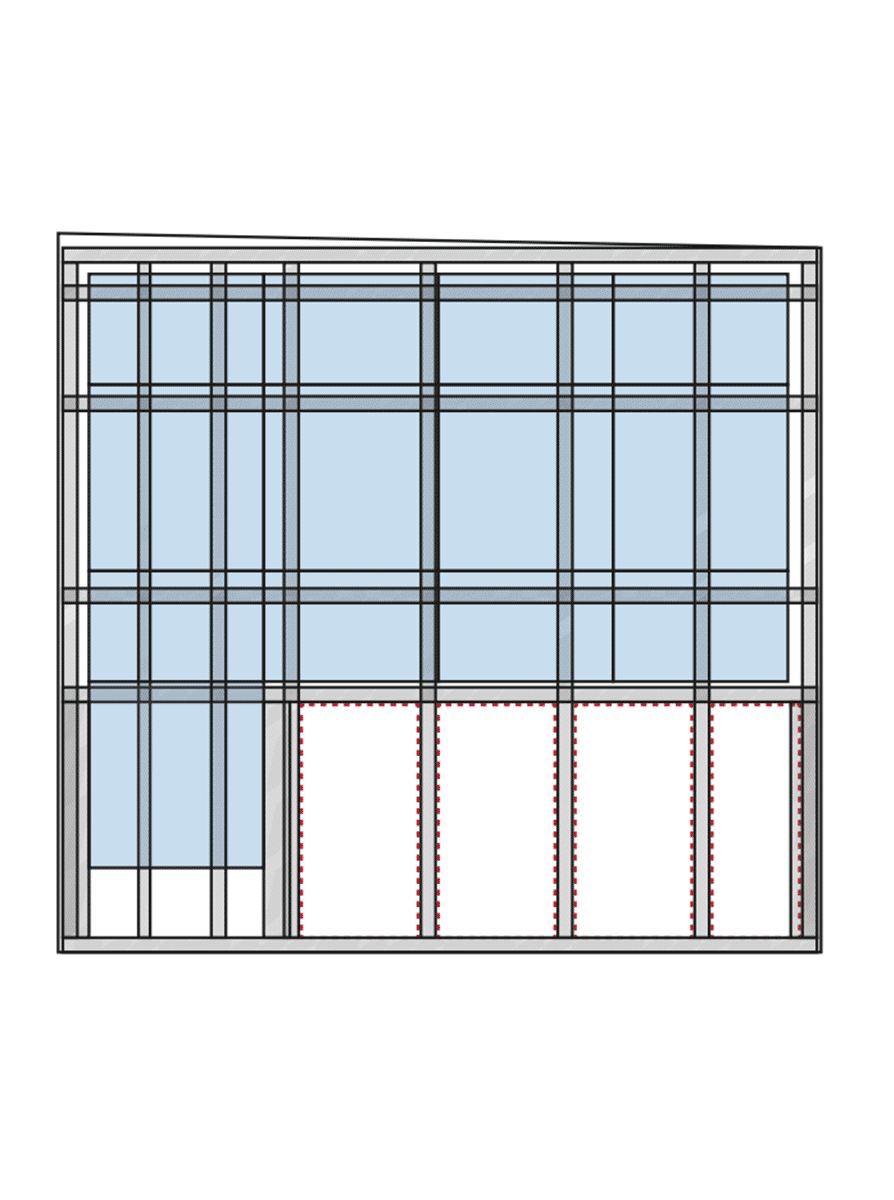
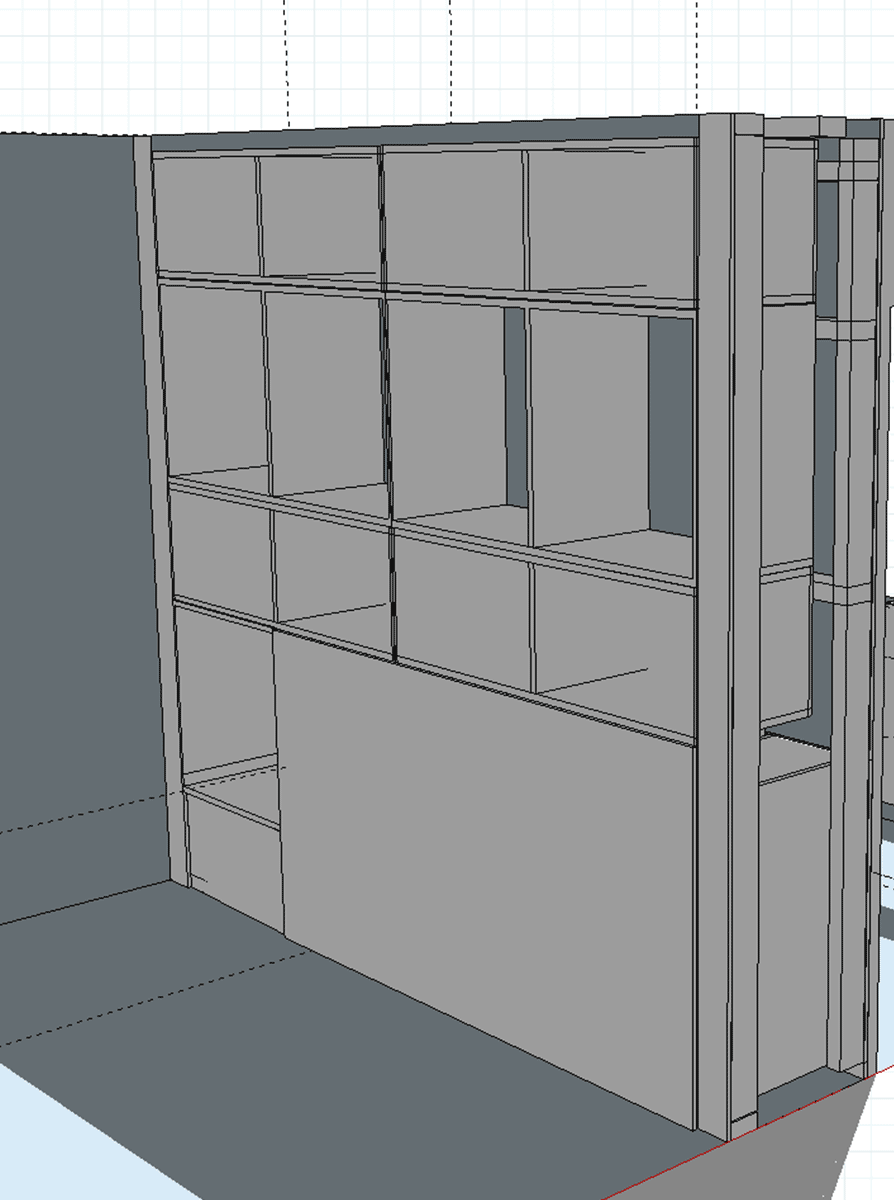
Floor plans and Sketchup model for the storage wall - a thick wall of intersecting storage spaces.
I drew up plans for the new room dimensions, marking out socket locations and later I used Sketchup to create an accurate 3D model of the storage wall I would eventually be building. Sketchup helpfully has a library of IKEA unit assets to scale. With the walls construction I needed to consider where the brackets for the wall units would mount to, so this dictated the positioning of the horizontal noggins.
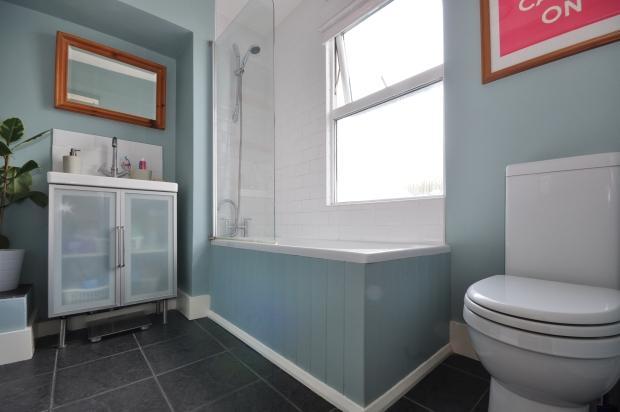
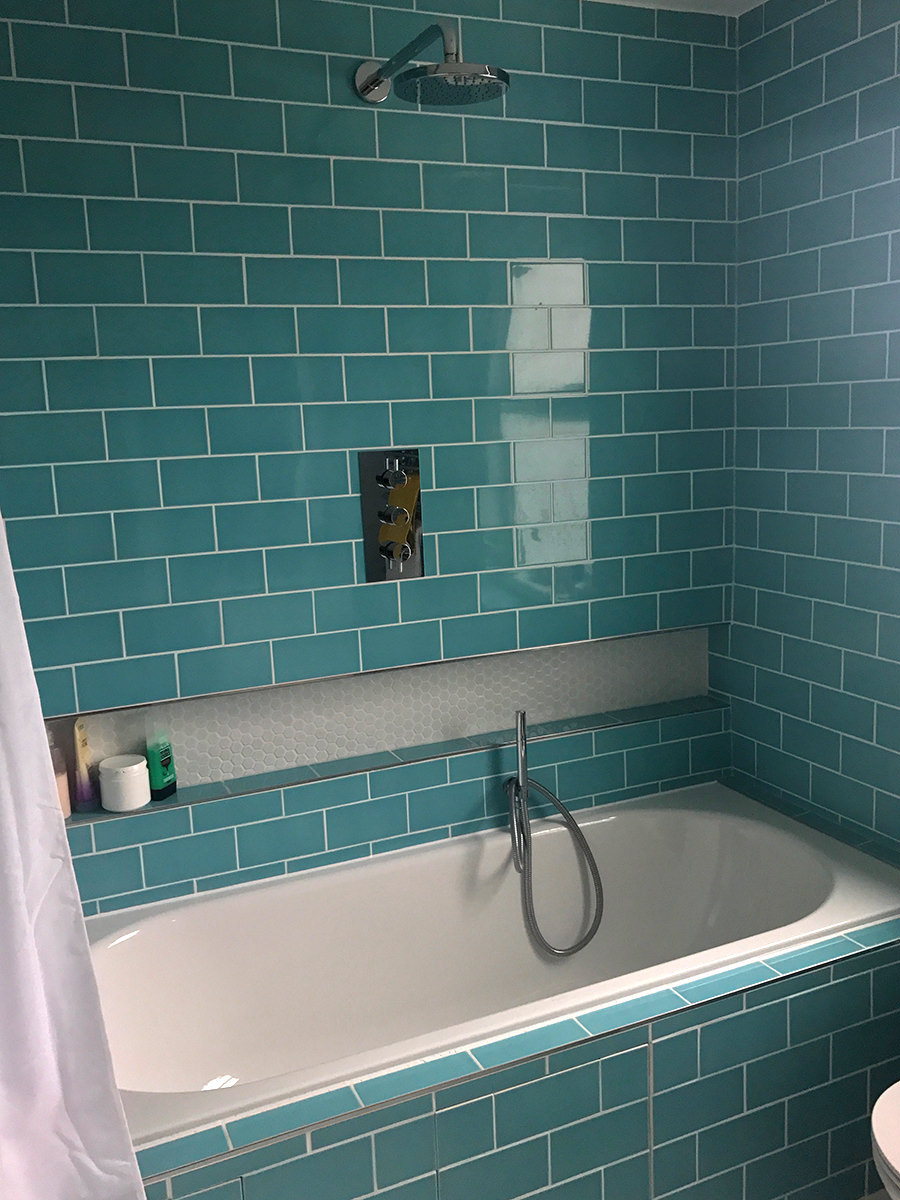
We also discussed and planned out the layout of the bathroom. With a small room, the layout was fairly restricted. We wanted the bath to cover the width of the room, on the opposite side to the entrace, to ensure maximum space, and have a shower above the centre of the bath. A full width shower rail would stop any splashing in to the room. We then had three walls left, the interior wall was being used for storage so there the sink with a cabinet above it could go on one of two spaces, with the remaining space being needed for a toilet. These factors meant that after positioning the bath, the toilet and sink just fell in to their most sensible spaces. I can't actually remember the exact point at which we ordered the bathroom parts, all I can remember is that it was extremely boring. I thought it would be exciting, but finding the pieces which fitted our space and requirements was really tedious. One visit to the bathroom shop had lasted 3 hours. 3 hours of looking at bathroom suite catalogues!
It begins
The first step was to get some quotes for the building work which needed doing: removing the chimney breast. Chimney breast removal is relatively straightforward, providing it's done properly and that the house has a structural survey beforehand. Initially we got straight on to the builders, but found they wouldn't quote until we had a survey done. We had the surveyor come round and take a look.
Now, our house is a little wonky in places. We first properly realised this in the upstairs bedrooms where I had already levelled the floor, but with a surveyor looking over the property thoroughly, we discovered a few hidden surprises. The ground floor joist, which was holding up the bedrooms above, was an original Victorian timber joist supported by original timber column. Not great news because this meant it didn't meet building regulations and that we would need to get it replaced. The surveyor seemed to think that the mortgage company shouldn't have leant us the money for the house if they'd have discovered this in their survey. The ground floor itself was held up by an RSJ in the basement, probably around 40 years old, from when it was made open plan. So some degree of settling may have happened there, then above that, a wooden column connecting to the wooden joist would have also seen slow movement over the years. So there was plenty of explanation for the wonkiness.
Before we could think about the chimney breasts being removed, we needed to have the column and joists replaced with steels. Getting the structural calculations for the steels, ordering them, booking the builders in - it took months. Everyone was busy and we had the slowest structural engineer ever. He was a little frustrating to work with, but the process had begun so I didn't want to back out and lose time. In retrospect this may have been easier!
Not wanting to lose time I got on with work not dependent on the new joists.
Because insulating the bedroom had been been such a good transformation, I decided to do the same thing in the lounge. It was a little more annoying, because the bay window was newly plastered. When we had very first moved in, there was original timber panelling underneath the lounge bay window from when it was sash. These were all rotten, I ripped them out eagerly and had the wall re-plastered. We then used the lounge as a dumping ground for a year - so it still had essentially newly plastered walls. I wasn't going to remove the new plaster, so I just stud walled the bay over the top. This was totally fine, it was just frustrating to know we'd wasted some money. Like in the bedroom, I used timber studs with Ecowool in-between, a vapour barrier and insulated plasterboard over the top.
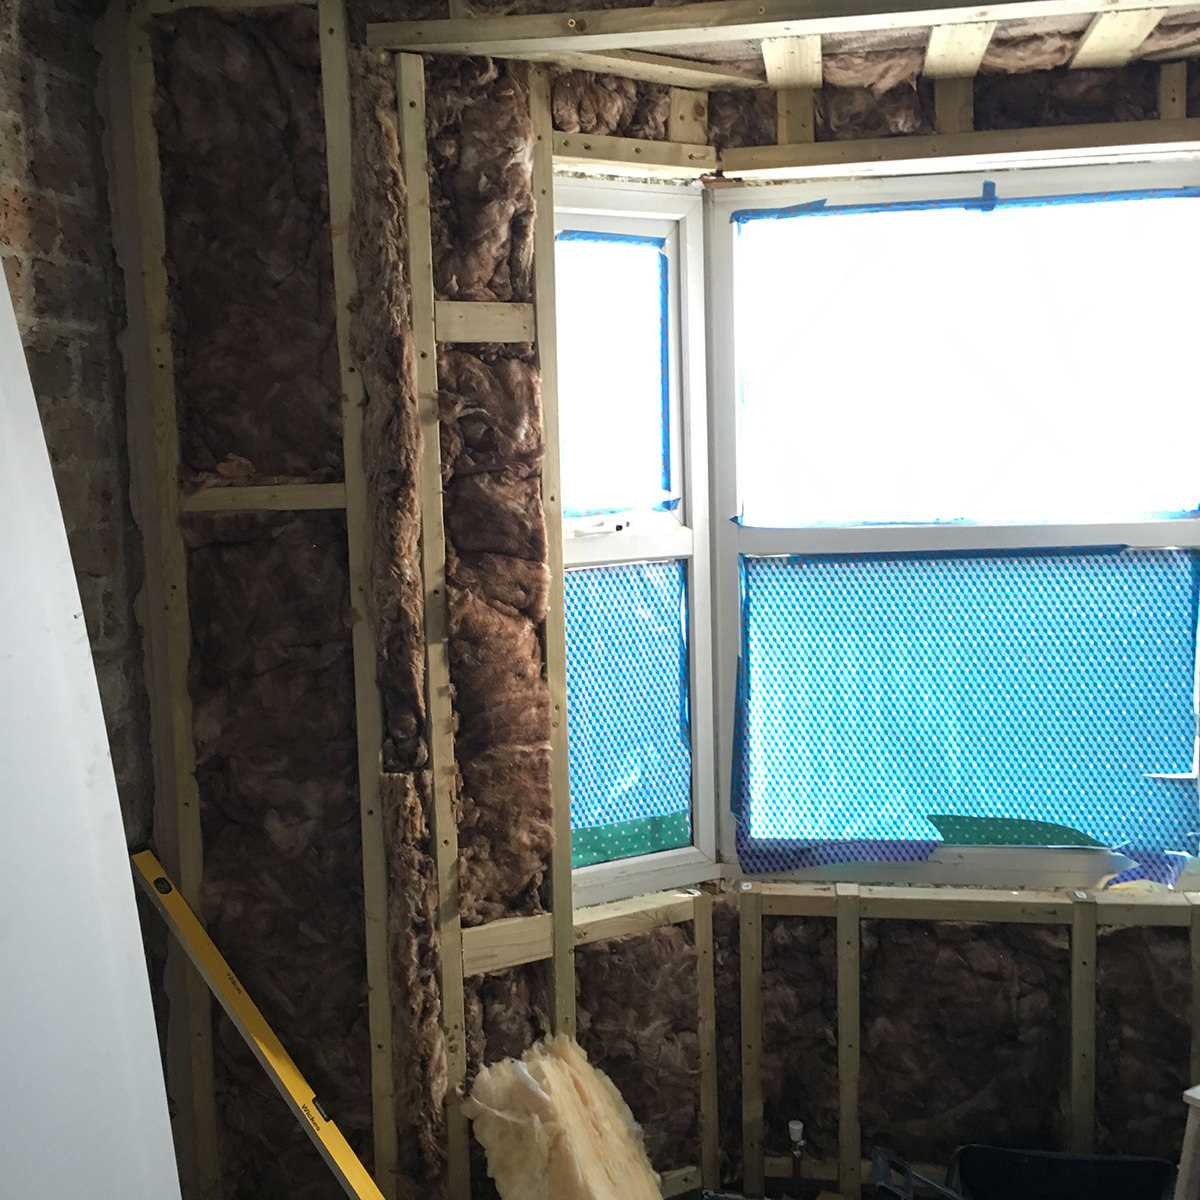
Stud wall, Ecowool, a vapour barrier and insulated plasterboard. Exactly the same us upstairs just much quicker to do the second time around.
Insulating the bay window was a perfect opportunity to sort out the various Virgin Media, BT and TV connection points. I split the BT socket and ran the ADSL line downstairs, so I could create a network cupboard (total geek out). I sank the Virgin line in to a back box so that it wouldn't use that big, sticky-outy white square box any more - I think I've had one of those ugly things sticking out of a wall in every house I've lived in for the past 15 years! Nice to be able to do something about it. Then I moved both of them around in to the corner, keeping the TV aerial and two network ports in the bay ready for the TV and all it's gubbins.
More uneven floors
The lounge had similarly uneven floors to the bedrooms above and I wanted to level them using the same method as I had in the bedroom, sistering new joists to the old ones. This needed to be done before any new walls went up, so as I was still waiting for the builders to become available, I got on with levelling the floor.
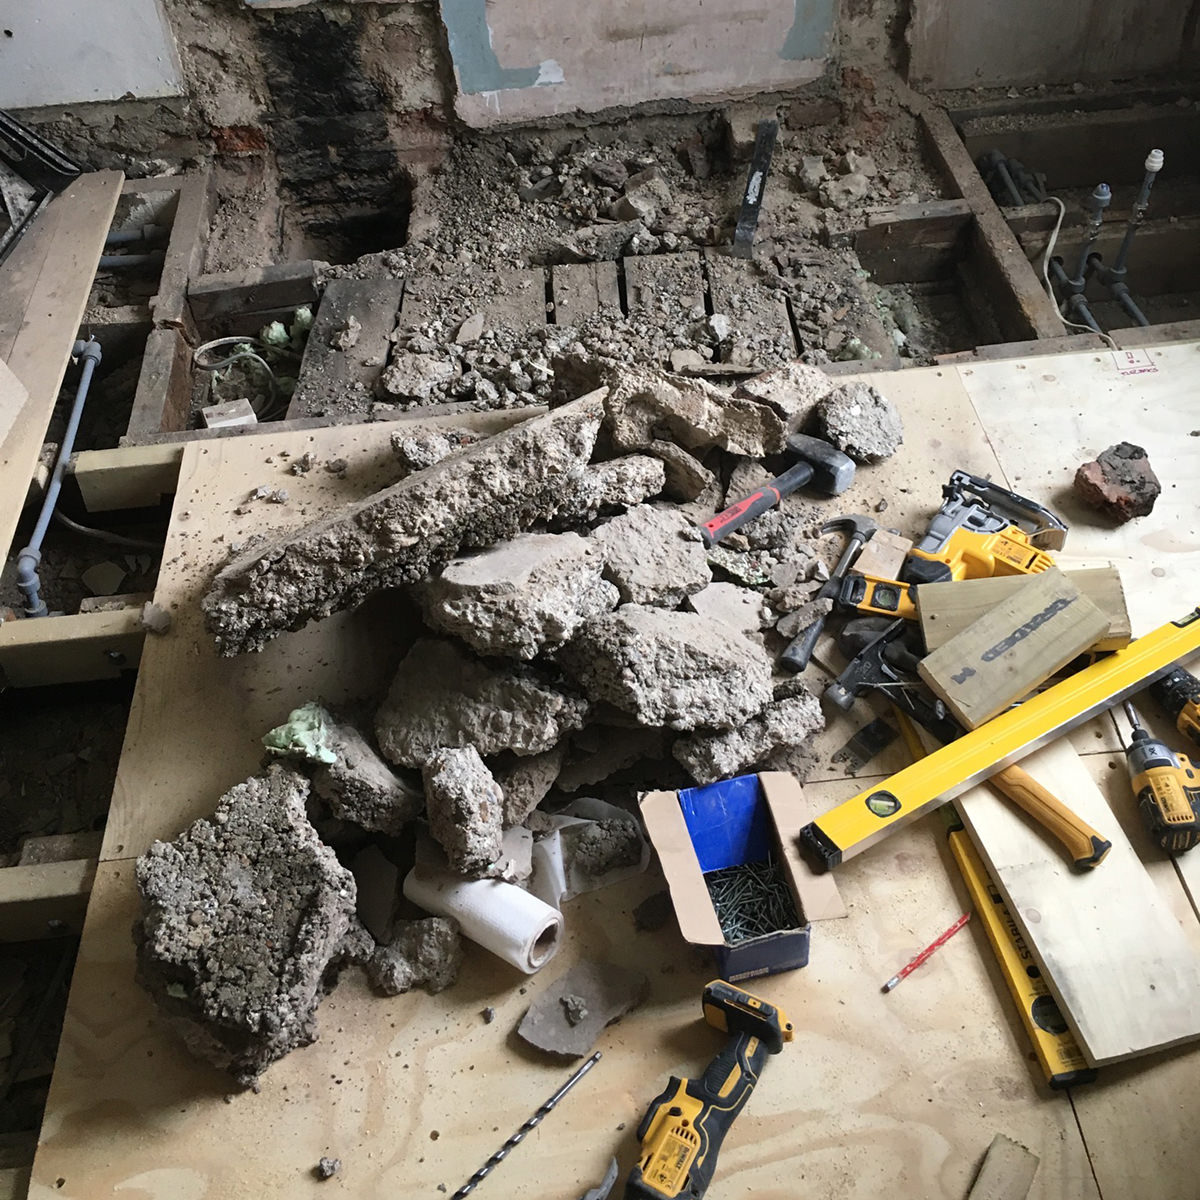
Underneath the floorboards there were quite a few old pipes - including old gas pipes from when there were gas radiators, and pipes housing old electric cables. I took out as much redundant cabling and pipework as I could. There was deja-vu smashing up and removing the old, extremely heavy crumbling hearth - this was now the third one I'd taken out.
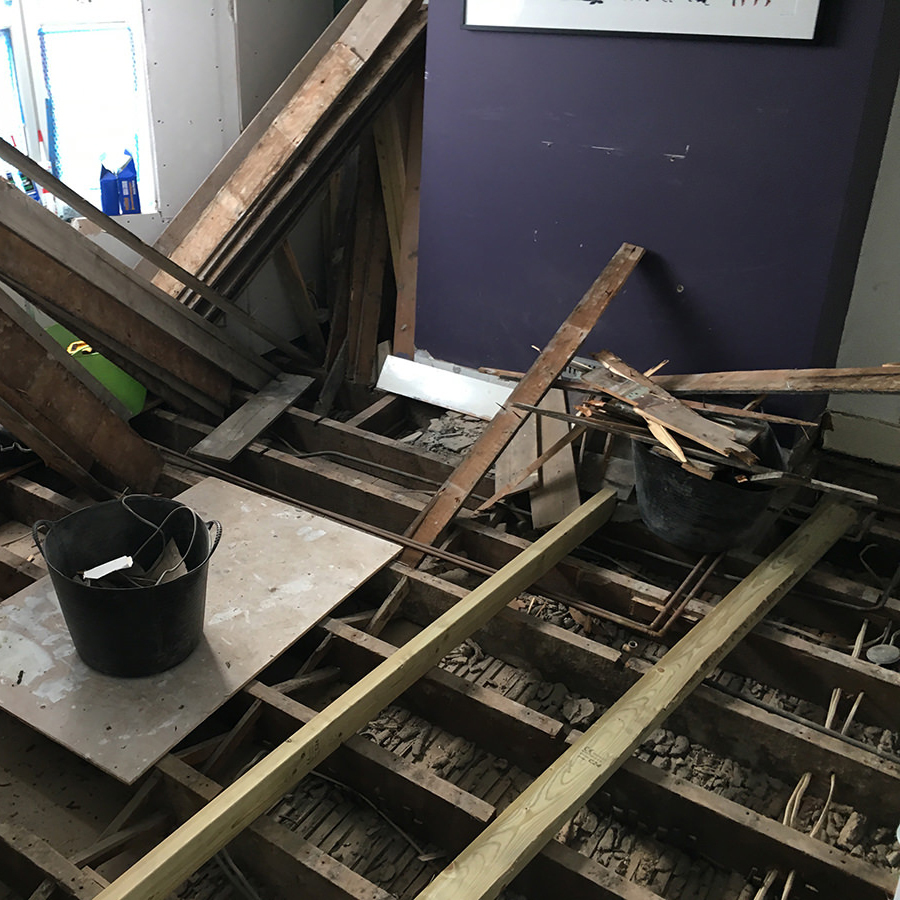
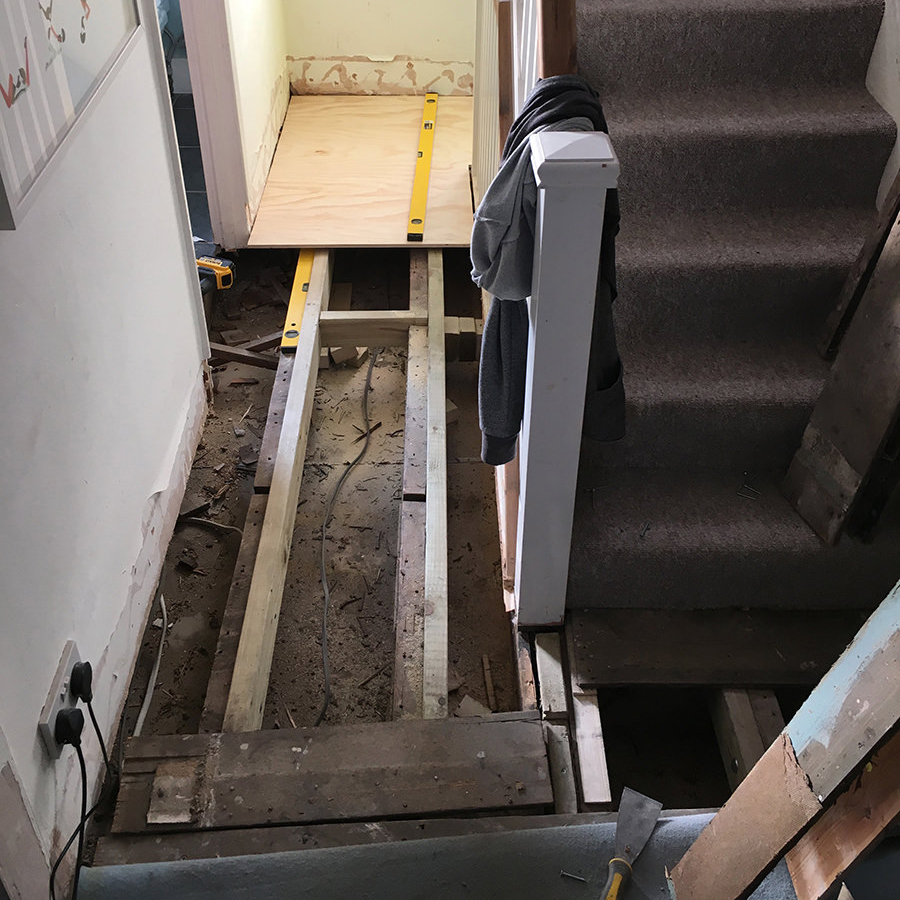
Boards up, joists down and total chaos all around.
Laying the new joists was easier, I was becoming a dab hand with the process now. Again, I decided to reuse the floorboards rather than throwing them all away. All the boards are screwed down two or three times to each joist, so I'm hoping for no squeaks over time. I couldn't level all of the ground floor at once, so I had to stop short of entering the bathroom.
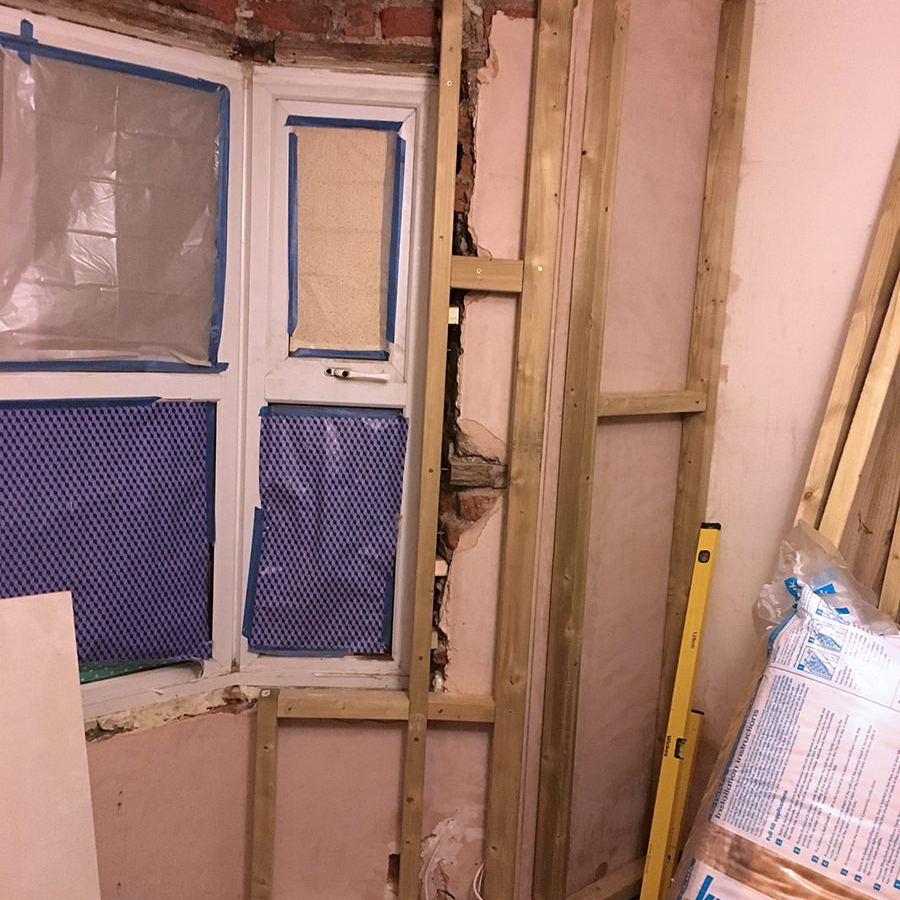
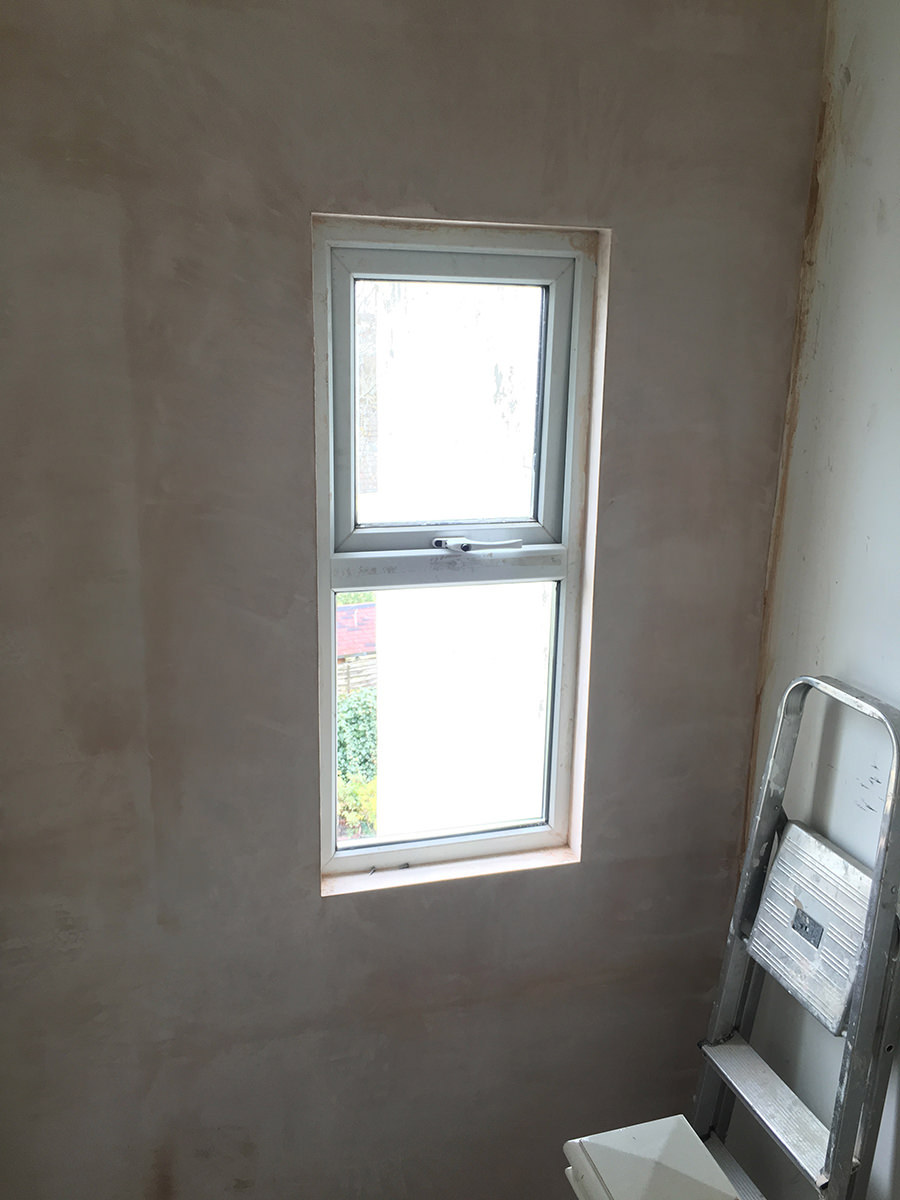
Fixing a window
There was still plenty of time before the builders were due, I wanted to book our plasterer in to do what work was ready to be done. I decided to take that opportunity to reinstall the upstairs hallway window. The UPVC window had been installed in to the original wooden sash frame, which was now rotten in places. Water ingress through the wood had run down the inside of the wall, loosening the plaster. I contained the loose plaster by cutting it out around the window before pulling it off the wall. Then I took out the double glazed units from their frame, and removed it from the window hole. The old timber came out quite easily, I cleaned the masonry down, scraping off tough debris from the hole. I rebuilt a timber frame, screwed it in to place and set the UPVC frame in to it. Then I weatherproofed the exterior, sealing the UPVC frame to the exterior wall. On the inside I plasterboarded the the interior of the timber frame and created a narrow window shelf. Everything was then ready for plastering.
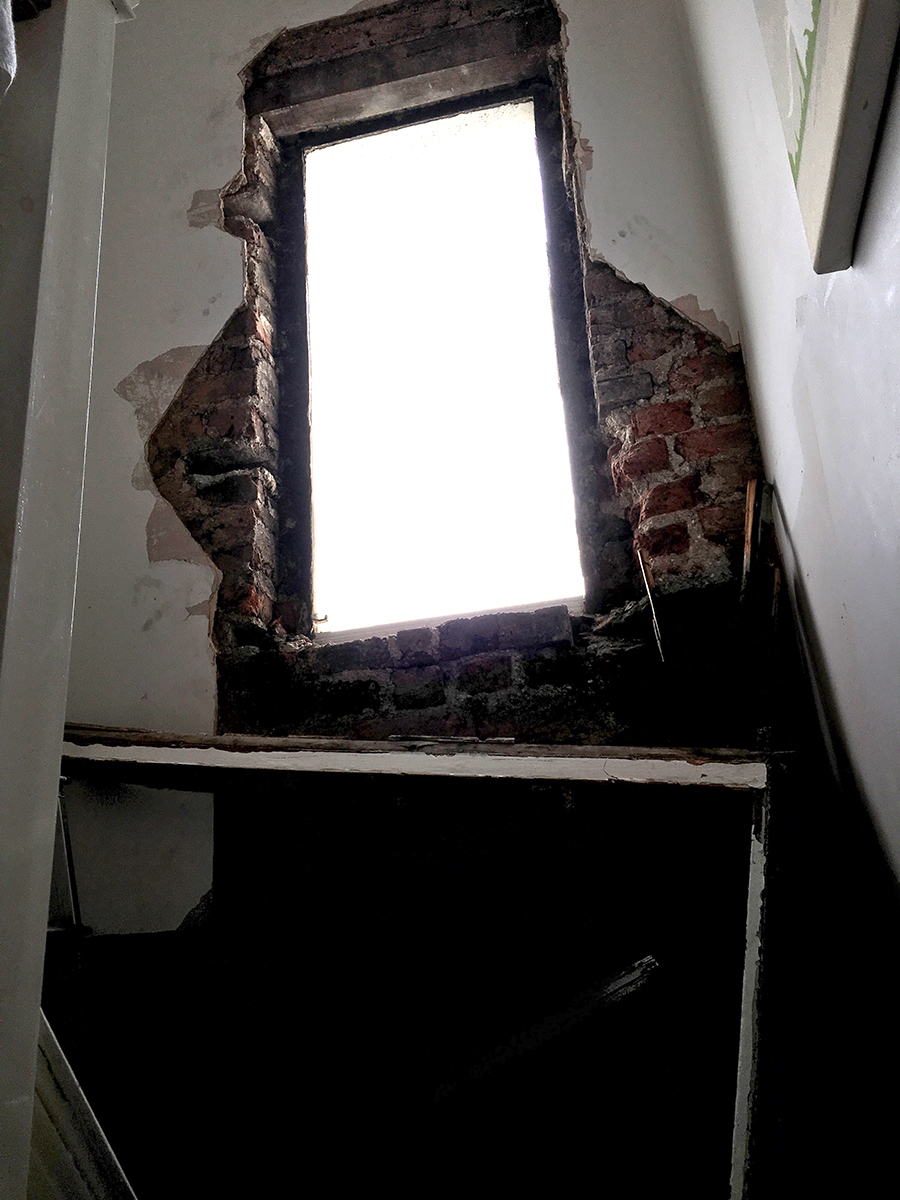
Out with the old, and then back in, with the old.
Dissecting those angles again!
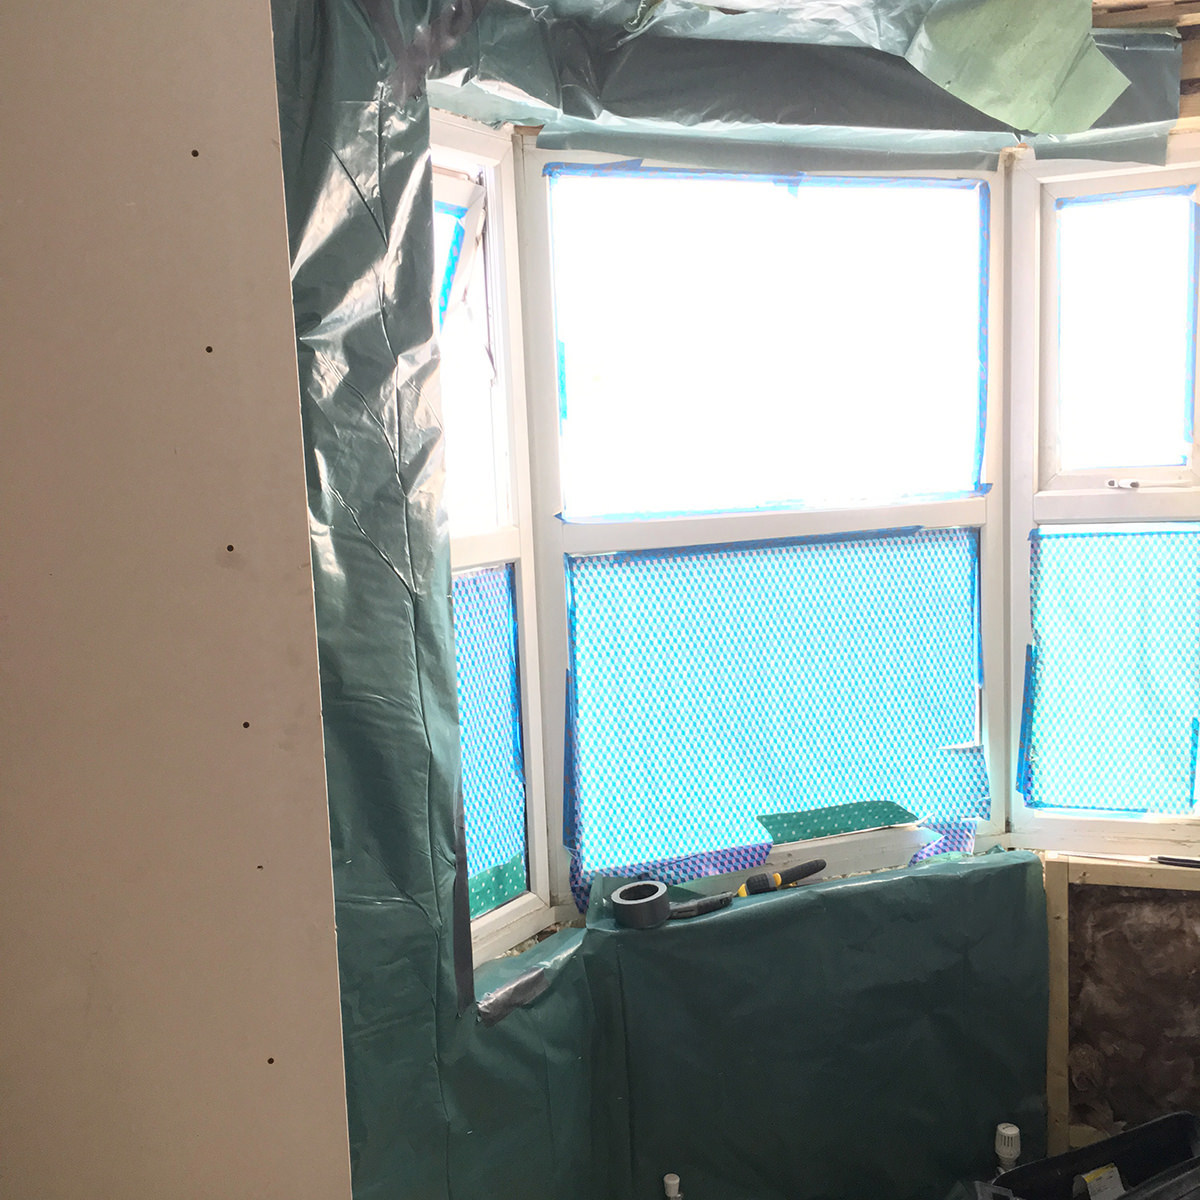
Our plasterer Dougie came and did the plastering in the lounge bay window and the hallway wall (with the window). Despite being small spaces to do, we were due to have a lot of plastering done so I wanted to complete any bits that were ready to be done as and when.
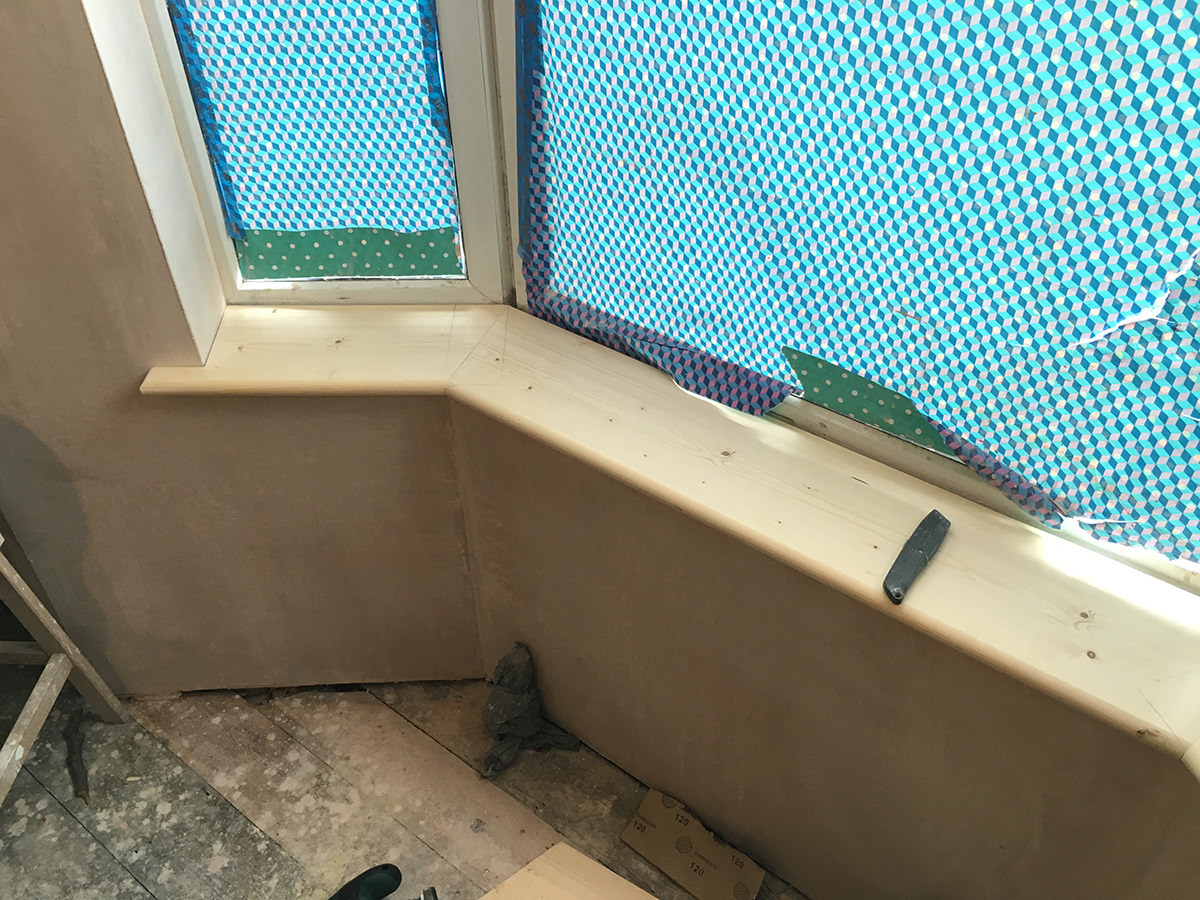
With the bay window plastering now done in the lounge, I purchased a window shelf from North Road Timber, installing it as I had done in the bedroom.
There wasn't too much longer to wait until it was finally time for the builders to come and install the new RSJ on the ground floor.
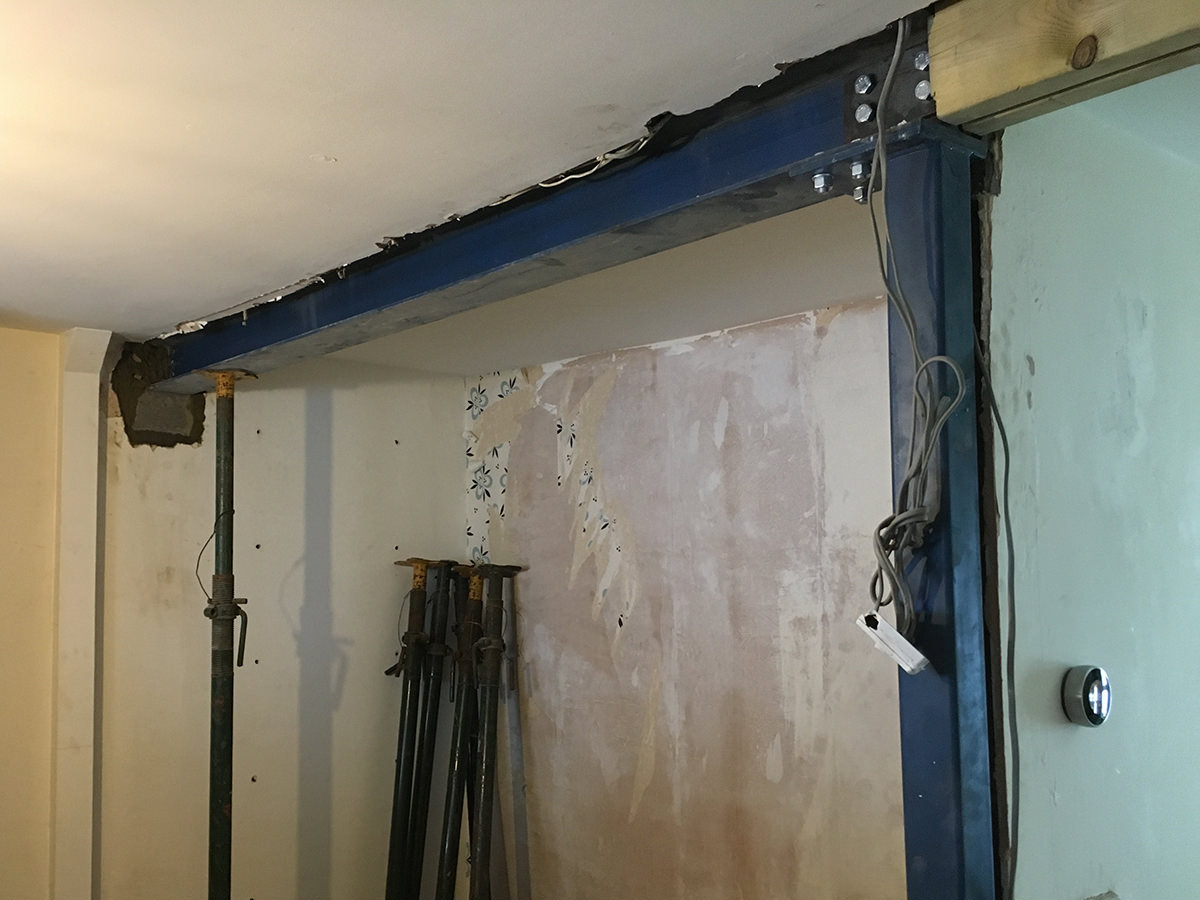
New joists.
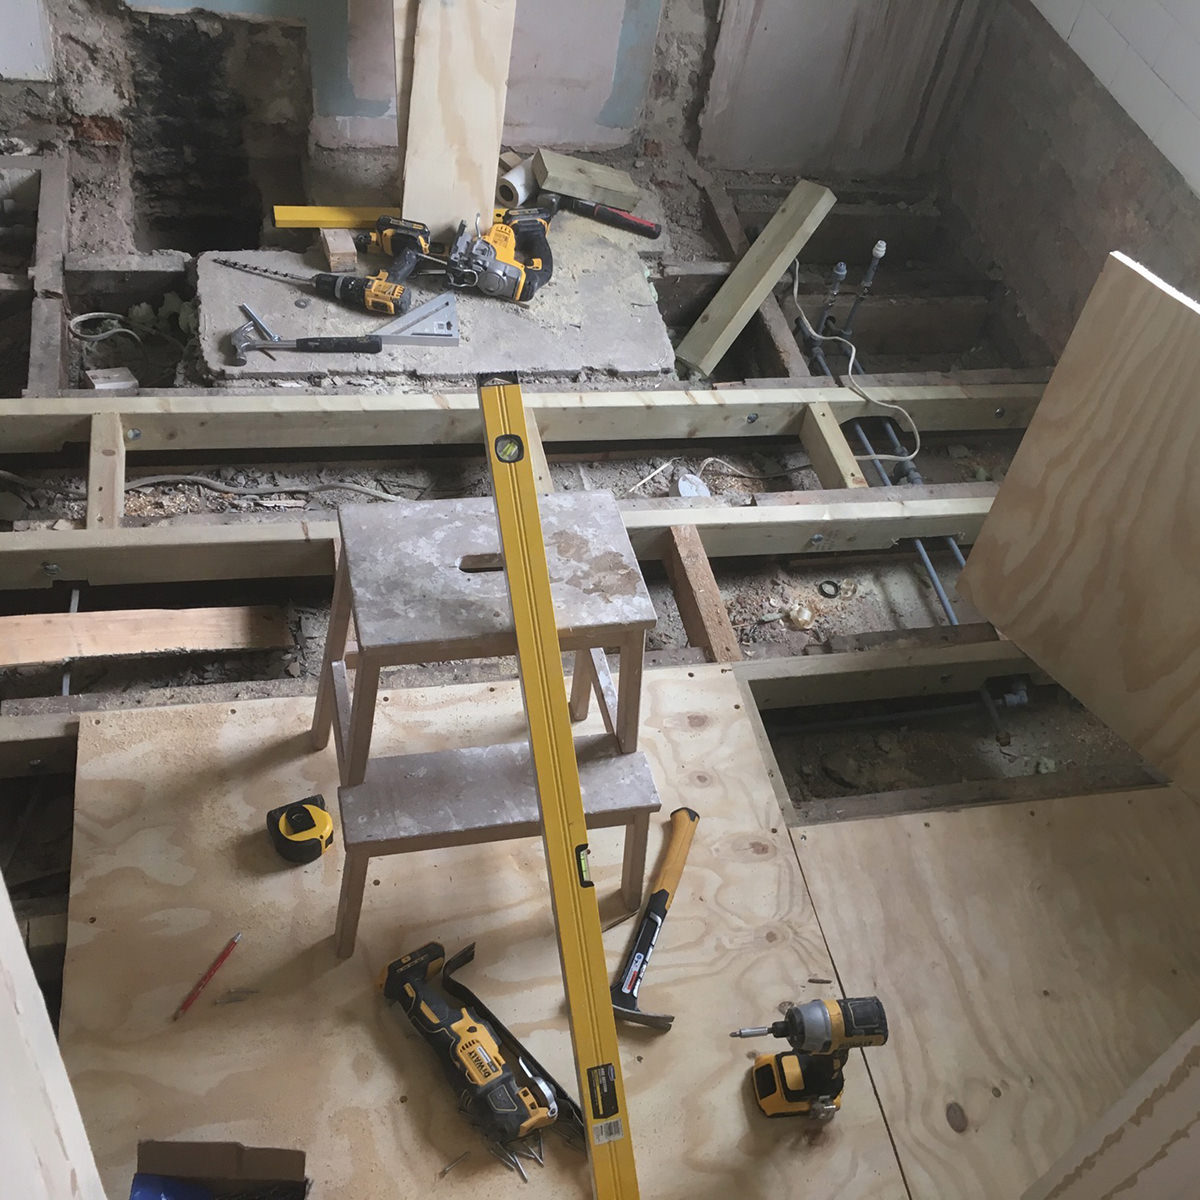
Installing the new steel joist was surprisingly quick. The builders were nice chaps and I got on well with them. I was terrified that the work I'd done upstairs on the bedrooms would crack with tiny movements to the floor below, they reassured me that it would not, and I needn't have worried, there wasn't any movement. It's quite remarkable, holding up a floor whilst the main support for it is removed and replaced. There was a lot of dust.
Once the joists had been in for a week, I plasterboarded them with fire rated plasterboard and started arranging with the builders a suitable date for the chimney breast to come down. This would mark the start of the bathroom renovation.
We arranged for the builders to come when Naomi and Rocco were away. They went to Greece on holiday for a week which was the start of a Challenge-Anneka style week of hard work as I tried desperately to get as much done as I could before their return.
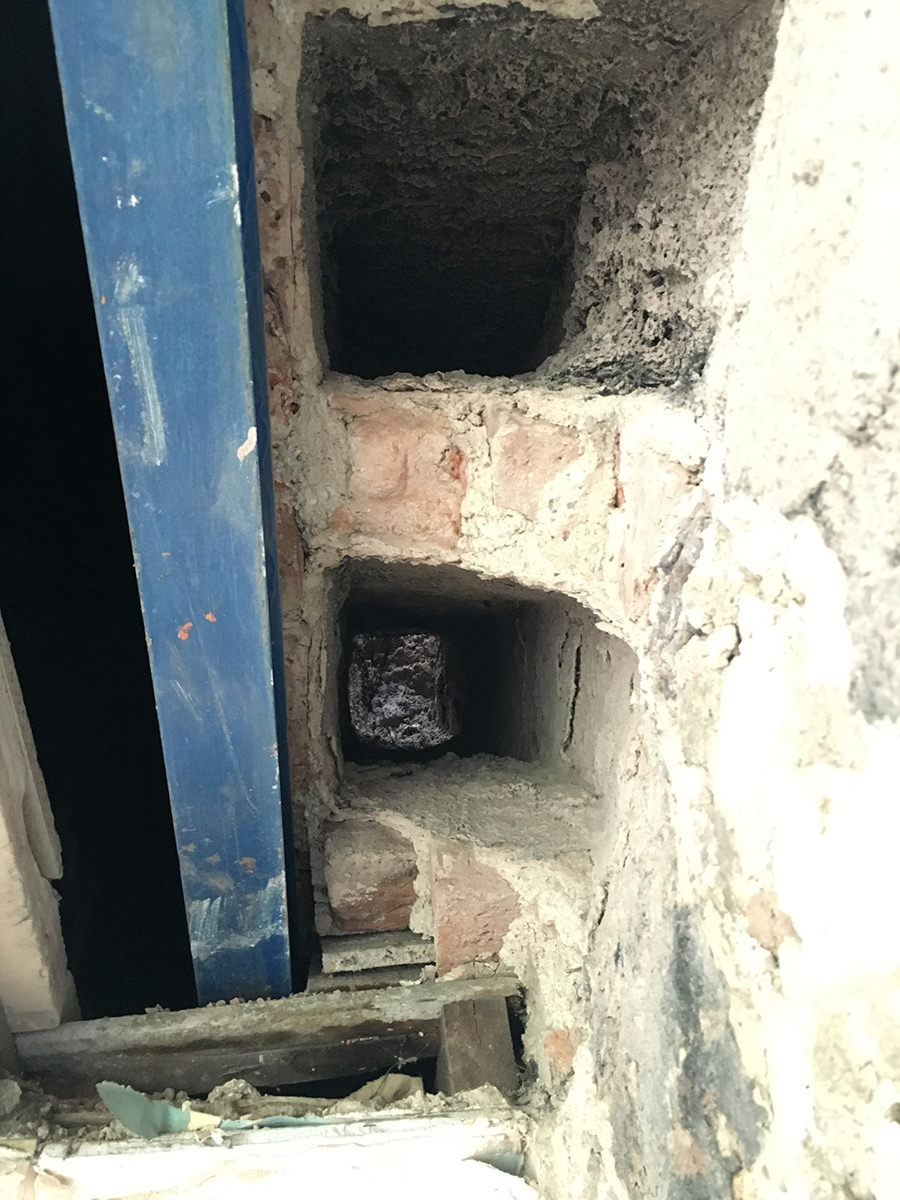
On the first day they were away, I was at work and left the builders to it, they arrived early and removed the Chimney breast, it took barely more than the morning. It had been partially removed already (hollowed out), so it was easy for the 3 builders to haul out the bricks. There was a mistake though, a line of bricks had been left because I hadn't made it clear what I was doing in the bathroom (moving the wall) - but the remaining brickwork was removed the following morning in under and hour.
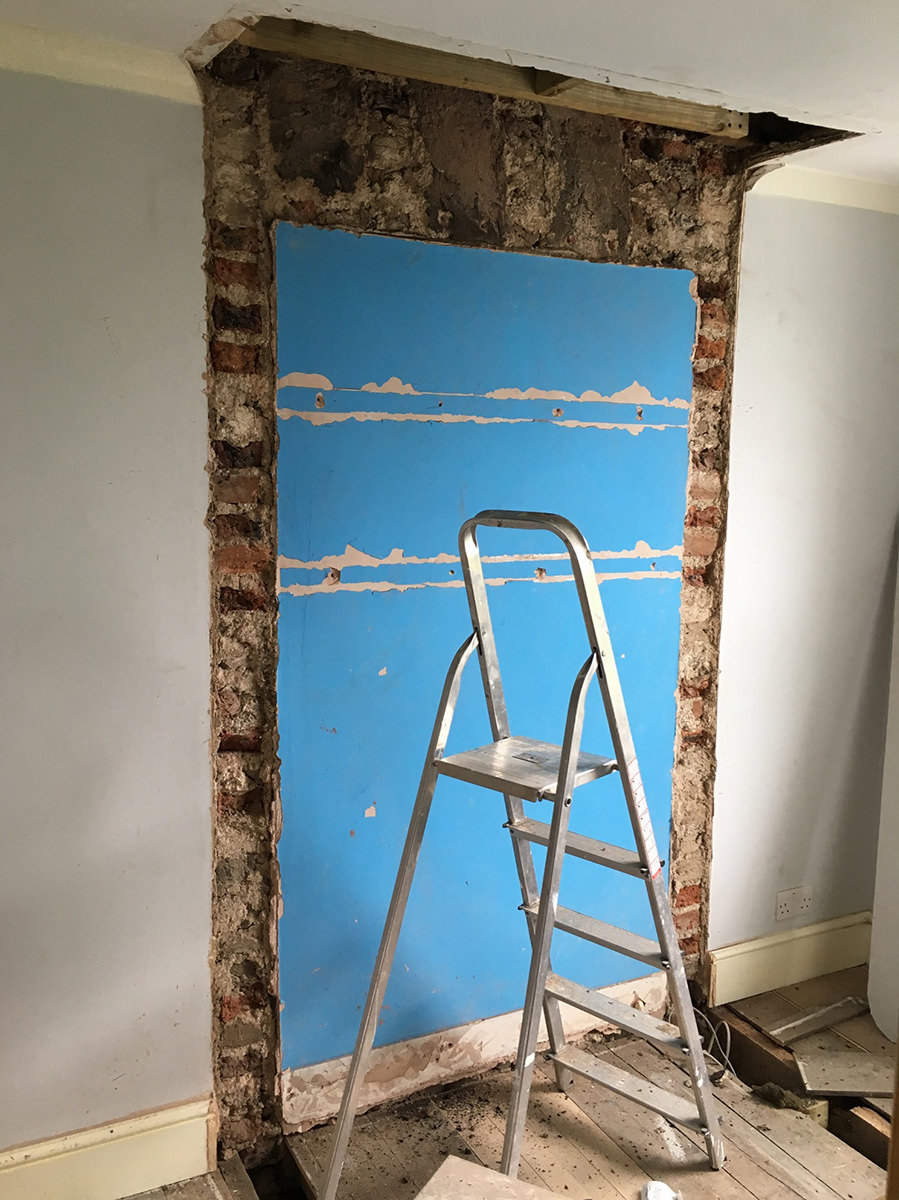
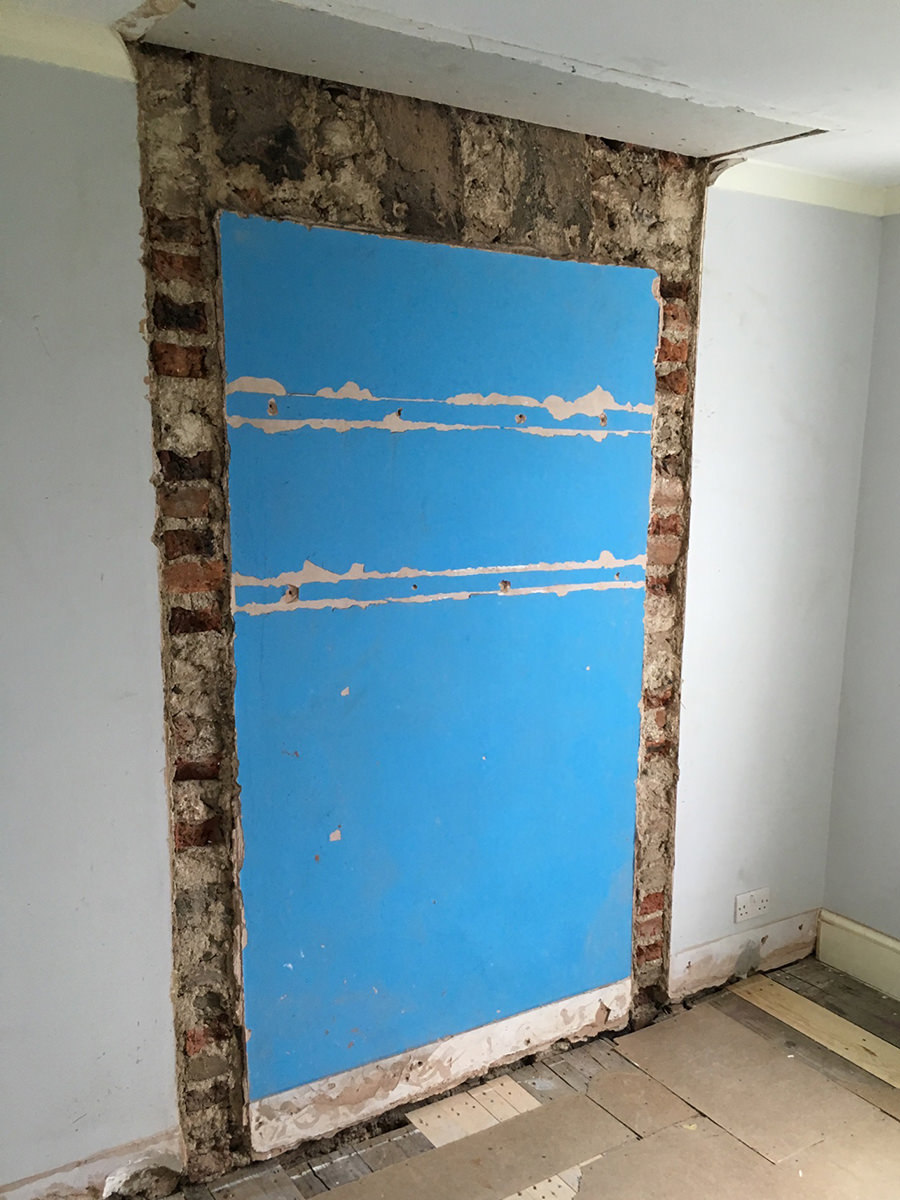
The chimney breast was removed over two floors, which meant repair work in Rocco's bedroom upstairs.
With the chimney breast gone, I set to work on Rocco's room, repairing the ceiling joists in the loft where there had been brickwork, and fixing plasterboard to them. After that, I fixed new joists to the floor and put down new floorboards. Two days later, Dougie came round to plaster the wall and ceiling - and I would go on to paint the room, repair the skirting, coving and put all the carpet back - all in between the bathroom work.
I had arranged for the plumber to come the following day and he came, disconnected all of the bathroom pipes and helped me remove the sink, bath and, after a short discussion on how much I actually needed it during the week, the toilet. This was it, no more bathroom!
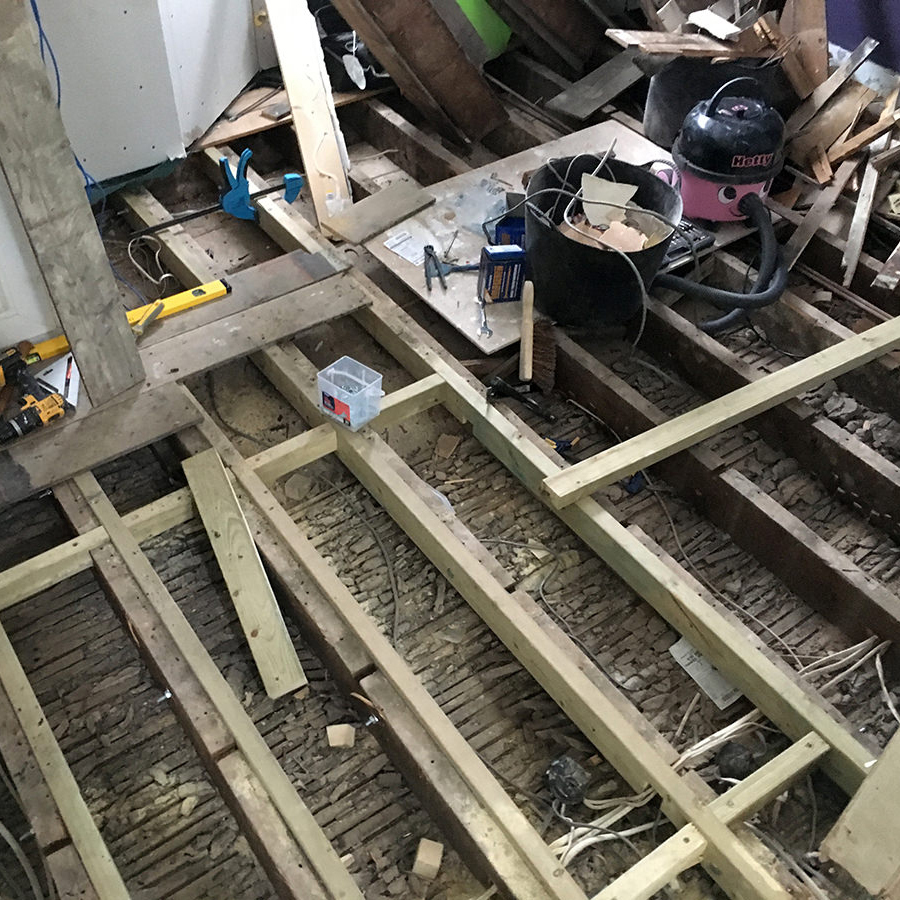
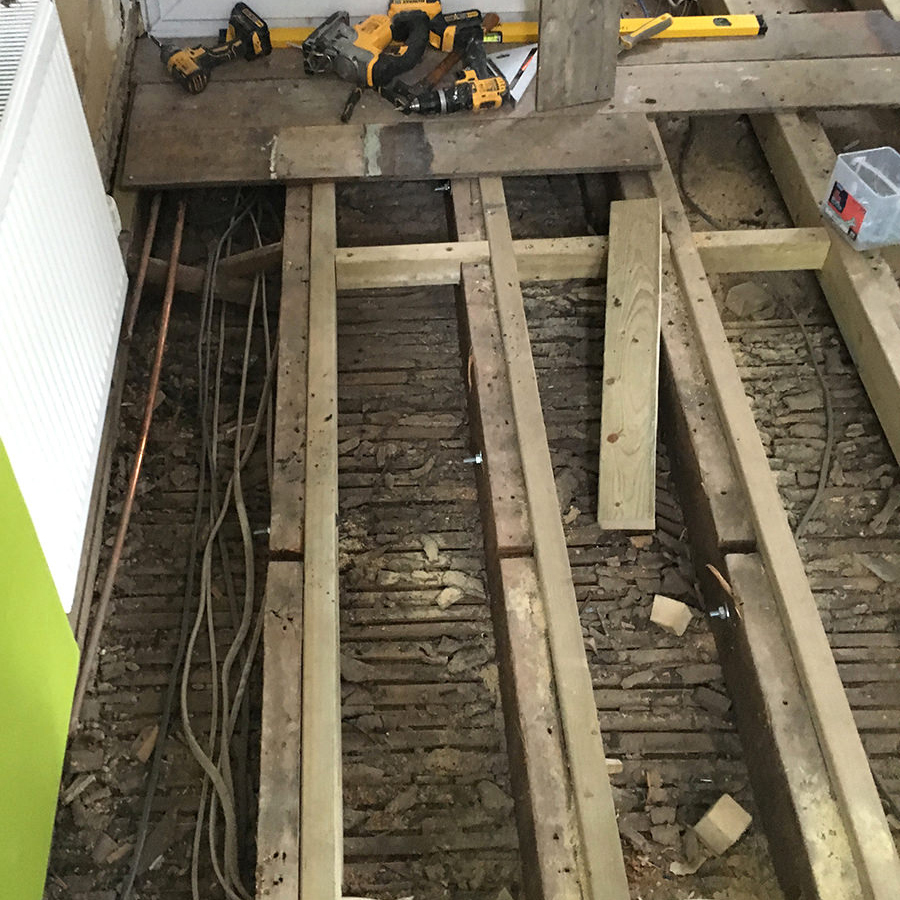
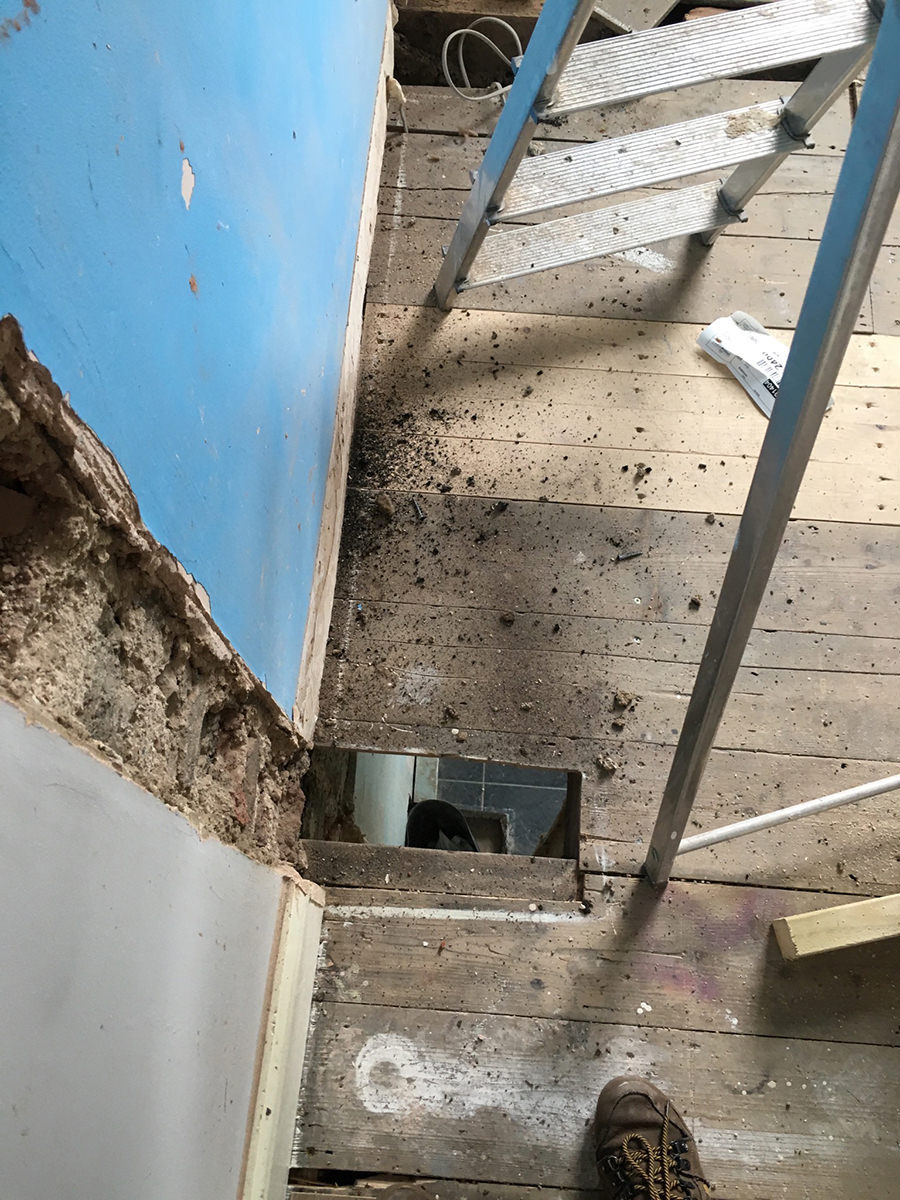
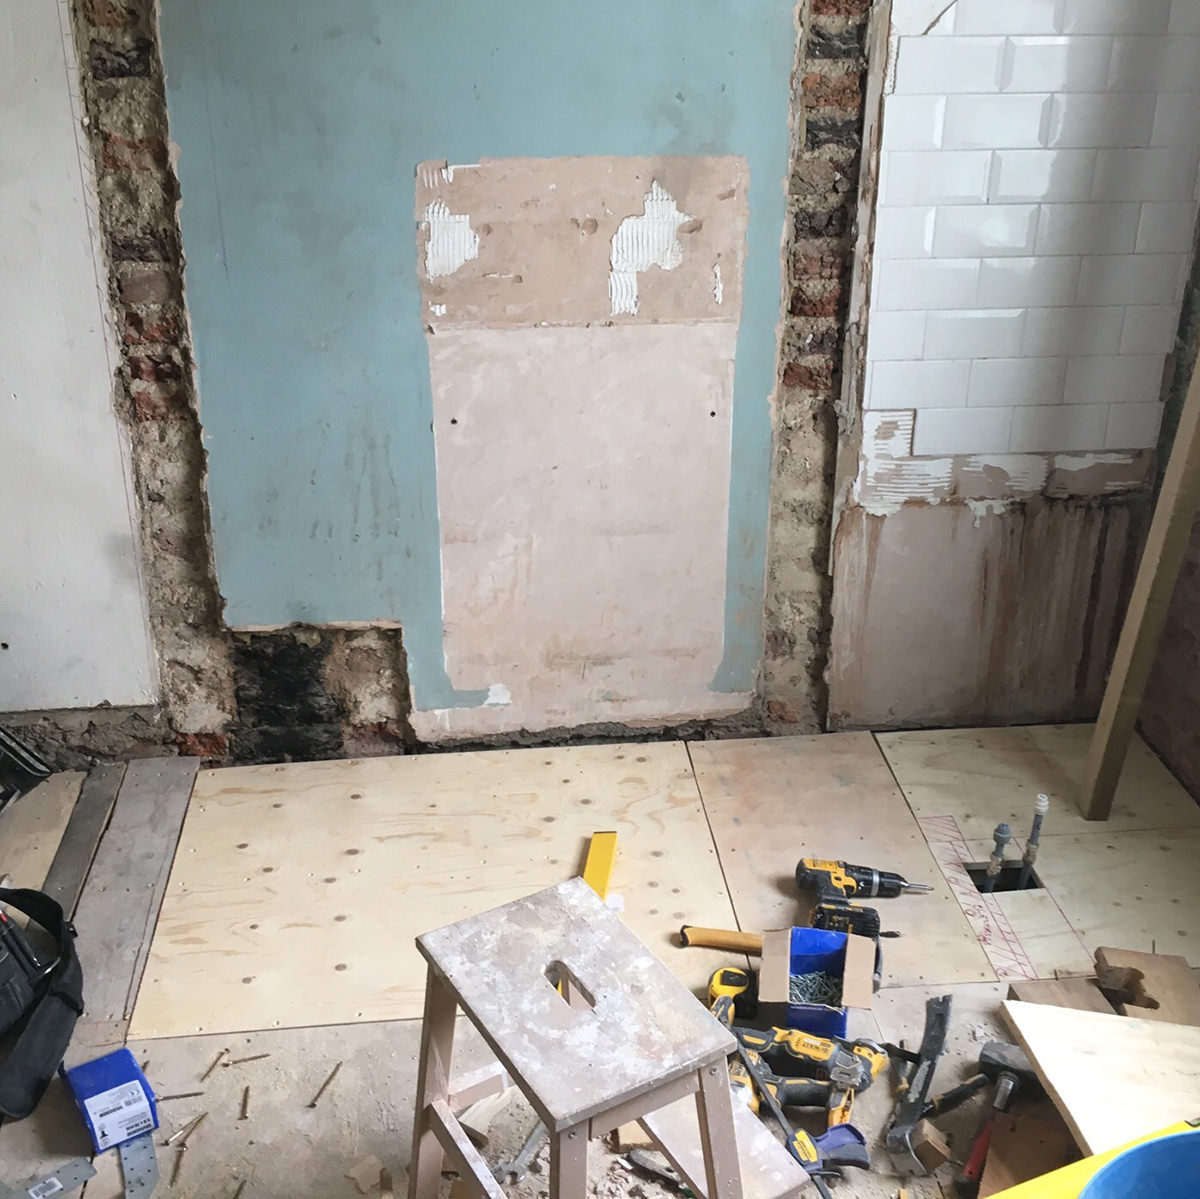
With everything out and the pipes made safe, I started taking down the interior stud wall between the bathroom and the lounge. I would need to rebuild this wall so that it could support the shelving, and I was also moving it by 10cm in order to give the bathroom door frame some more space. The wall came down easily, it was not original - plasterboard pieces were quick to take off. I put the wood studs to one side in order to reuse them later. Without the wall I could start work on, guess what - levelling the floor. The was the last piece of floor levelling I would ever need to do in the house, thankfully.
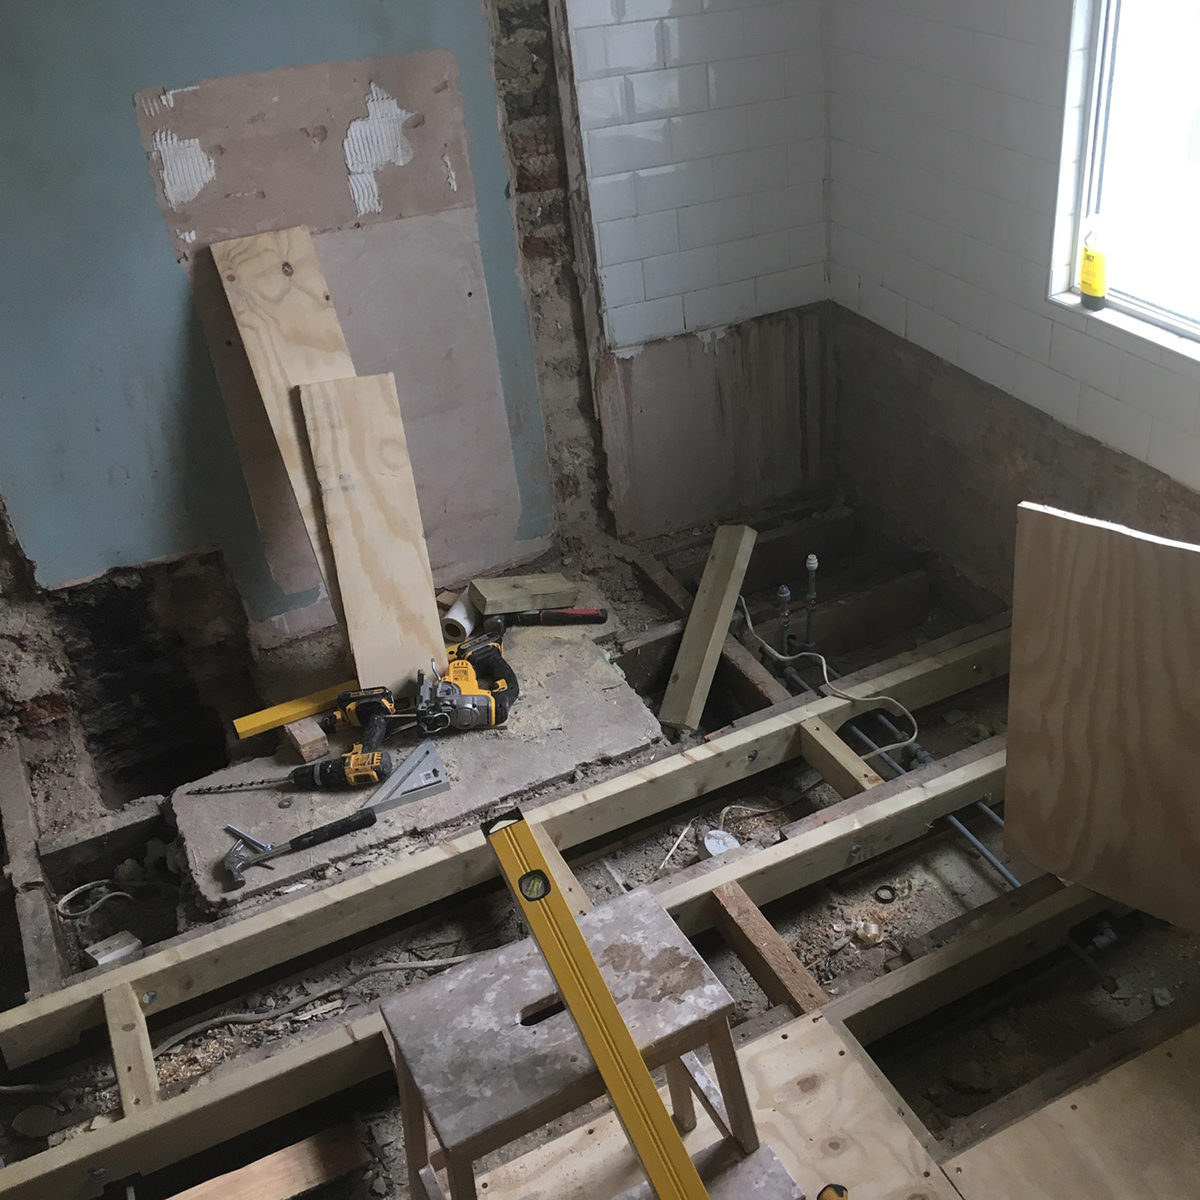
More flooring chaos.
I really, really don't like pipes in boxes like these ones.
Levelling the small bathroom floor took little more than a day, although there was another sodding great big ugly concrete hearth to remove - the fourth and final one. Around the old fireplace area I made sure to remove remaining chimney breast bricks well below the floor level. Then repaired the floor with new joists so that in the case that we or anyone else ever wants to remove the remaining section of chimney breast downstairs, then the bathroom floor doesn't have to come up again.
Once I had the floor repaired and plywood temporarily laid down, the plumber came back to start moving pipes around and getting things in place. In the lounge we had two heating pipes going upstairs in an MDF enclosure - he asked if I wanted them moved and I was so glad he did. I really hate enclosures that hide pipes and add fussiness to walls. As I was going to be building a new stud wall, he could move them and put them inside the new wall completely out of the way. It involved some more work under the floors upstairs and down but now was the time to do it. I really appreciated working with a plumber who was happy to work with me on the job.
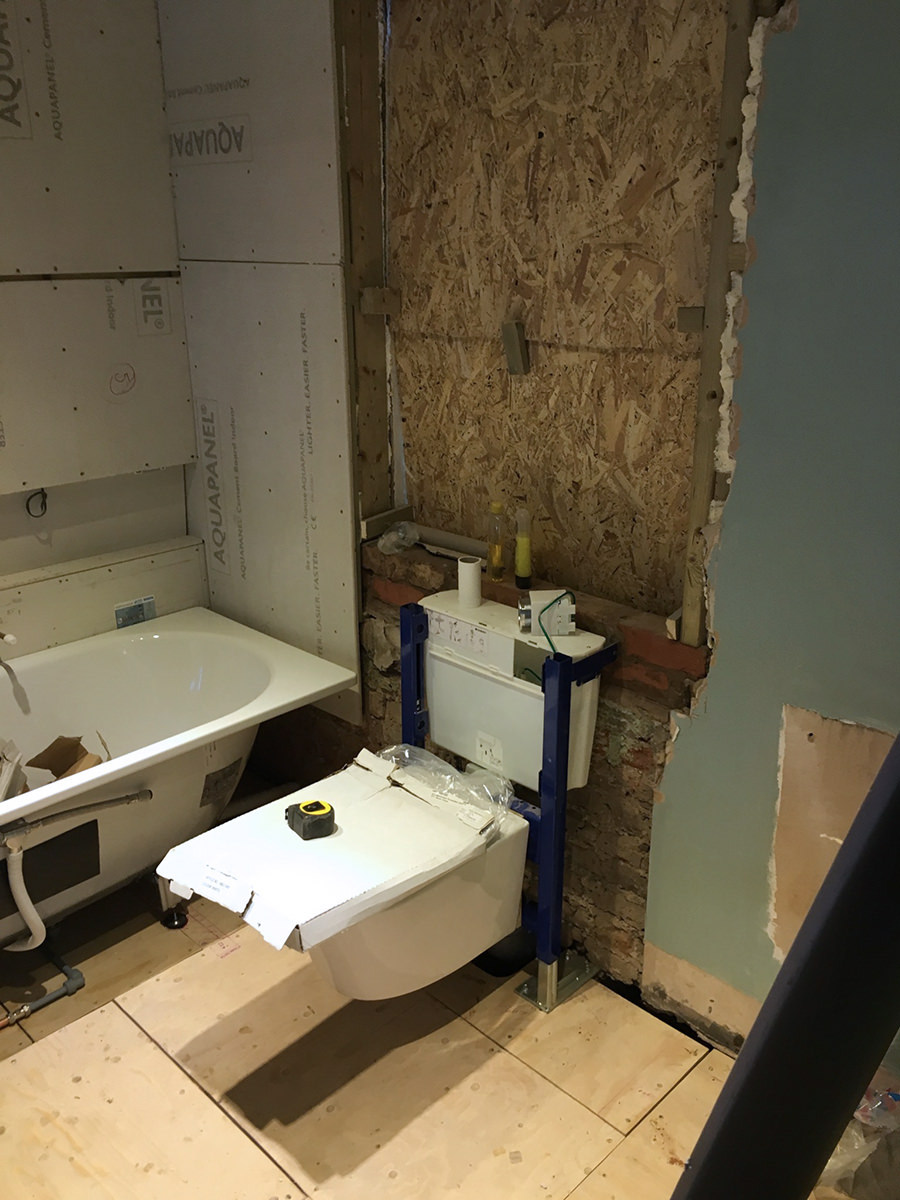
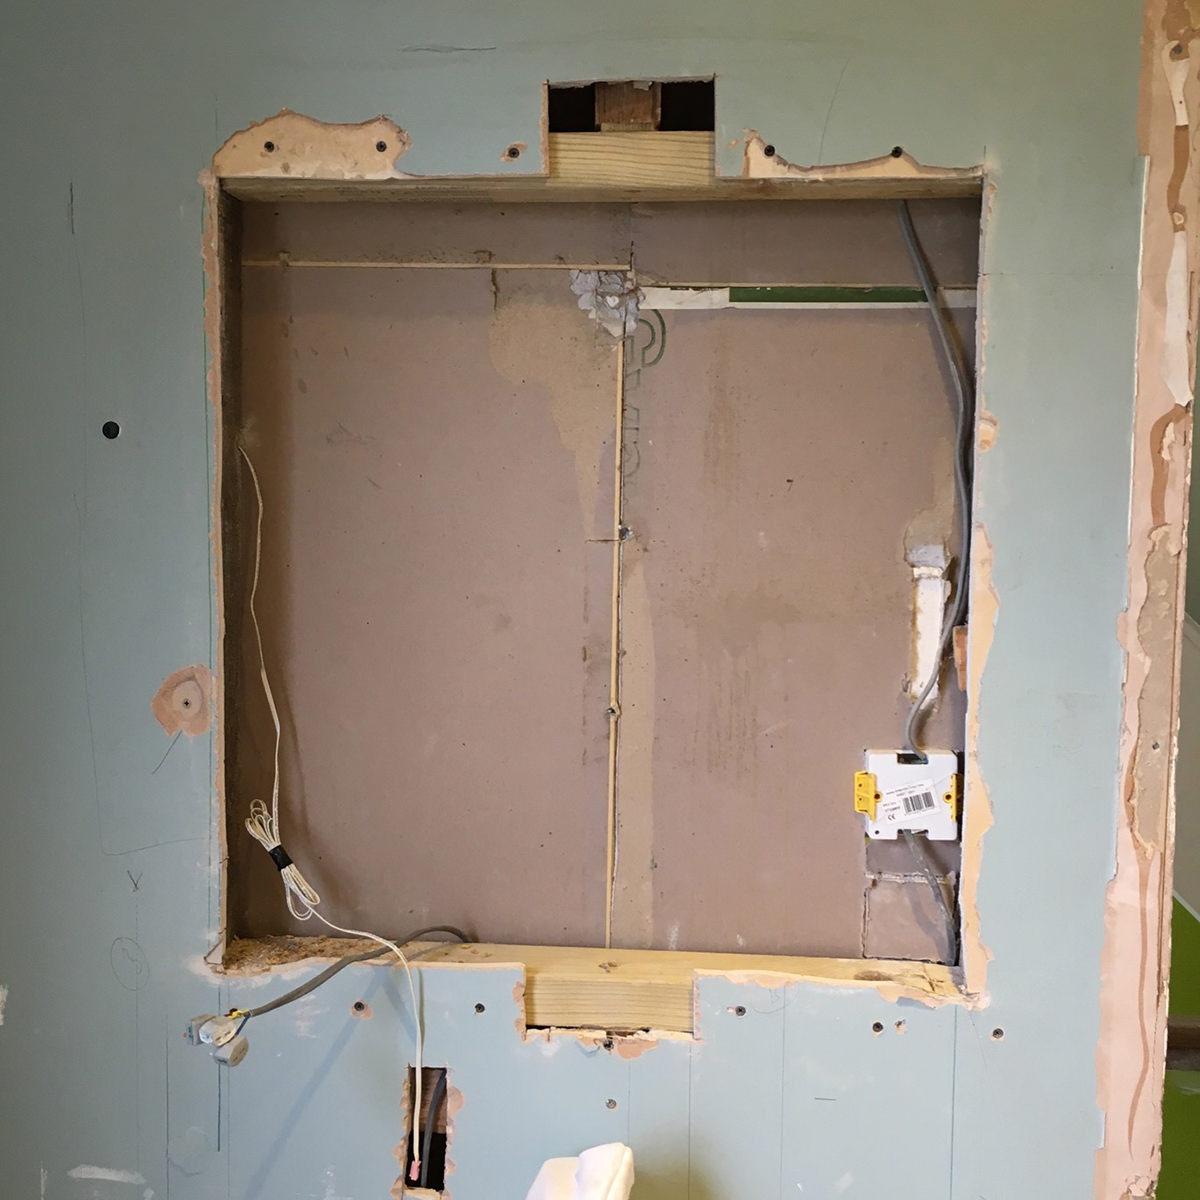
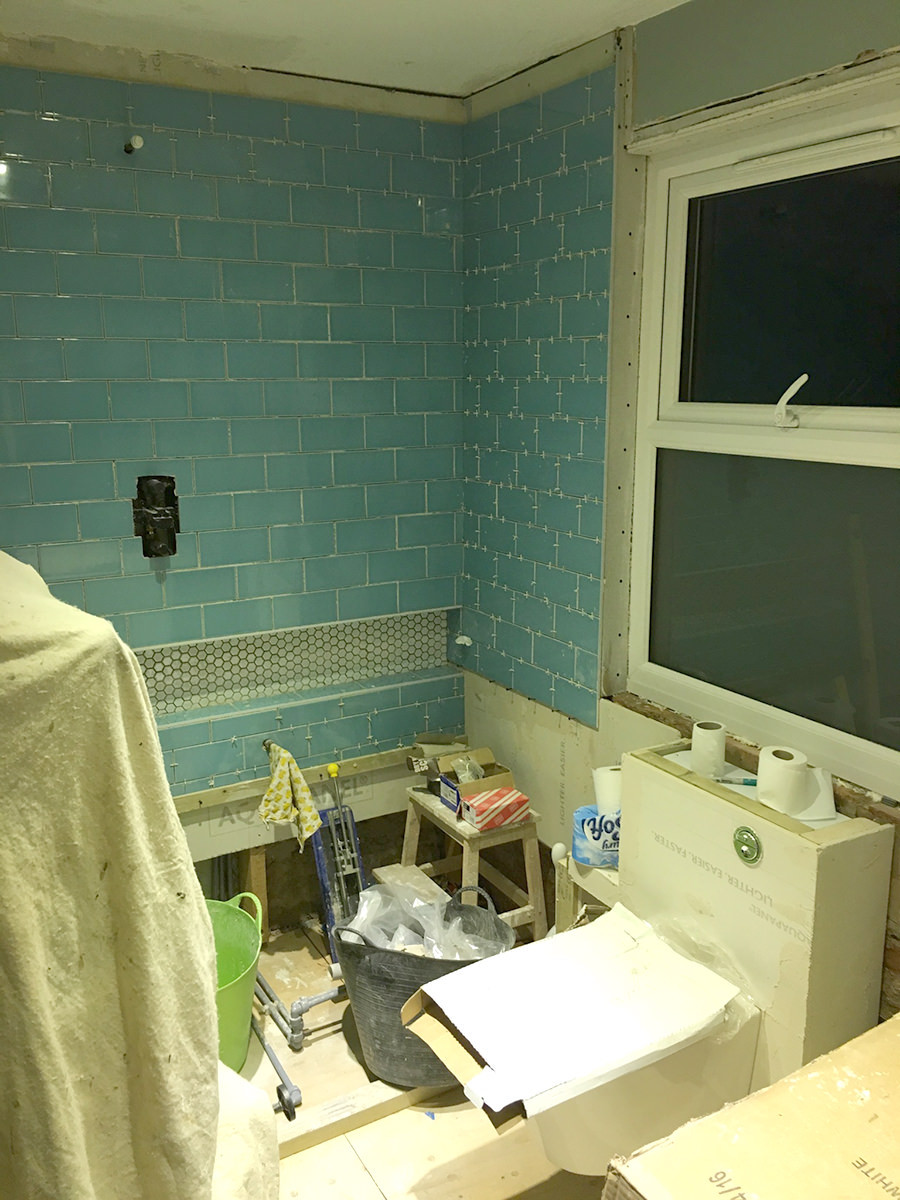
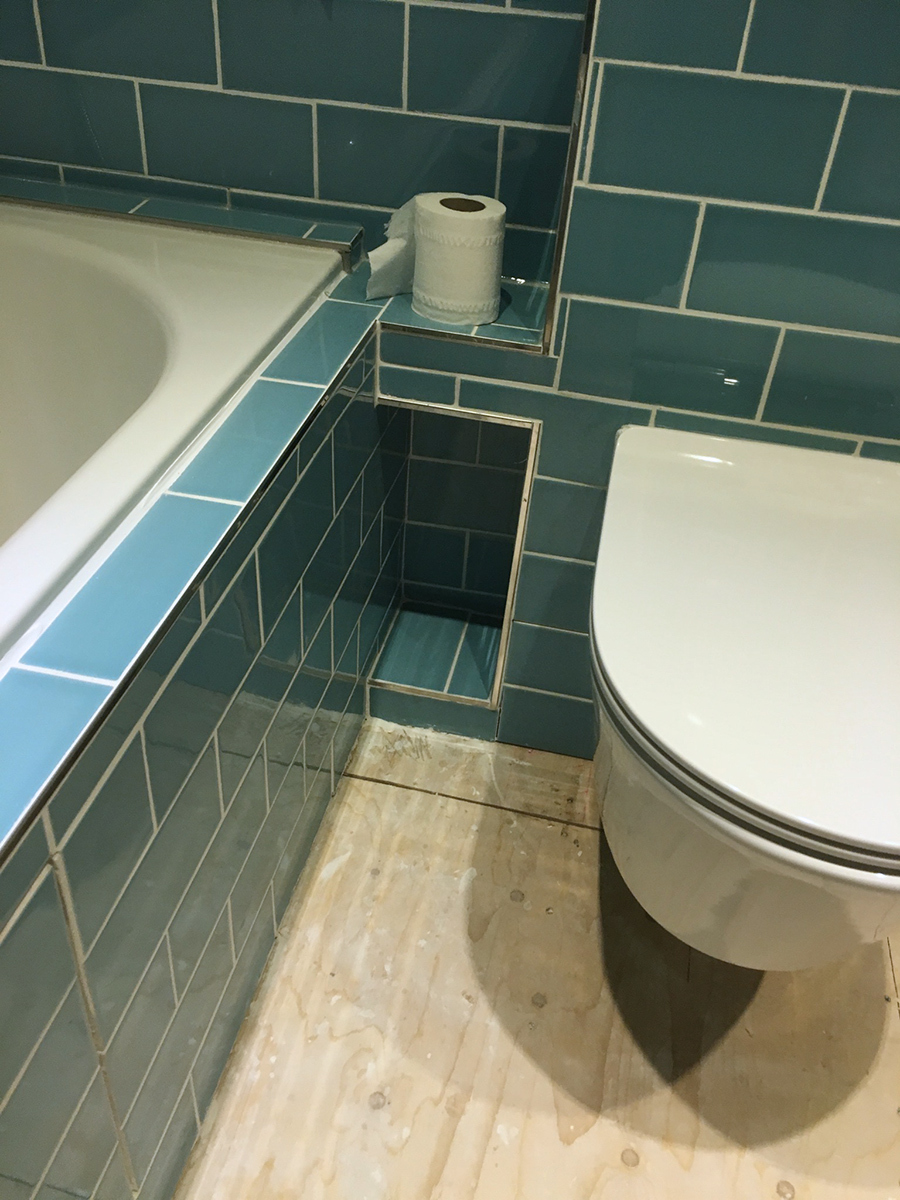
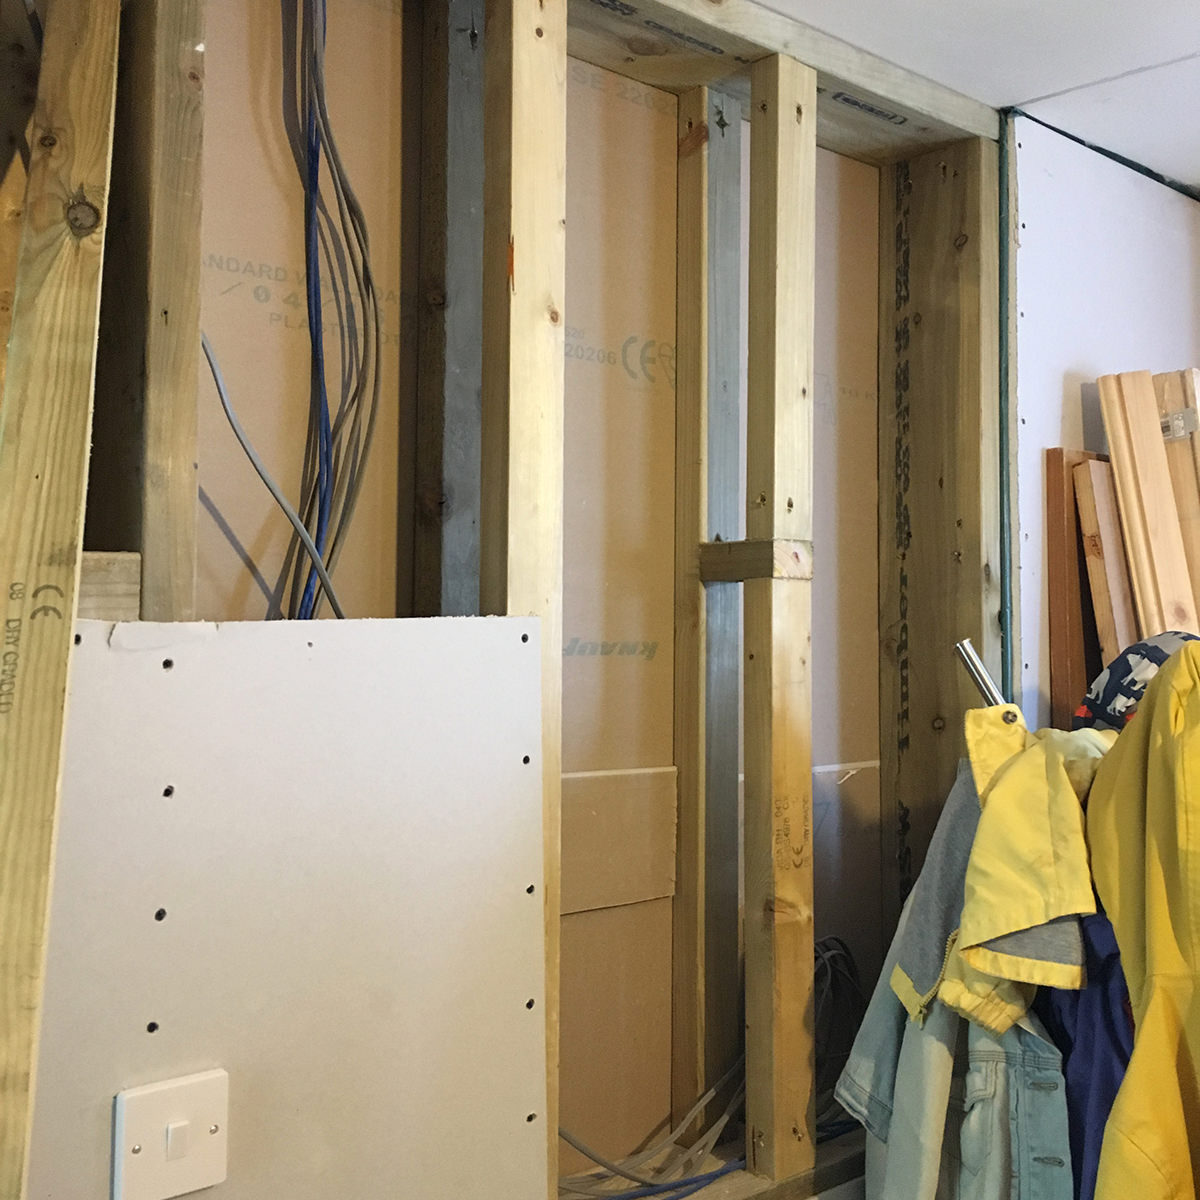
I started building the internal stud wall and then the stud wall for where the shower would be. Because I was stud walling the wall where the chimney had been, I didn't have to remove all of the old bathroom tiles or repair where the chimney breast was. The studs would accommodate all the pipework and help to create a bathroom shelf with inbuilt lighting.
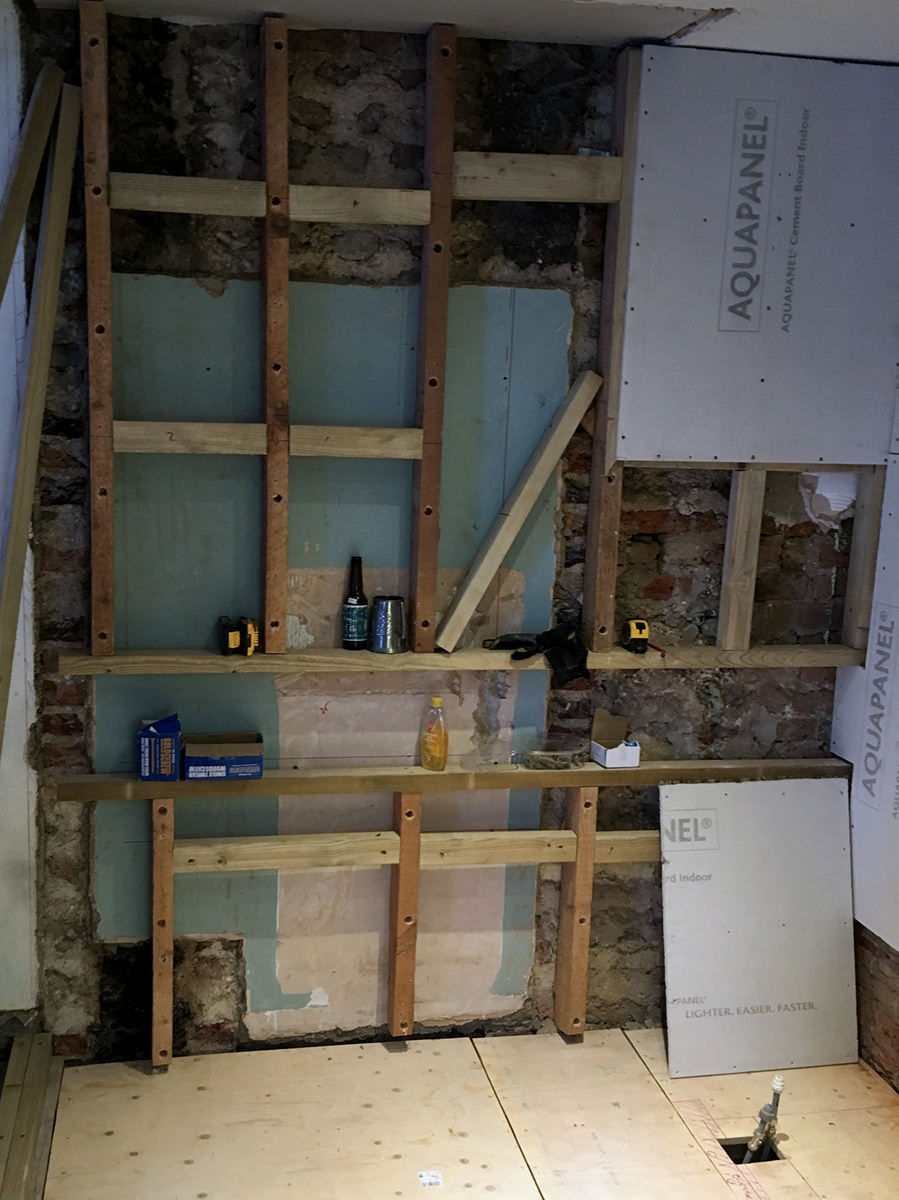
Stud-work showing bathroom shelf, start of the aqua-panelling and the interior wall.
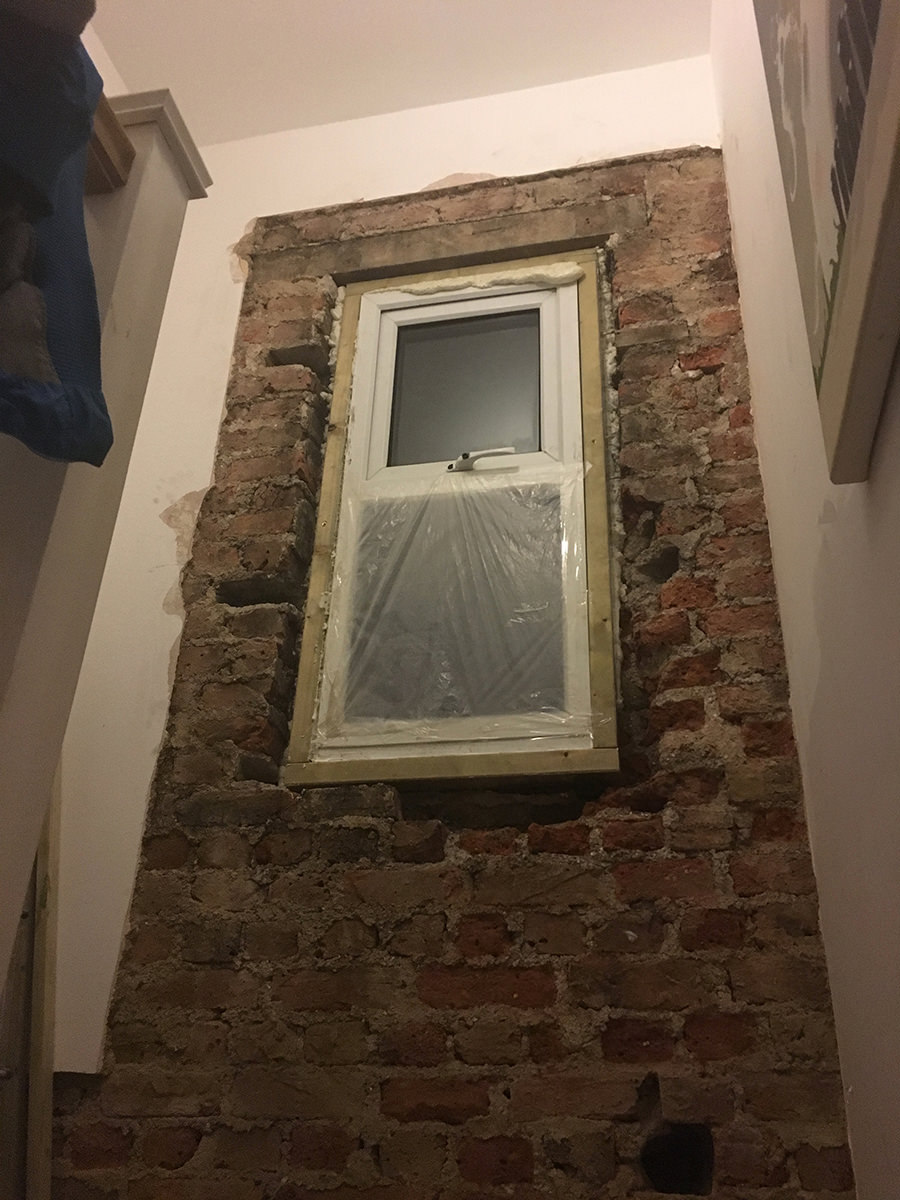
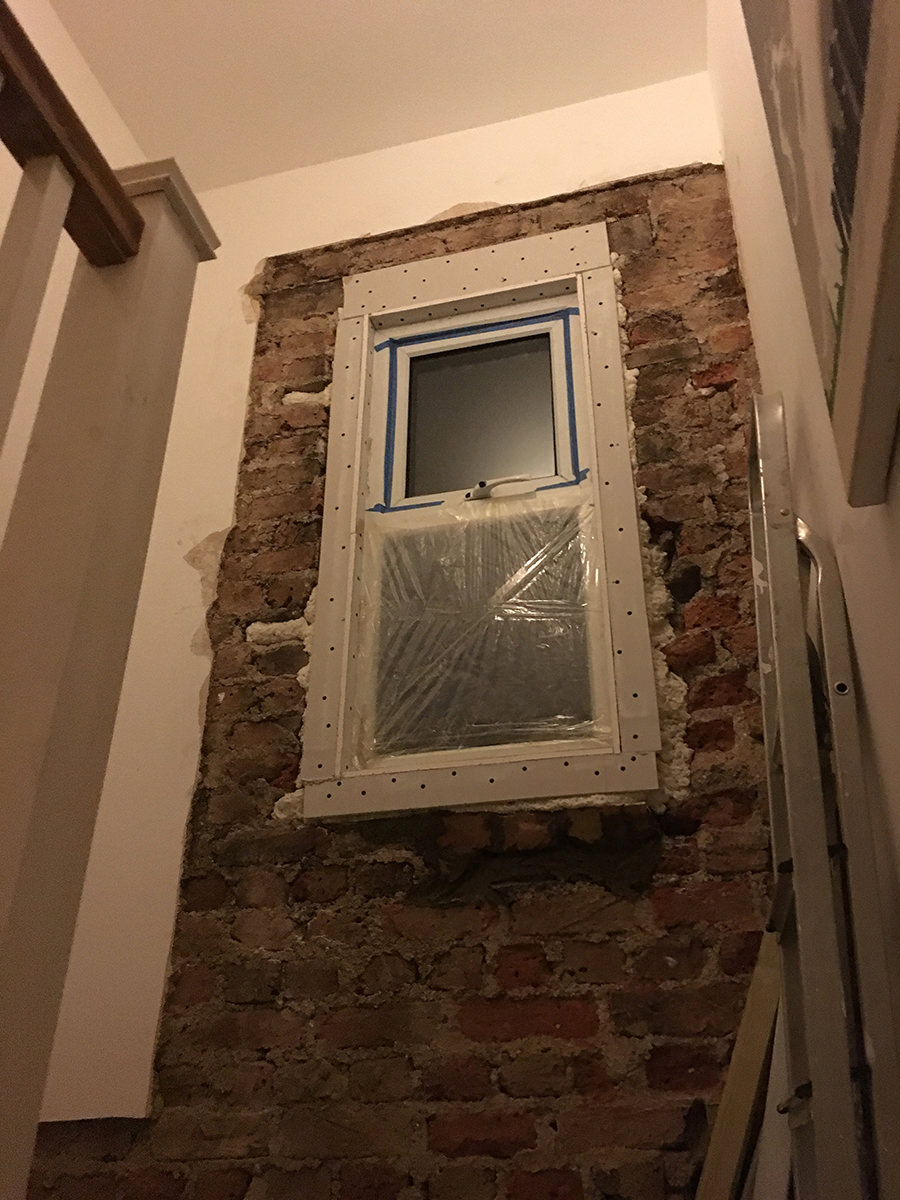
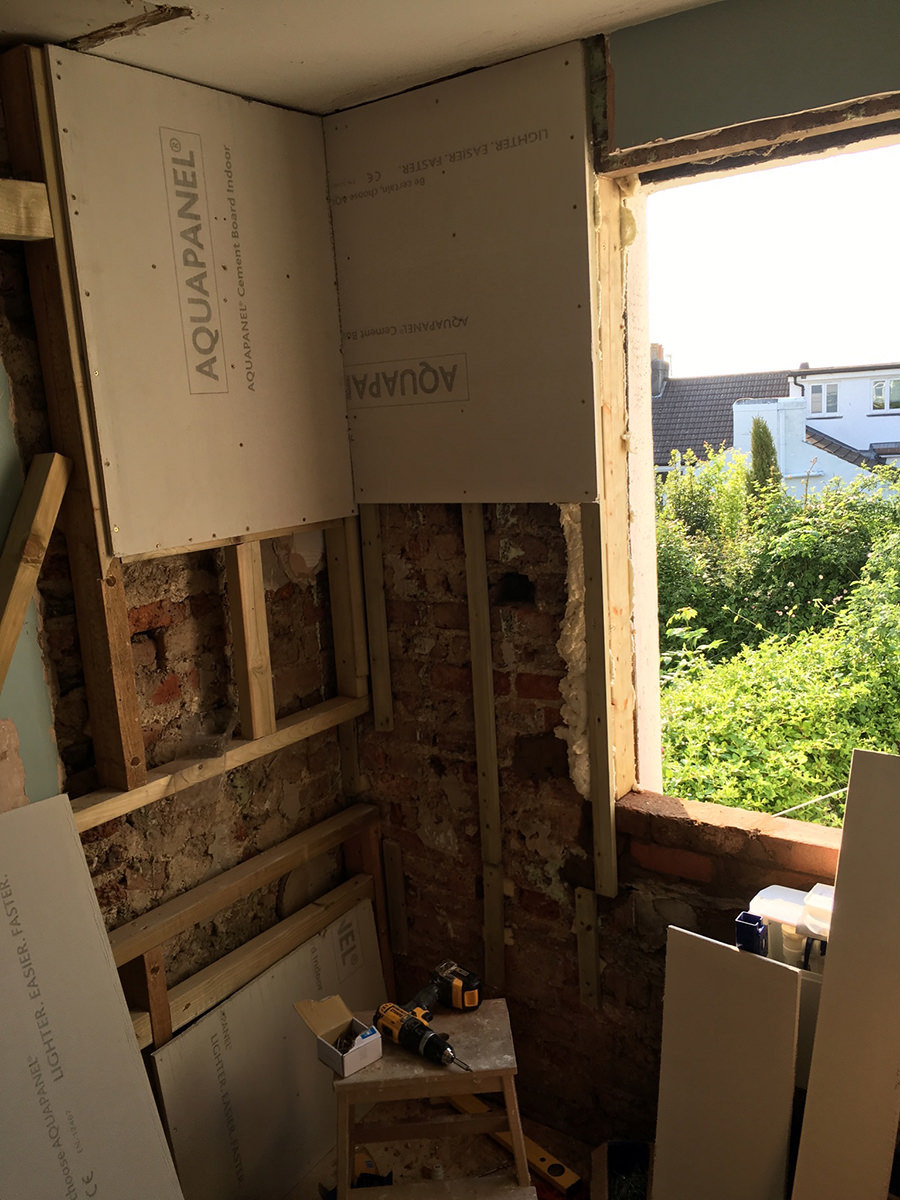
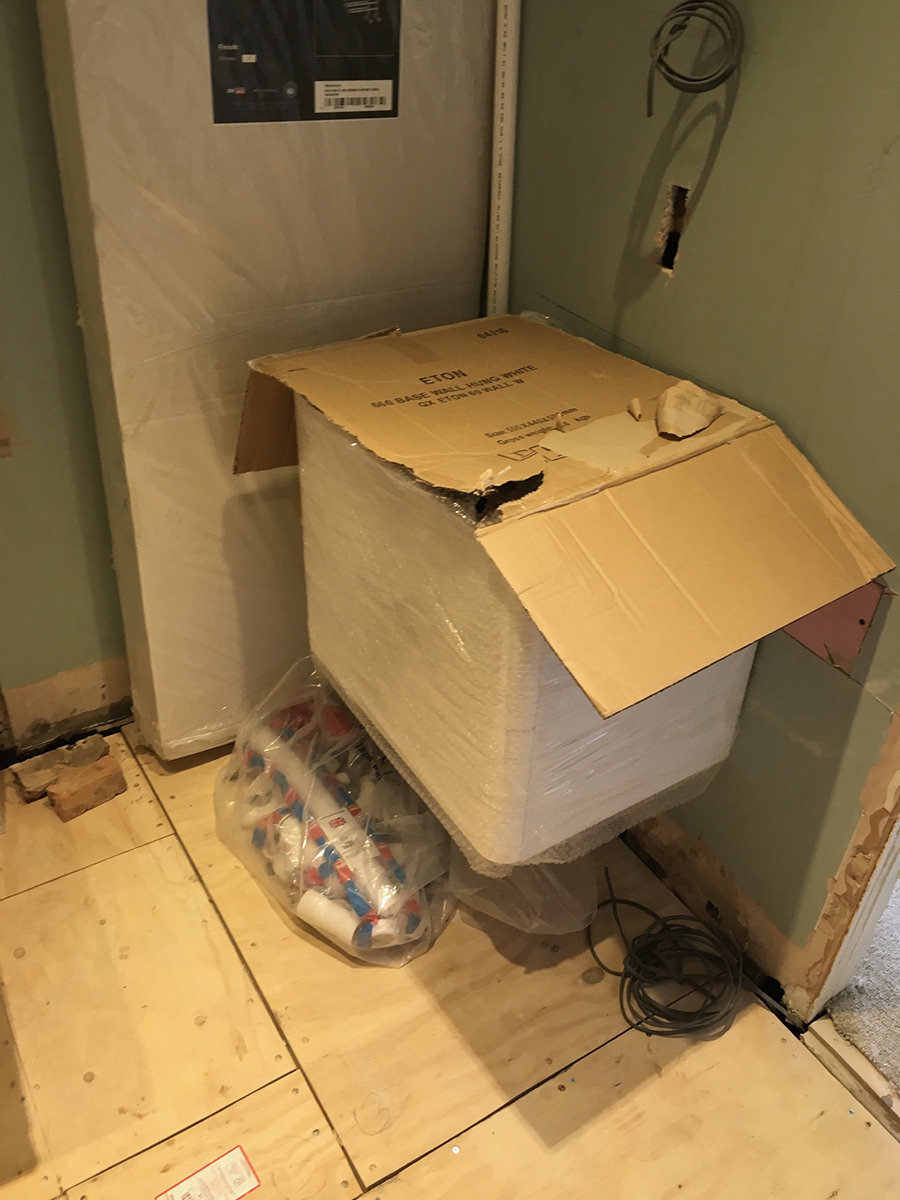
By this point we had received a first delivery of bathroom parts, and although I knew it was going to be close, I now realised that the hanging toilet support frame wasn't going to quite fit underneath the window. In order for it to fit, there needed to be another two layers of brick in the window hole, and a reduced size window installed. So, I took the window out and added two sturdy rows of brickwork. I also ordered a new window (note: if you install a window yourself, you will need building control to approve it, assuming you're not FENSA registered).
I had the electrician come to put cabling through the stud wall and on to the bathroom shelf. We had some 1W LED down-lighters for the recess shelf, an idea we stole from a Pinterest reference photo. Studs for the bathroom were covered with Aquapanel cement board, joints taped and filled with tile adhesive. The plumber installed the pipework for the wall as I built it.
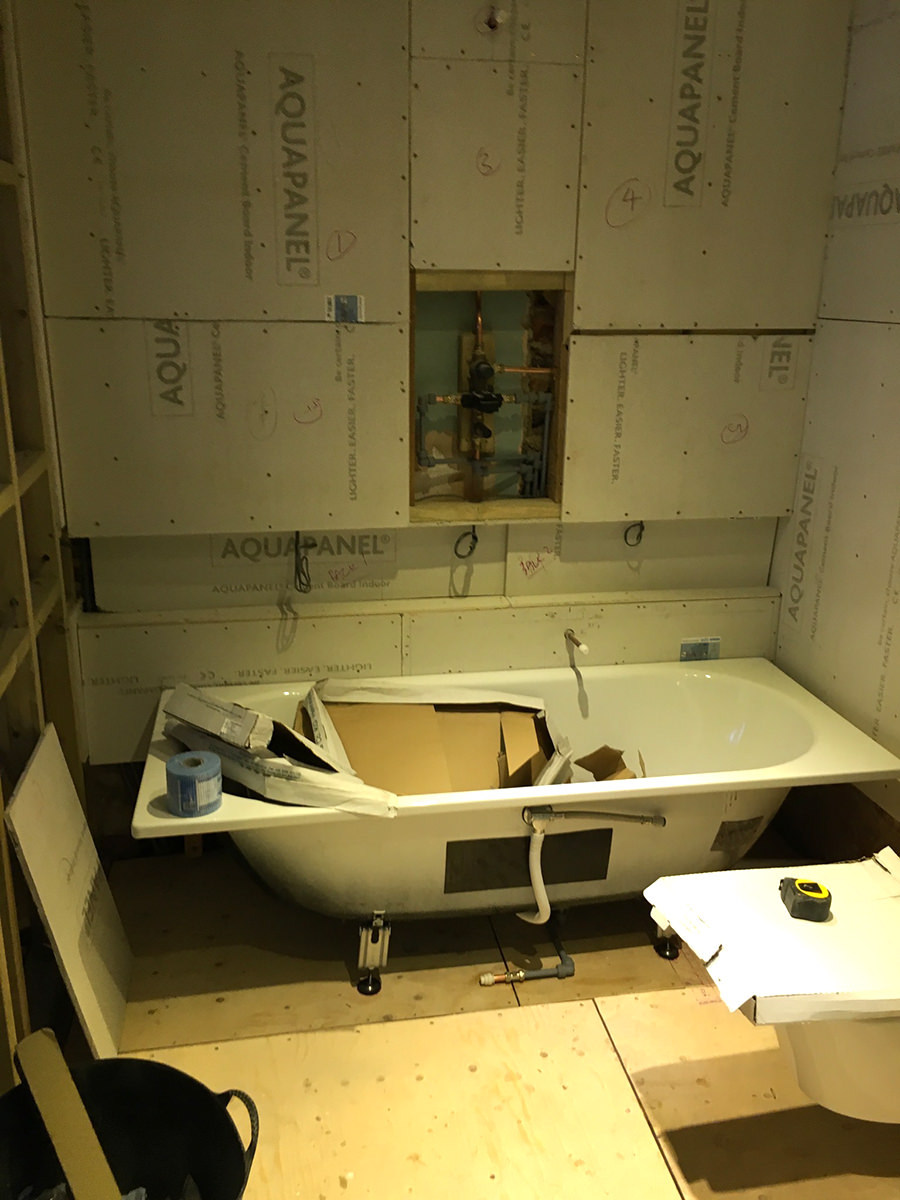
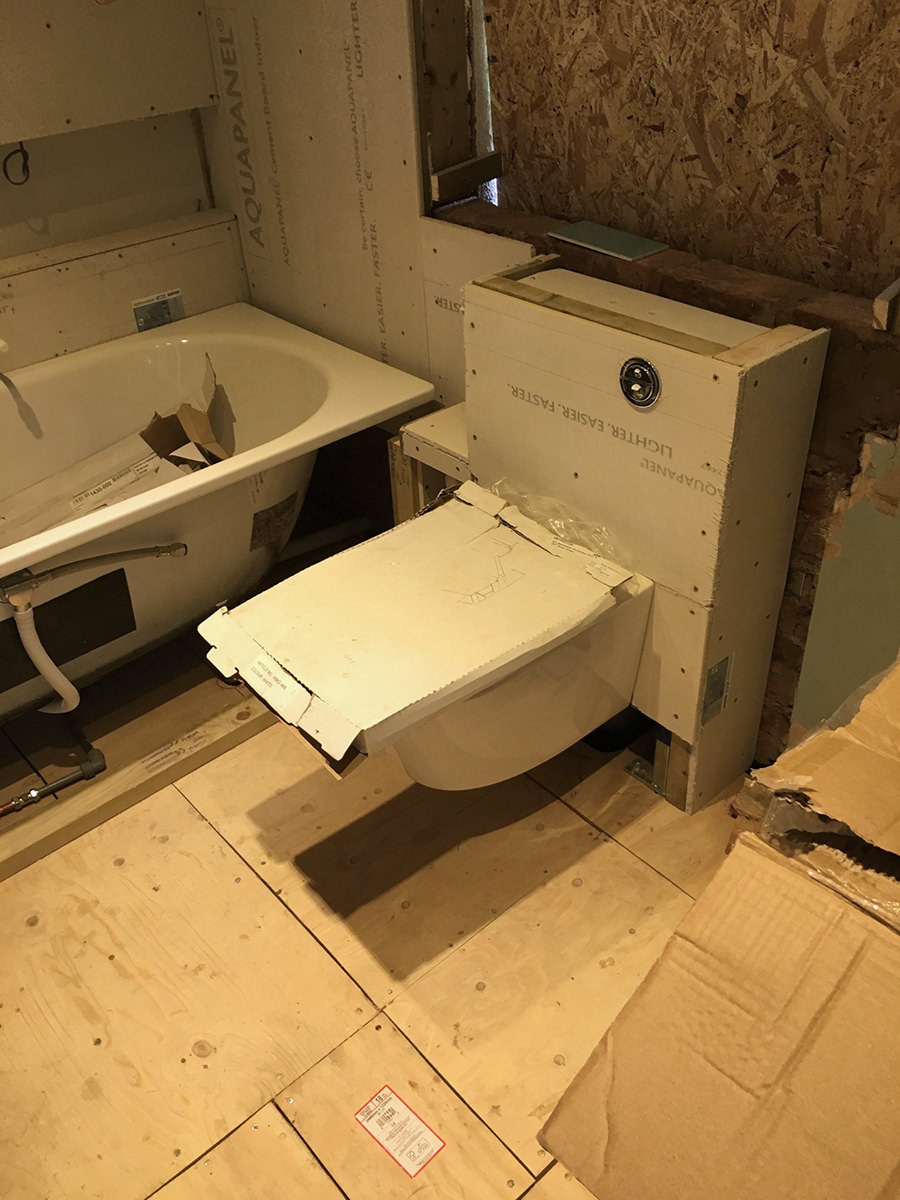
Panelling work around shower/bath area and toilet. Plus getting the sink mounted on to the wall.
I continued panelling the stud-work, moving around the room to the loo. Here I built a timber surround and panelled around the toilet. To ensure access to the pipework underneath the toilet, I used magnetic holdings to allow a section of Aquapanel underneath to be removed easily (I did a similar thing on top for access to the cistern, but without the need for magnets).
To mount the sink, I cut out a section of plasterboard from the wall so I could add reinforcing stud work for the sink supports to screw in to. The plumber and I then put the sink in to position and he connected the pipework. It's all concealed in the wall, so there is no exposed pipework (well, apart from the pipes coming from the floor up to the radiator).
It's worth noting that it was around this time that the Challenge-Anneka week long spring came to an end. The previous bathroom had been removed, floor levelled, wall removed and rebuilt and there was a working toilet, so I guess the house was just about ready for Naomi and Rocco to return from holiday. I was totally exhausted at this point, pretty much broke myself during this particular week. I took what felt like a rest by returning to my regular job. Sitting at a desk thinking about web site design, not really doing any physical exertion certainly felt like a break by that point.
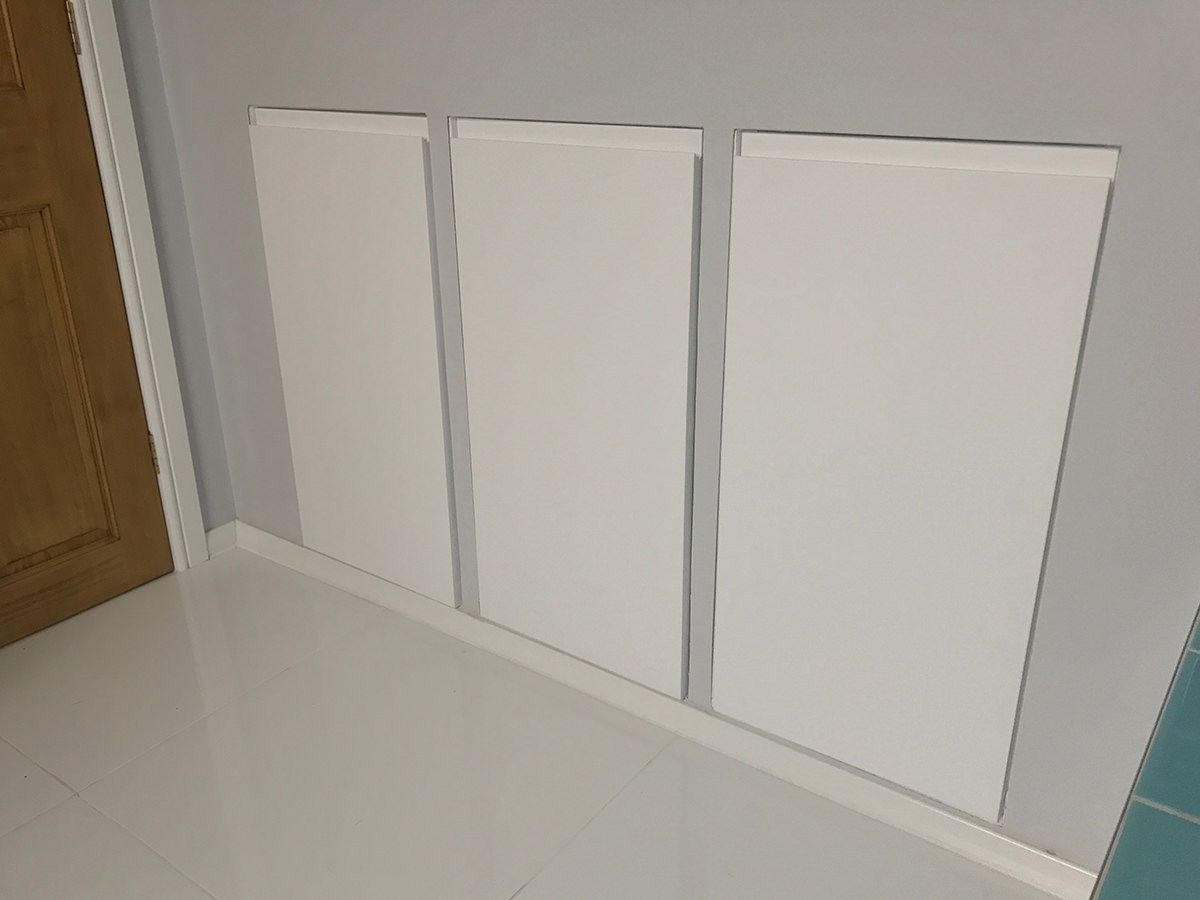
The following weekend I continued work. Above the sink there would be a bathroom mirror cabinet, an IKEA one. To save more space here, I realised I could recess it in to the wall and reduce the protruding size by about 7cm. I put more reinforcing studs in to the wall, and mounted the unit in to it. I got the electrician round to fit a shaving socket in the cupboard and hook up the lighting. The cupboard uses a custom fitted IR switch embedded in the left hand side wall, you just wave your hand and the lights come on. There's a regular failsafe toggle switch I had added inside the cupboard too.
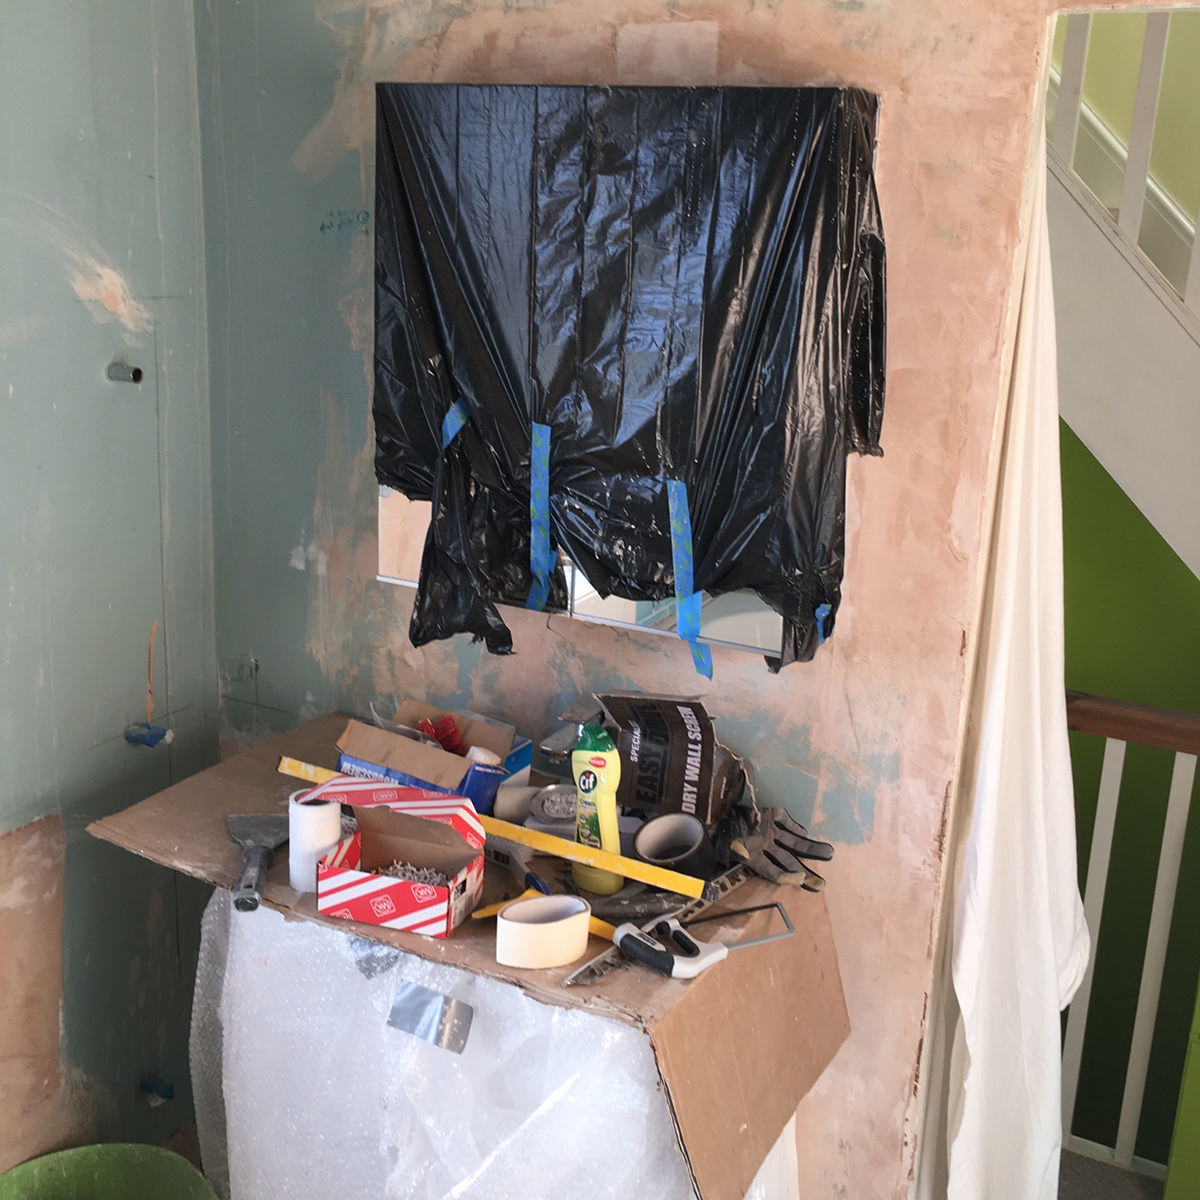
Another space saving idea: Recessing the bathroom cupboard in to the wall.
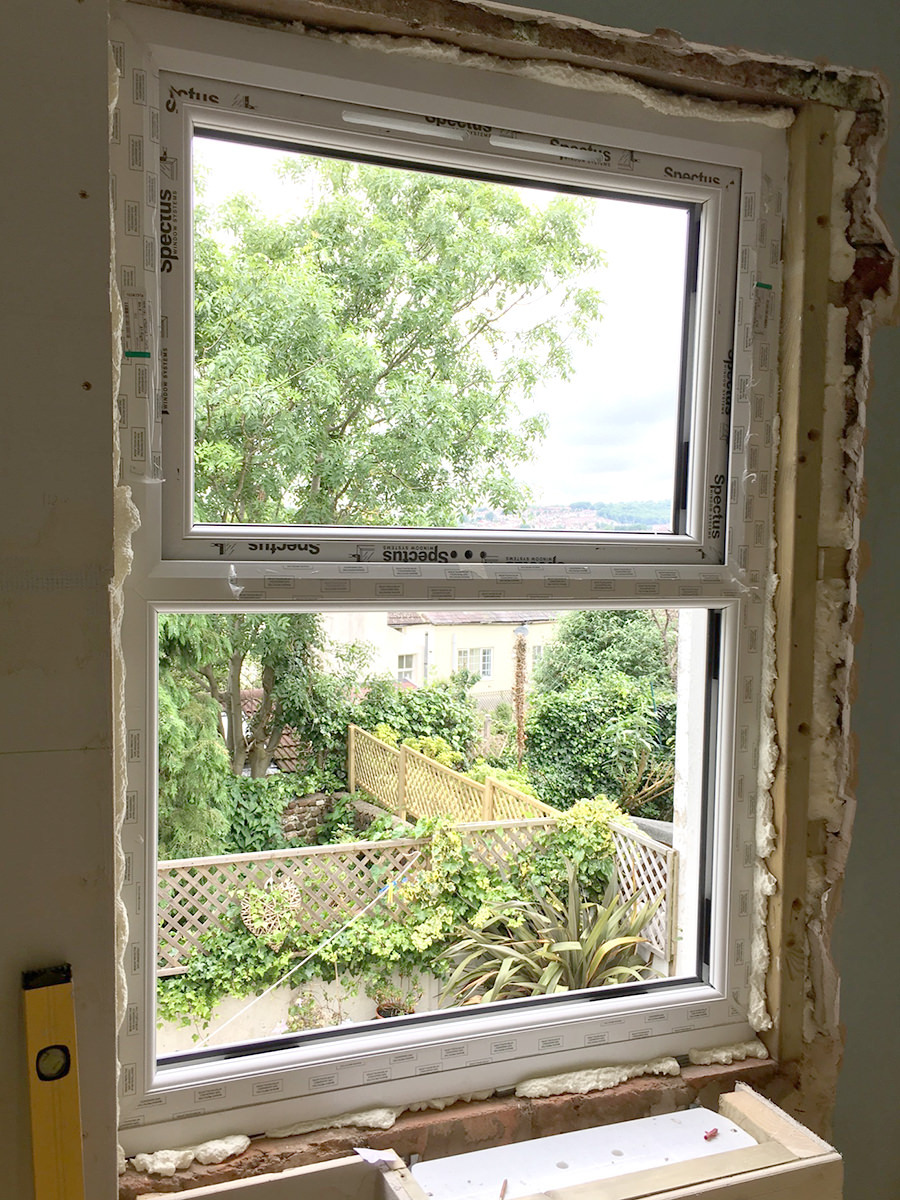
New window in position waiting for the glass to go in.
The following week I picked up the new window (£160 from Brighton Trade Windows) and installed it - I was very pleased that it looked great straight away. I put it in the window hole with a timber support around, filled in the holes and weather proofed the outside where the UPVC meets the masonry. The lower brickwork outside I weatherproofed with flashing strip and UPVC cladding over the top. Later I plasterboard around the window on the inside ready for plastering. The glass panels we chose for the window was a privacy / sand blasted effect on the bottom and a clear pane on the top. This works really well for us, as we still get to enjoy some of the view over Brighton.
Tiling (is really boring)
When the walls were all panelled and the remainder of the dividing wall plasterboarded, Dougie did a small amount of plastering and then it was time to start tiling.
Now, I like grids - I'm a pretty nerdy about grids and tiles are just grids, I had some idea that I might enjoy tiling. But, it's really boring. I found it so tedious, I had to take breaks for a few days at a time to recharge my "tiling batteries". At least if I wasn't cutting tiles, it was a quiet job I could get on with in the evenings after work.
Once the first tiles went on though, it started to seem like at some point we might have a bathroom.
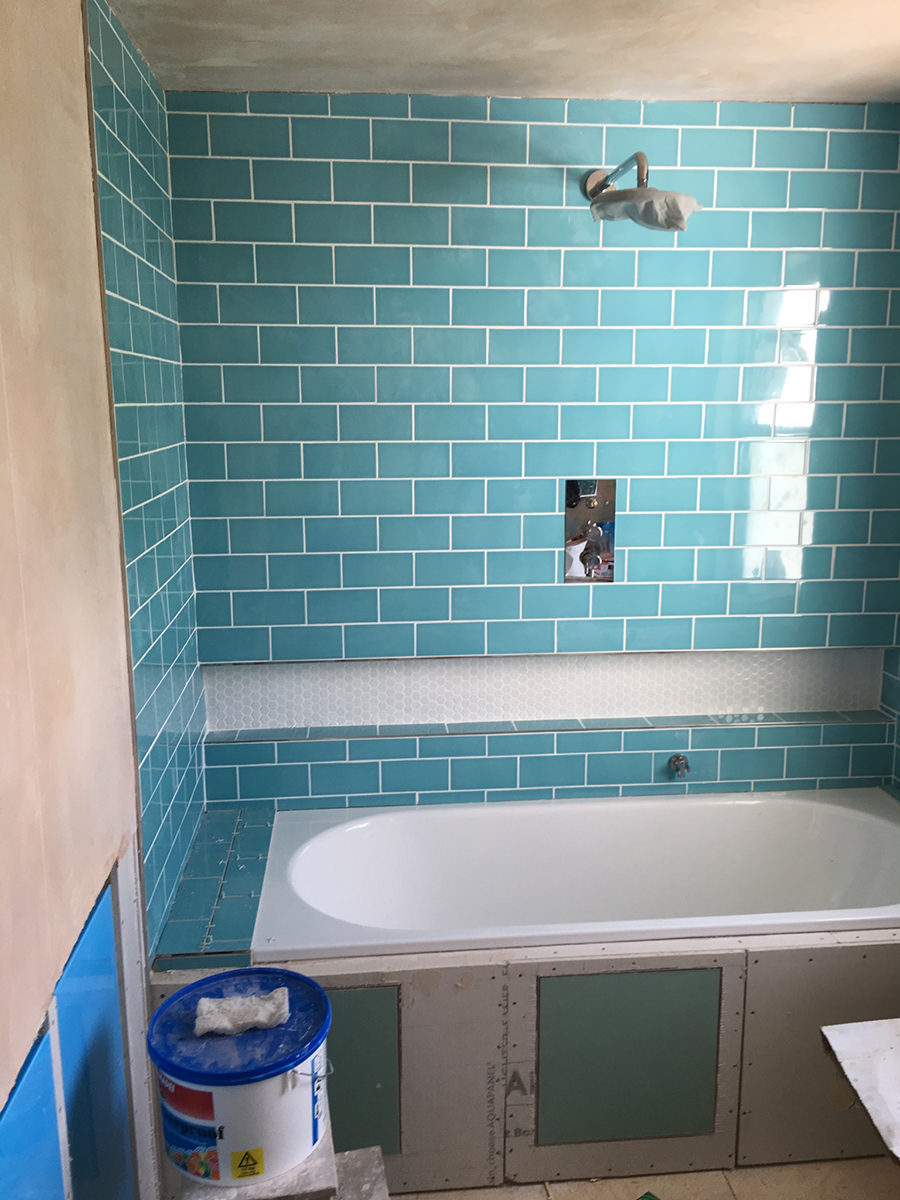
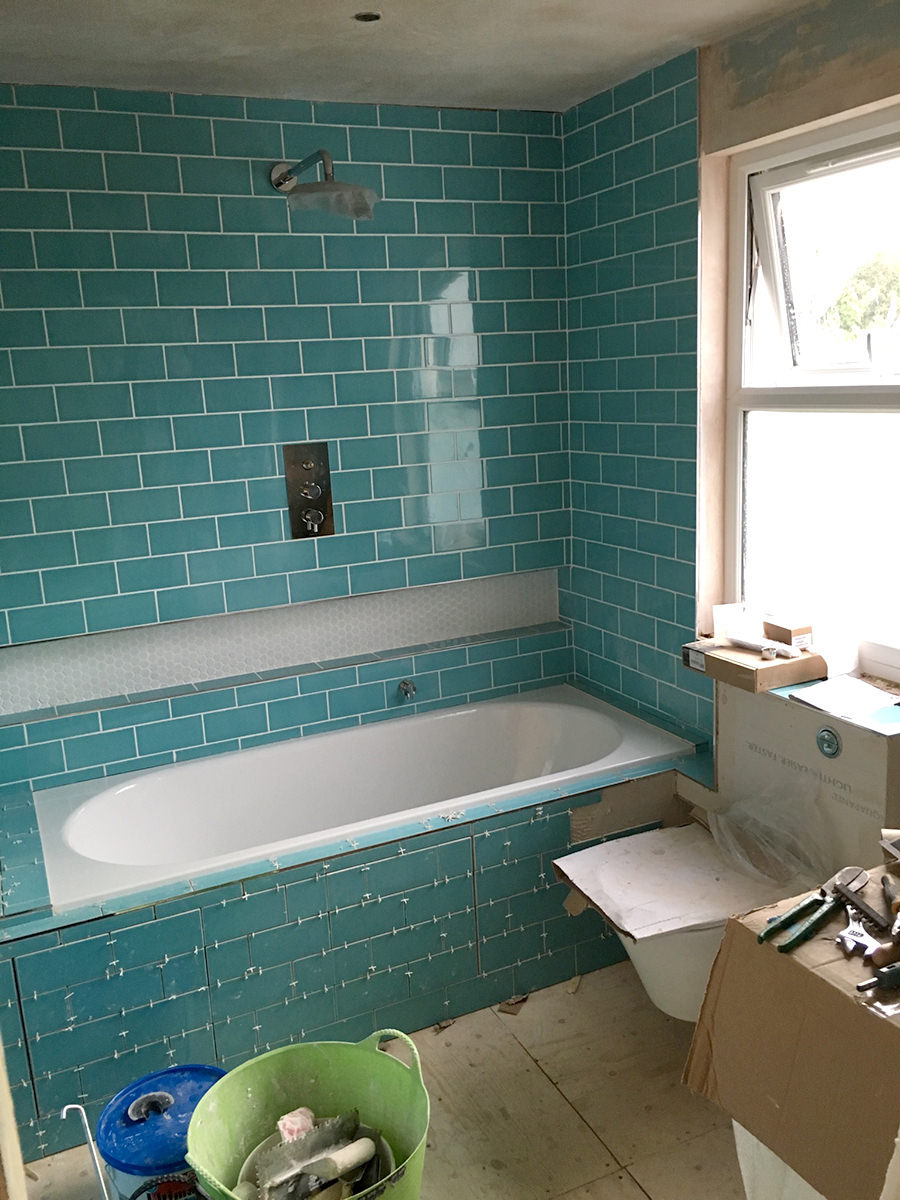

Progression of tiling around the bathroom.
I held out on buying a tile cutter, trying to save money I bought a manual one, but towards the end I really struggled with some awkward tile shapes and ended up buying a Plasplugs Compact XL wet tile cutter. Totally worth it, cheap but was easy to use and did the job - wish I had bought it at the start.
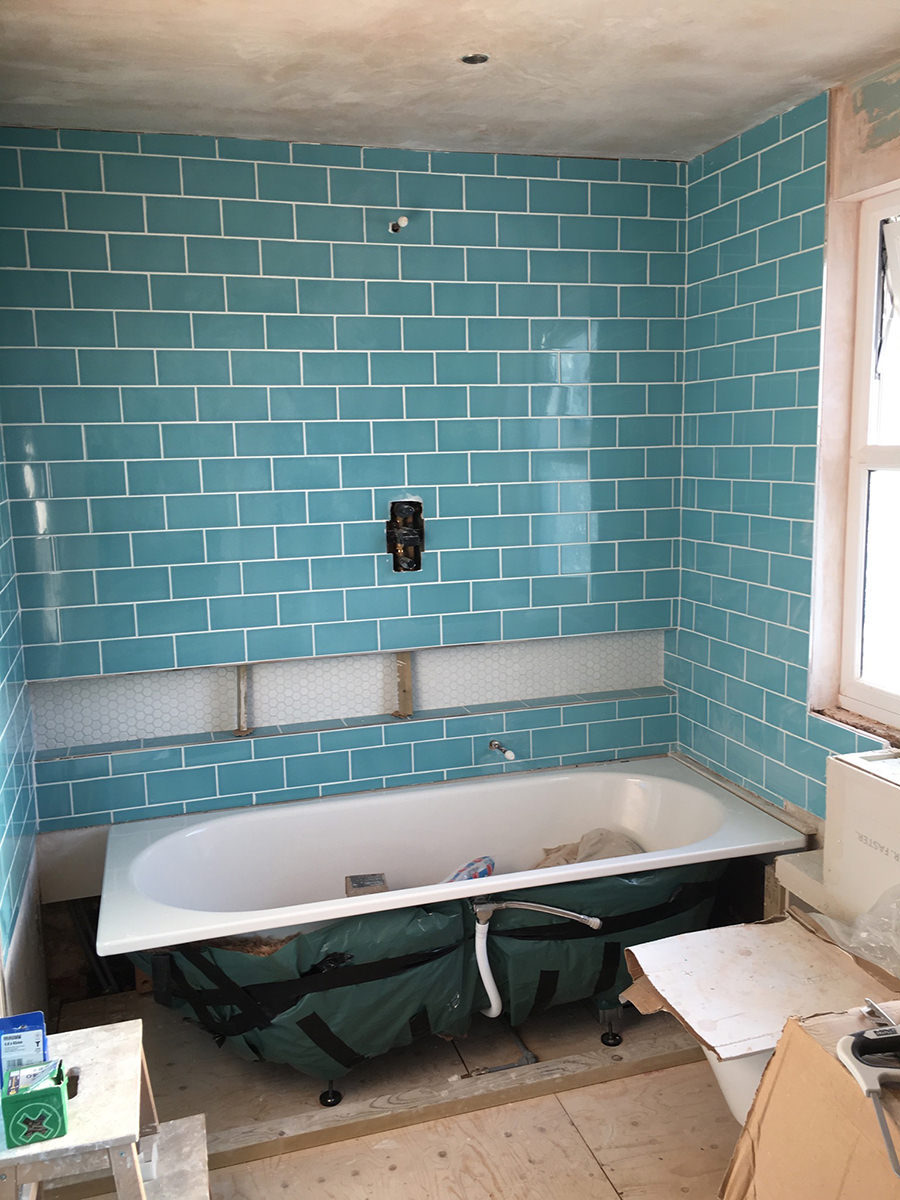
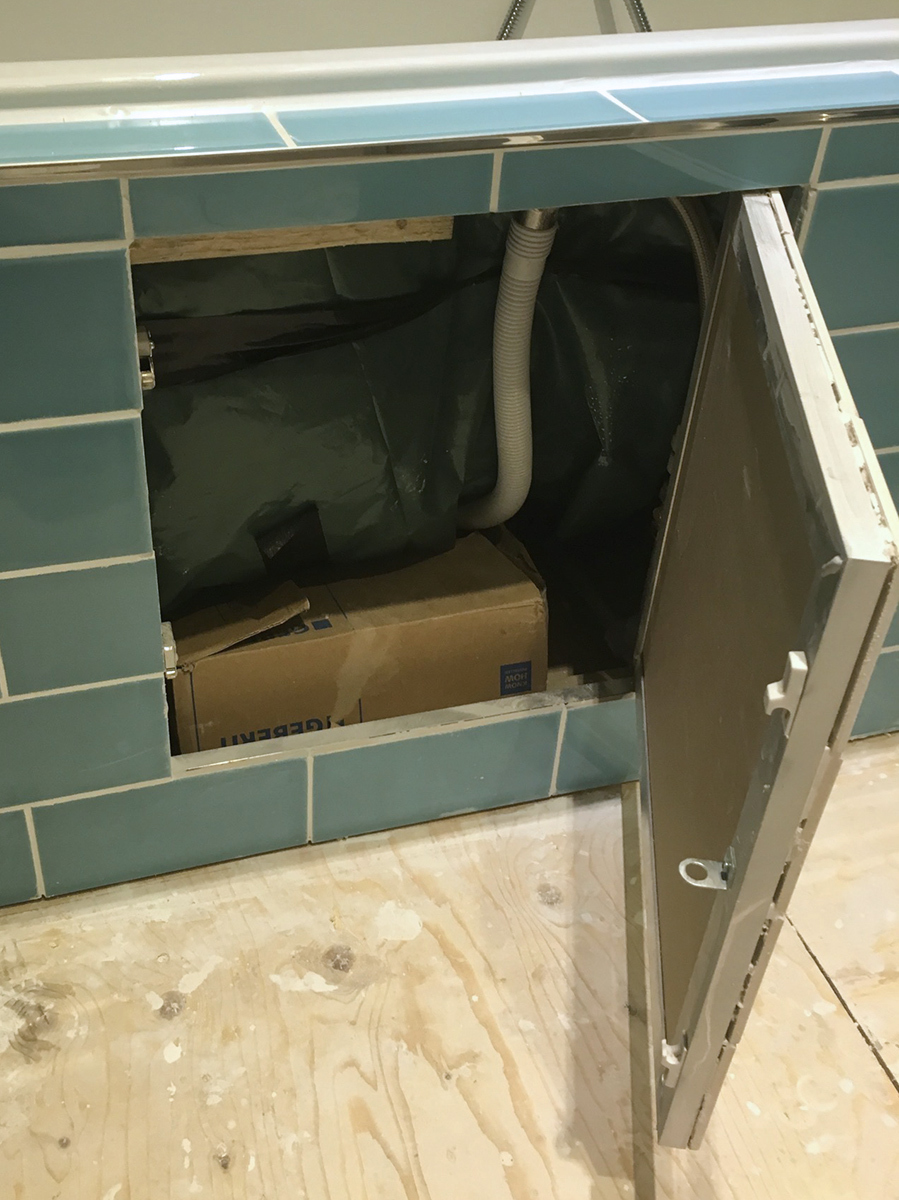
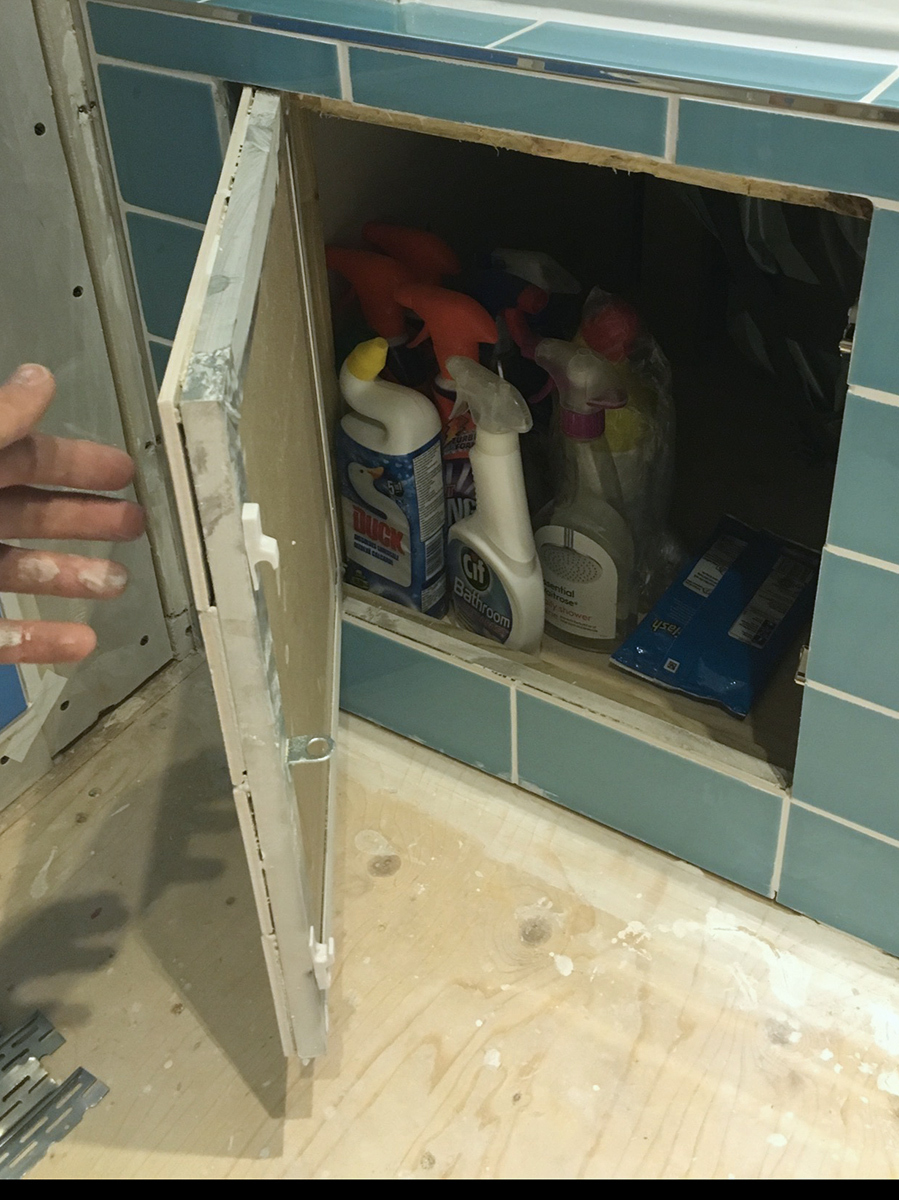
When I reached a point where the bath needed plumbing in, I got the plumber back to connect it all up and fit the various knobs and handles. We got a great bath overflow component which acts as the filler and the overflow in one, meaning: tapless bath! With the bath plumbed in I built the timber surround and added the last pieces of Aquapanel. For under-bath pipes access and storage, I bought two HoweGreen hinged plasterboard access panels, they are excellent and allow for tiling directly on to them. They're available in a number of sizes so I was easily able to buy ones that worked well with my 10 x 20cm tiles. The left hand cupboard makes a great storage cupboard for cleaning products and bath toys.
Top tip from the plumber - metal baths can get pretty cold in winter, so insulating them (with, in my case, leftover Ecowool) will help to stop this, as well as keep them warmer for longer.
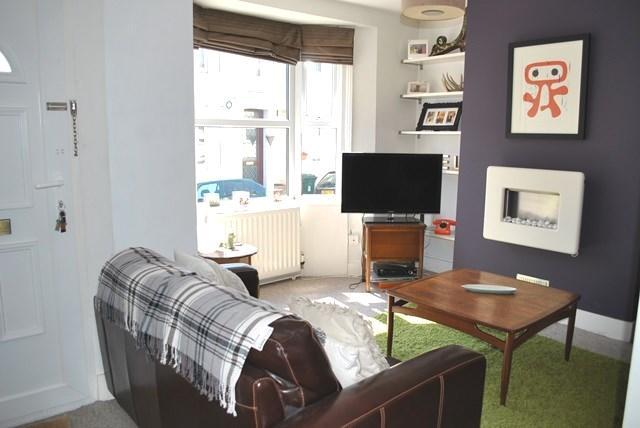
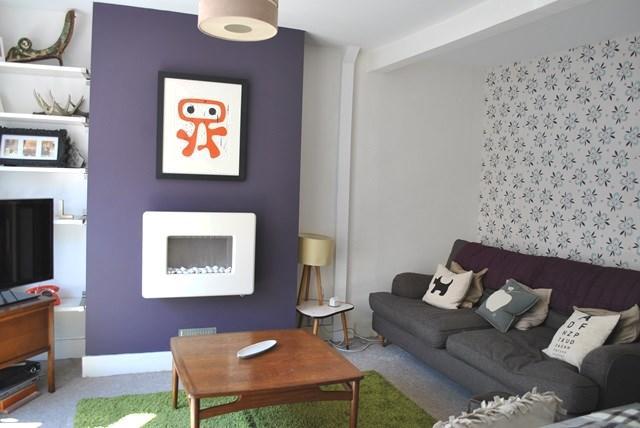
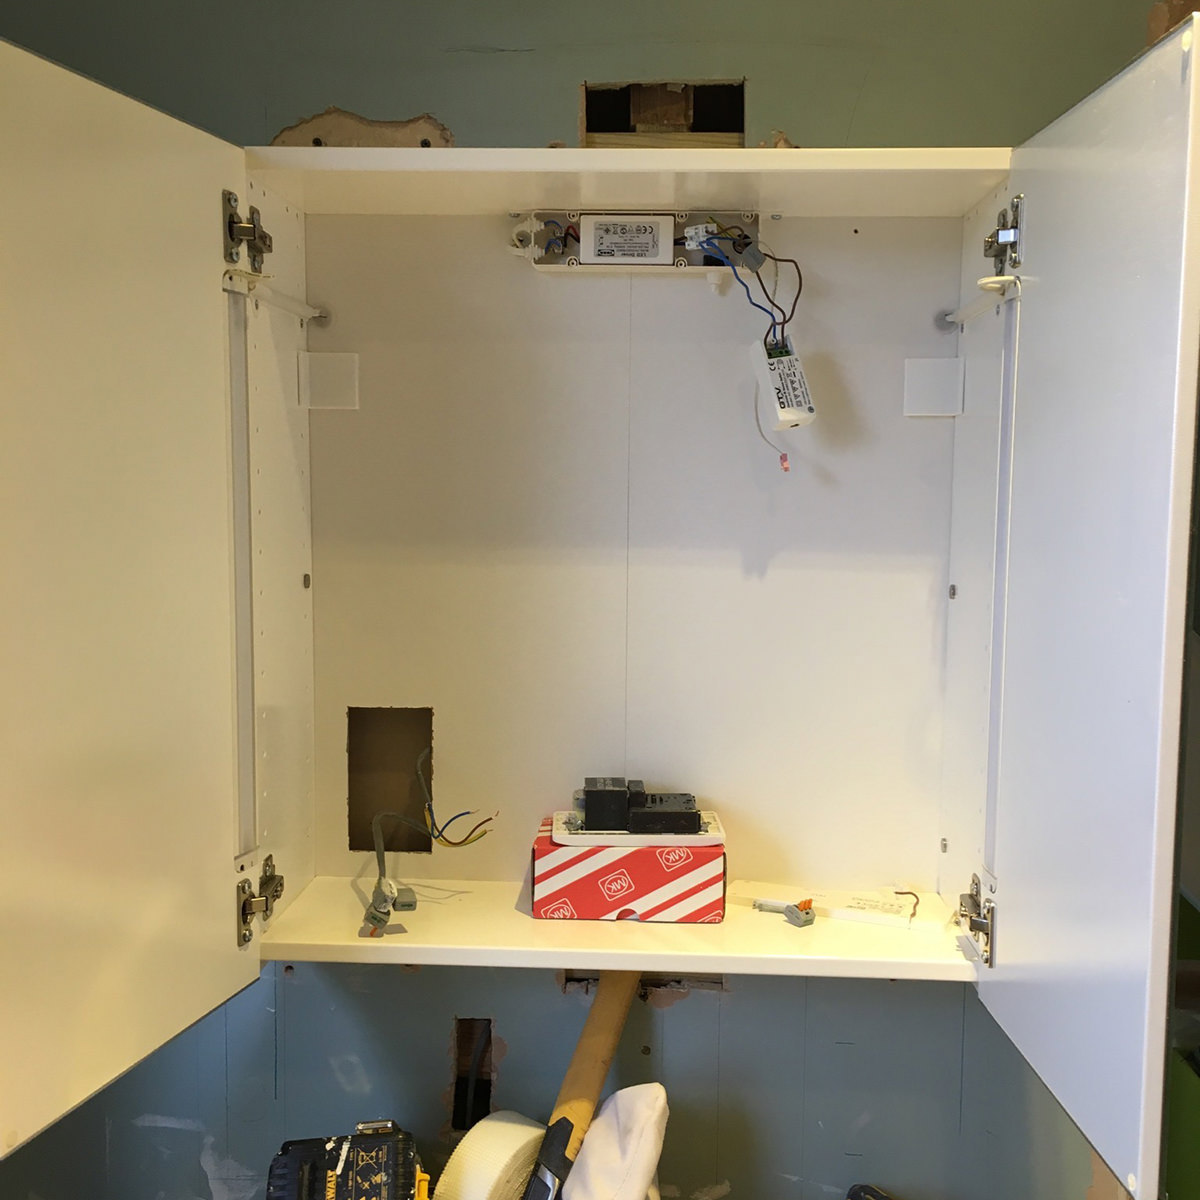
Building the lounge storage wall
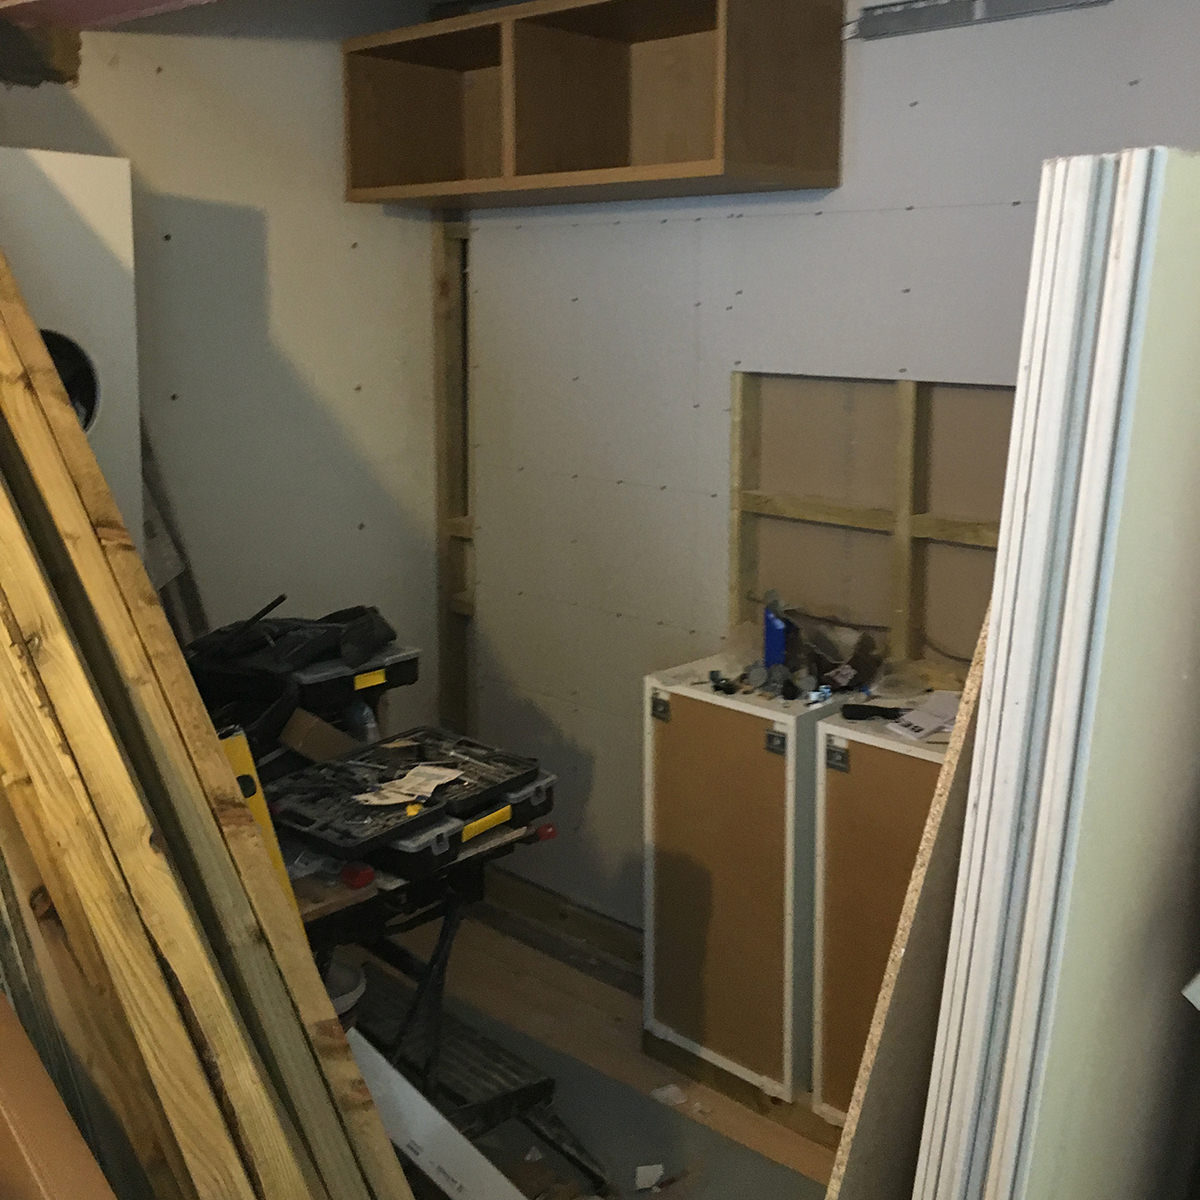
On the bathroom side, I'd already installed the three IKEA kitchen units which would form the in-built storage cupboards on that side. The rest of the wall was plasterboarded and plastered, so it was time to do some work on the lounge side. In there, I had to first plasterboard the walls and carefully mark out the centre of each horizontal stud. I then screwed the mounting brackets for the IKEA BESTA units on to the wall before I started positioning the cupboards themselves. There was a lot of measuring involved, constantly taking the cupboards down and putting them up again to get things right - but, in the end I got a pretty reasonable result - everything is square and it all stayed up! There was some stud work to add around the edges of the units, including a ceiling beam. These would eventually help give the impression that the cupboards were recessed in to the wall.
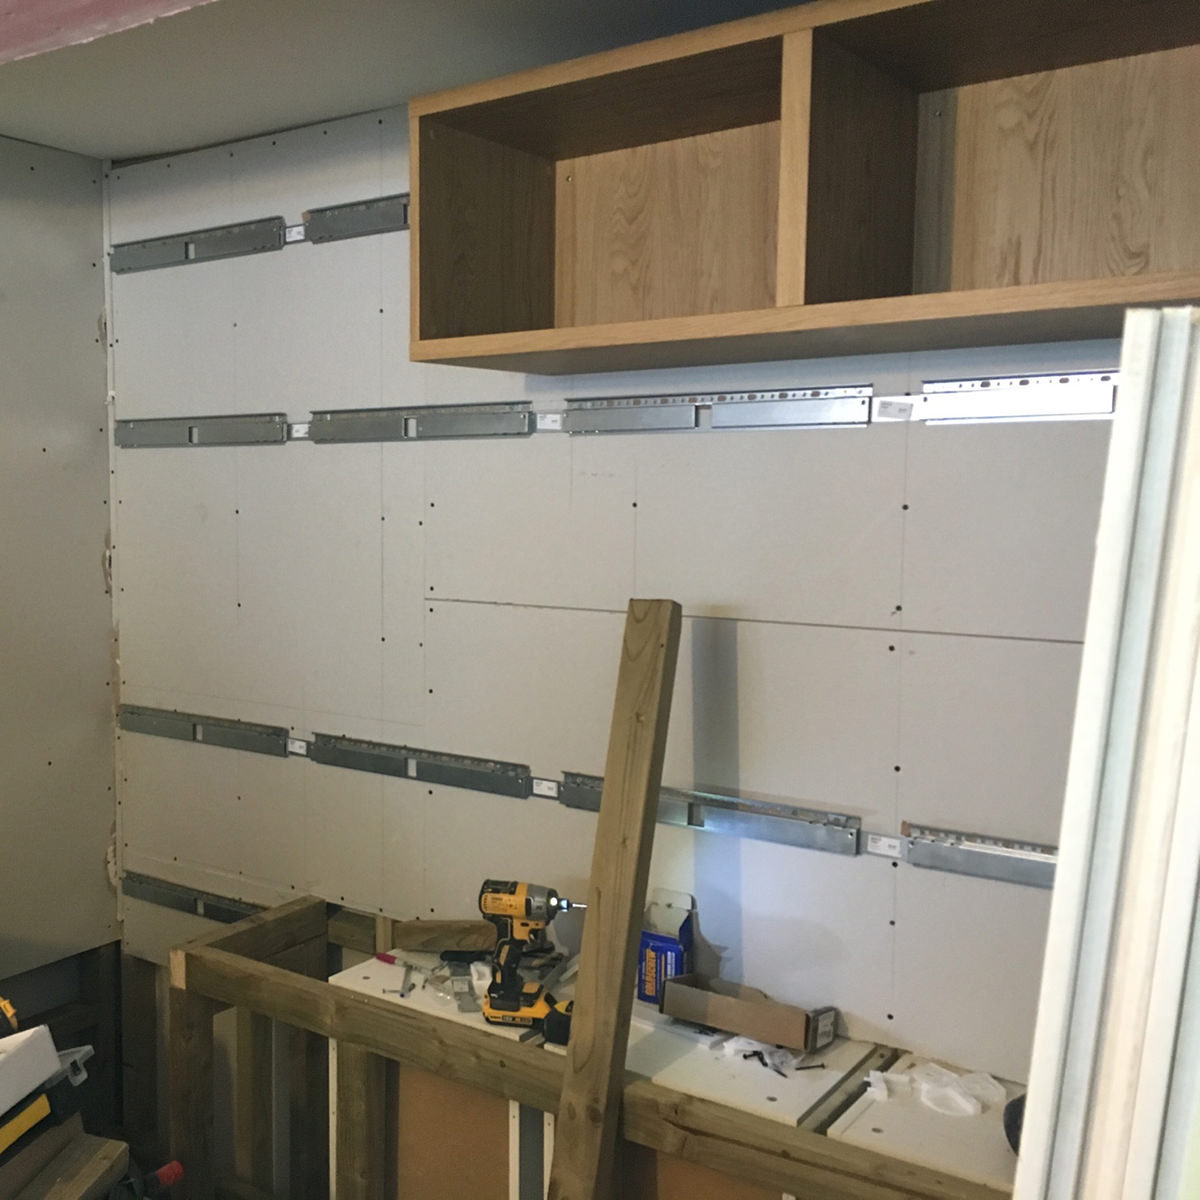
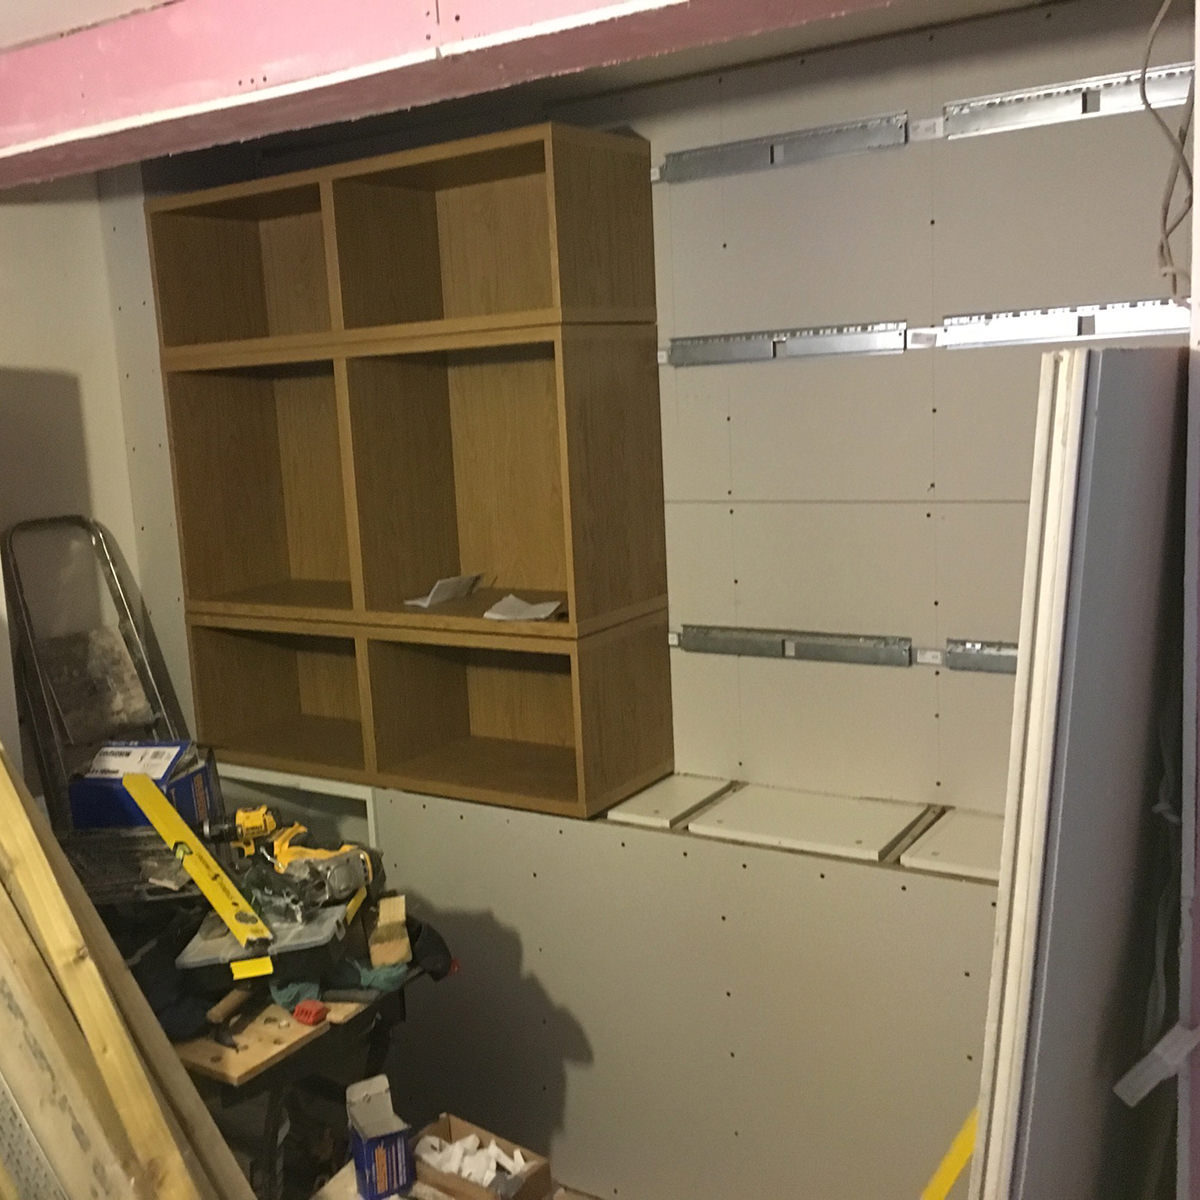
Lounge side of the storage wall. Lots of measuring out the wall mounting brackets and then boxing the shelving in with more stud-work and plasterboard.
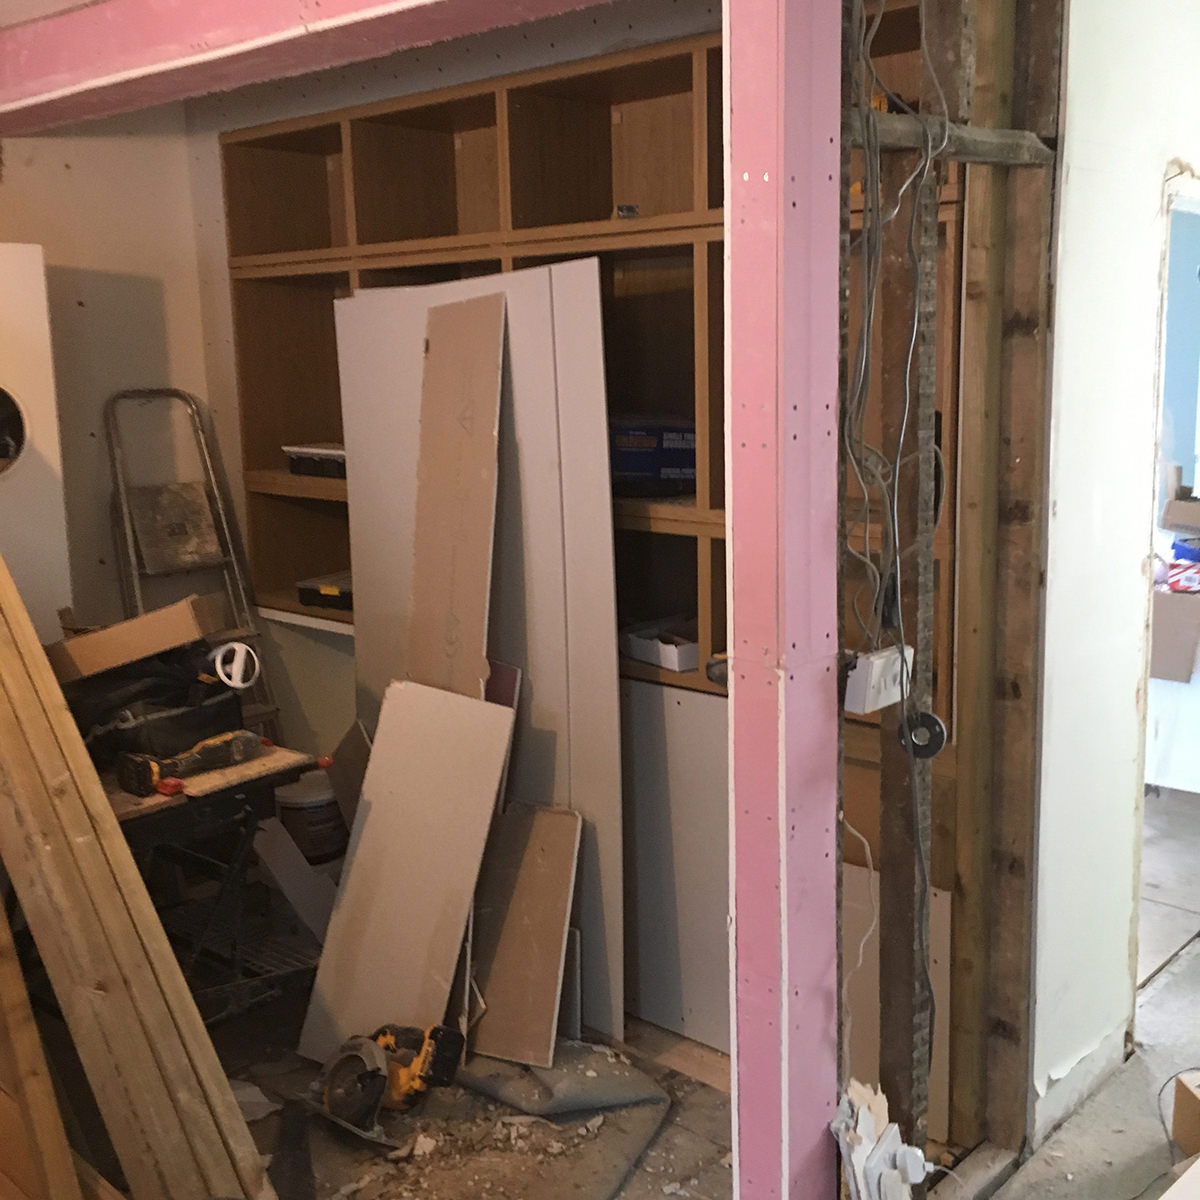
Once the cupboards were on the wall, I finished up by adding plaster edging beads around the plasterboard that meets with the cupboard edges, ready for plastering.
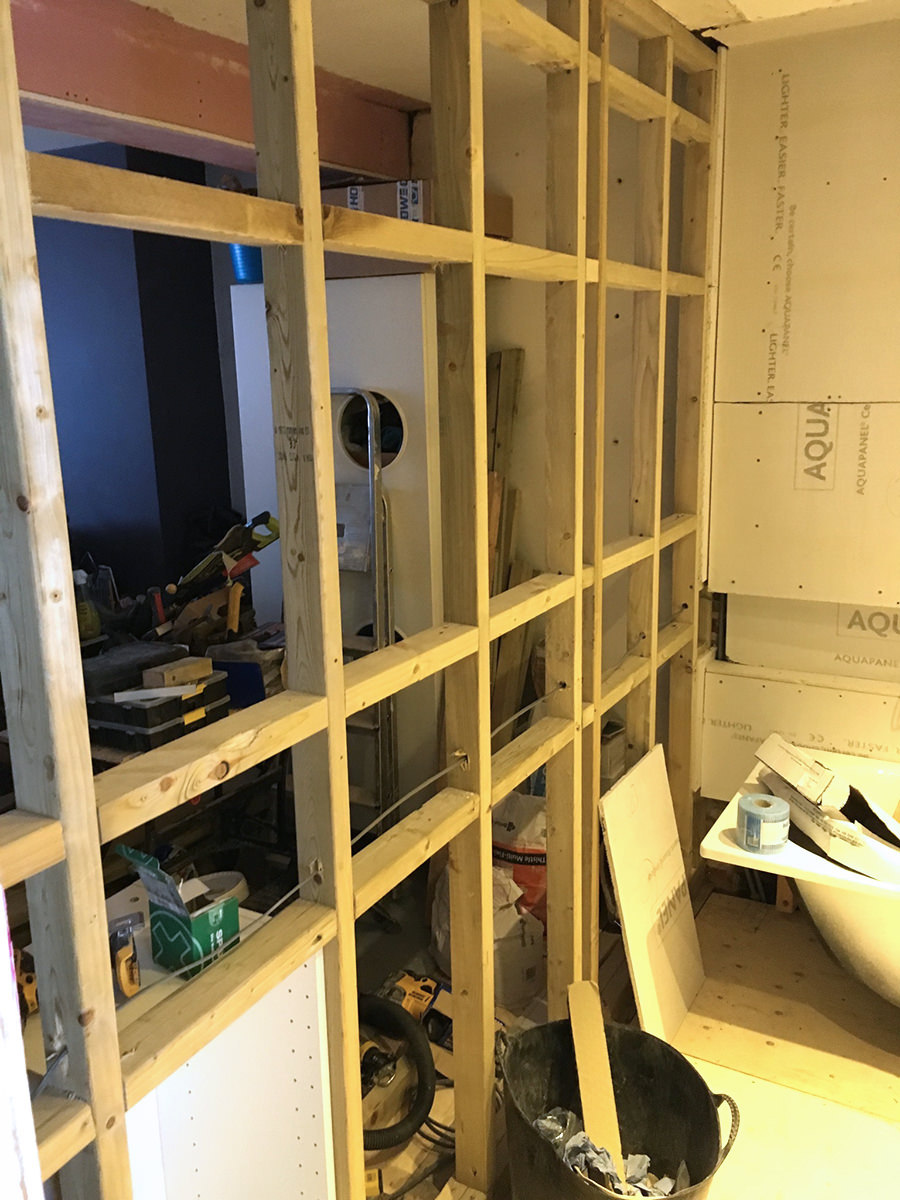
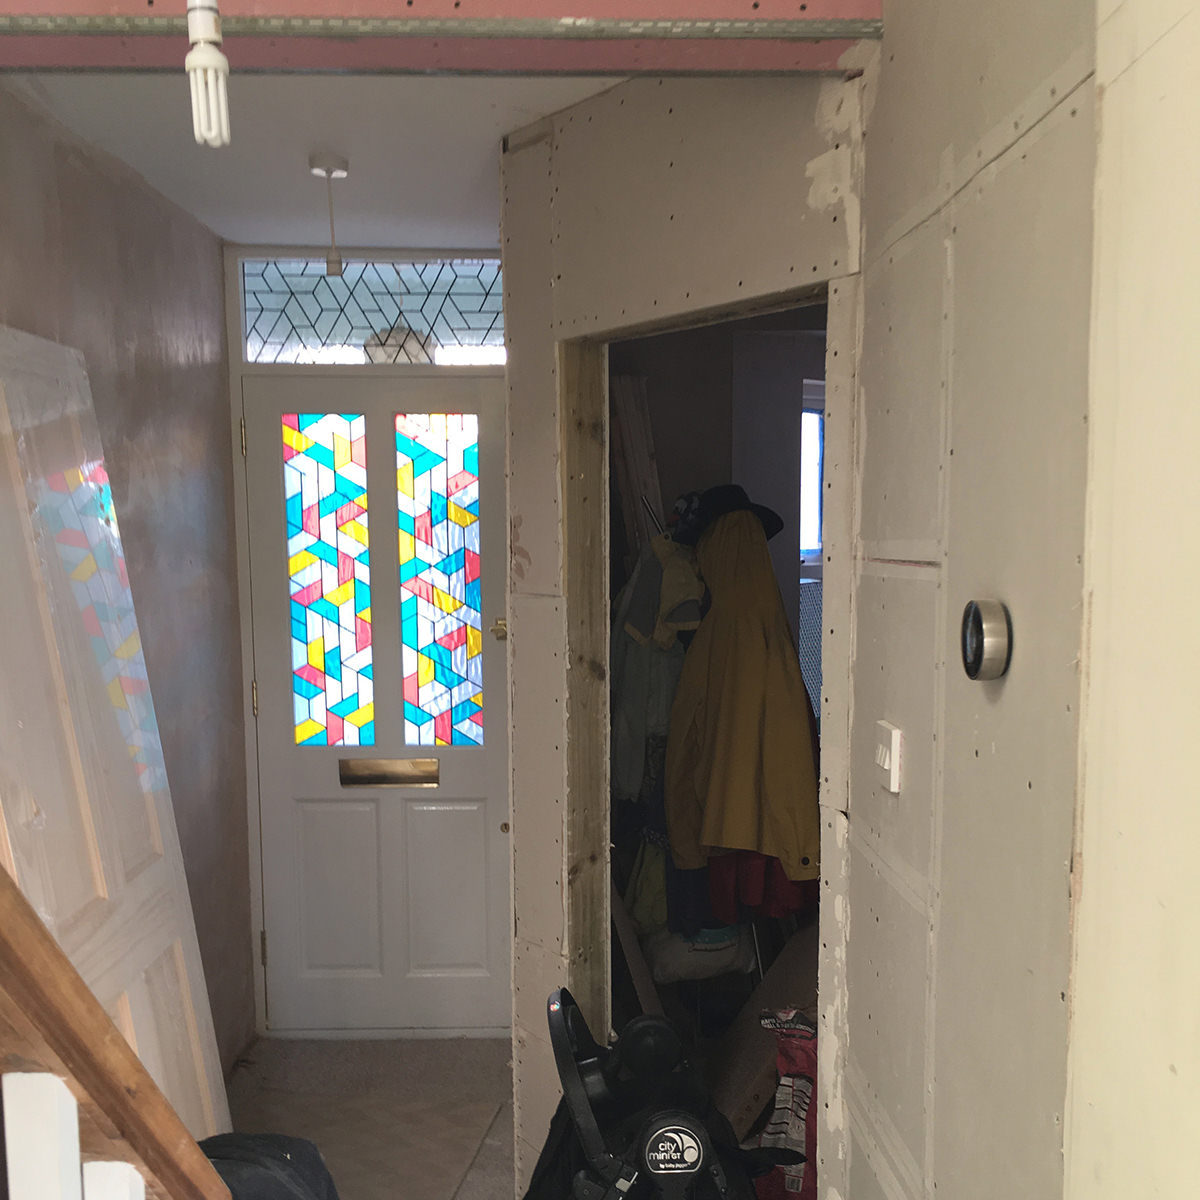
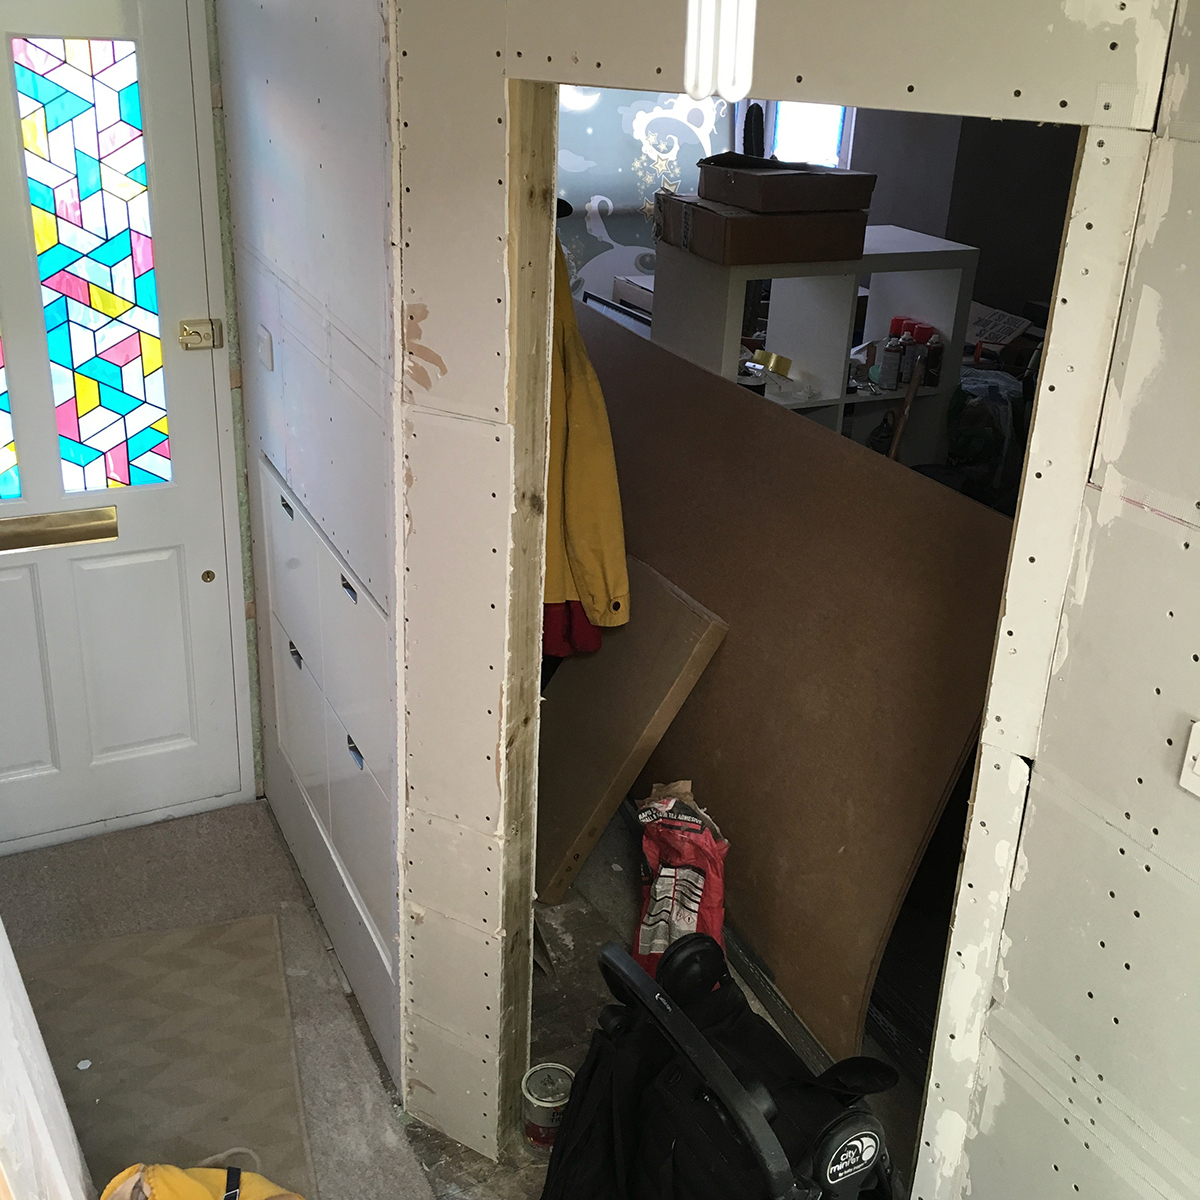
The rest of the lounge had a fair bit of work to do. By this point I was almost working on the two rooms at once and having to prioritise work between them. I started building the hallway wall using the measurements from my original plans. One of the original ideas for space saving was building a shoe storage rack in to the hallway wall (another IKEA unit). This meant increasing the width of the wall a fraction, but it doesn't notice. It was a little fiddly to get the angle of the lounge doorway wall correct but managed it on the second attempt. Building the stud work was straightforward and once complete, the electrician came to sort out the mess of cables. Always feels good to make sure that all the switches are in the places they should be: putting the hallway and porch lights... by the front door, for example. We also had the hallway lights replaced with LED down-lighters. I then plasterboarded the walls ready for Dougie to plaster.
Lounge and hallway wall construction.
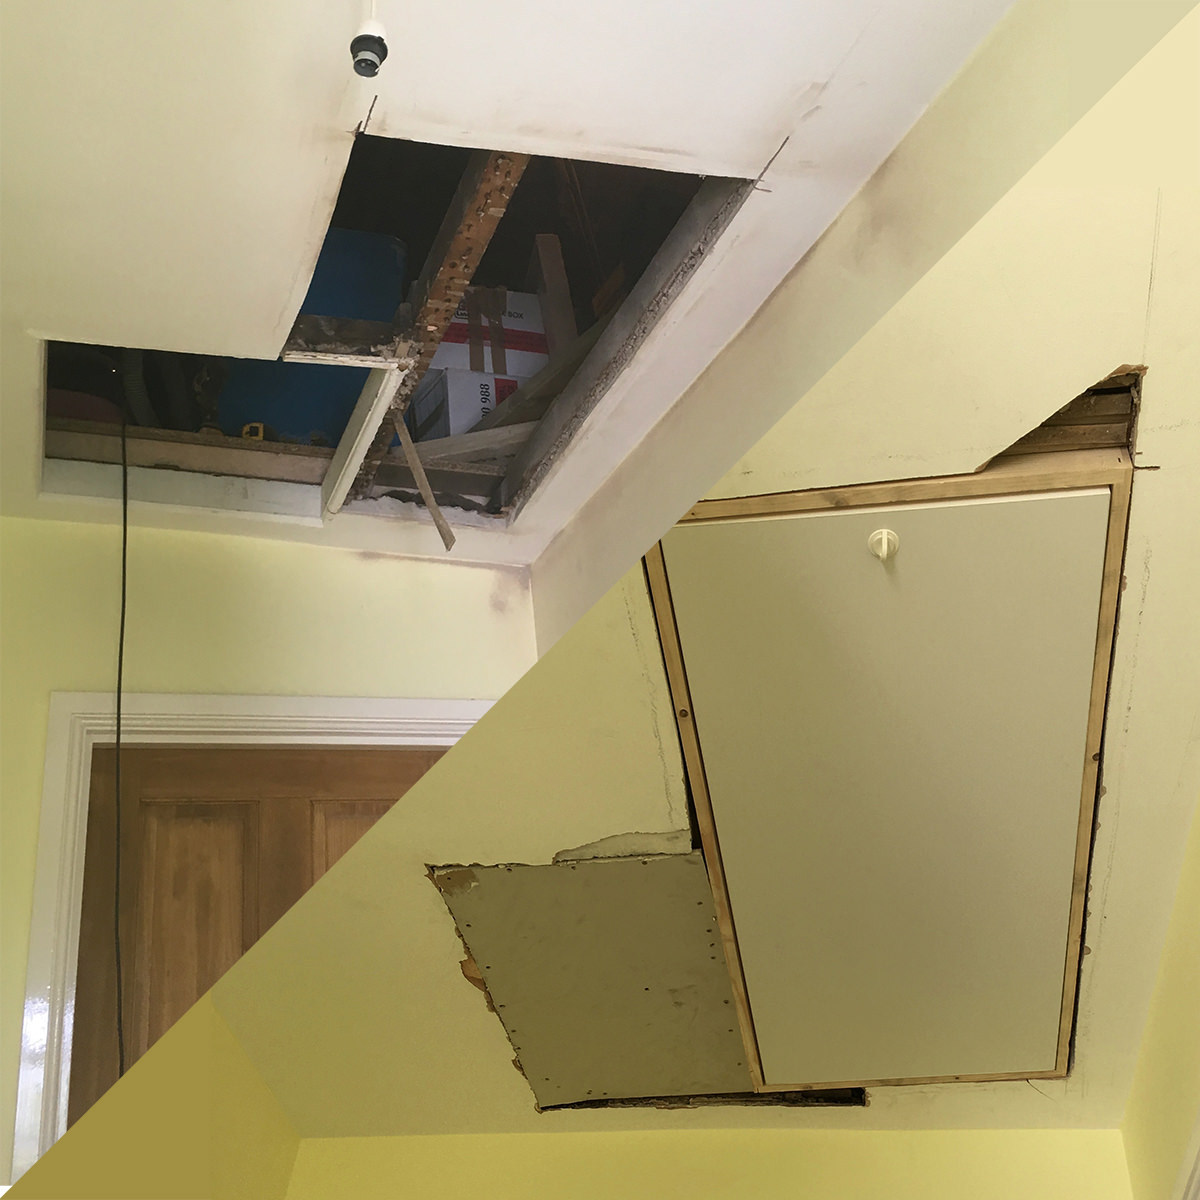
Sunday morning loft ladder fun.
We had a bit of a wait before Dougie was available again, and with a spare Sunday morning I decided to install a loft ladder. It's weird - when we first moved in we wanted to get a loft ladder and were quoted £450. We didn't get it installed because we couldn't quite afford it. Now I found myself with a spare bit of time and with £120 in Wickes, 3 hours later we've got a new loft ladder. This meant that the following week, Dougie could include the plaster repair work around the ladder in his work - another job done! It's amazing how your perception of what you're capable of can change.
So a week later Dougie had finished and all the lounge plastering was complete. This was tantalisingly close to getting somewhere near finished. It had been months by this point and seemed never ending.
I phoned building control and they came for a final inspection. They'd already signed off the RSJ back when it was installed, this time they came to inspect the chimney support in the loft (which they could safely access now there was a loft ladder!) and check my window was installed OK. A little nerve wracking but everything was signed off and no work needed re-doing.
I caulked the narrow spaces around the built in storage, added beading around the bathroom cupboards and plastered as neatly as I could around them. Final jobs for finishing were the skirting and architrave in the lounge and hallway, then decorating the lounge, bathroom and hallway. Oh yes, and varnishing and hanging the two doors. These jobs didn't take too much time. I'd already done these jobs for the other rooms so they were all a bit quicker the third and fourth time around. We used Dulux Trade Light & Space again - Jasmine Shimmer in the lounge with Honey Beam and Lemon Spirit in the hallways. In the bathroom we used Dulux Trade Diamond Eggshell, Polished Pebble. We had booked the lounge carpets to be installed on a set day so I had a really tight deadline to hit but it made sure I got the painting done on time!

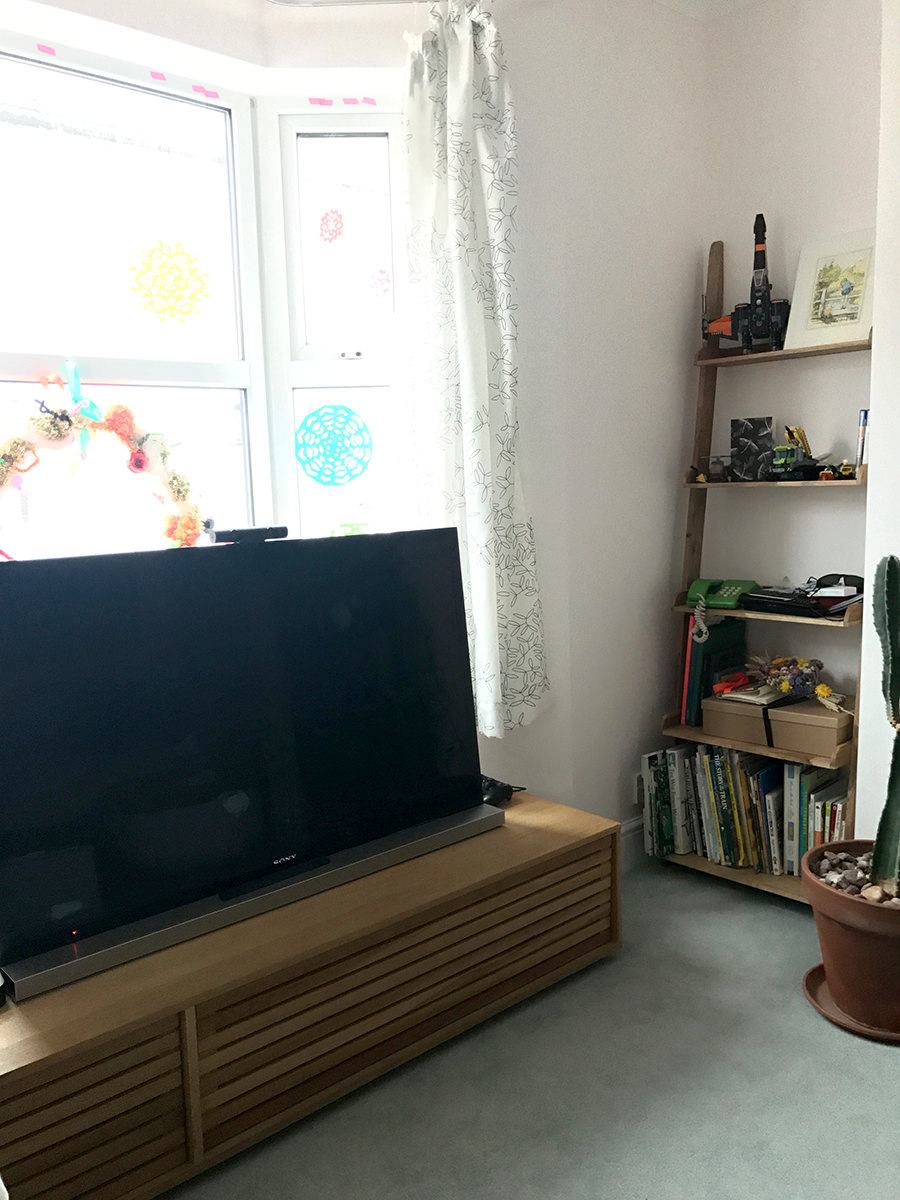
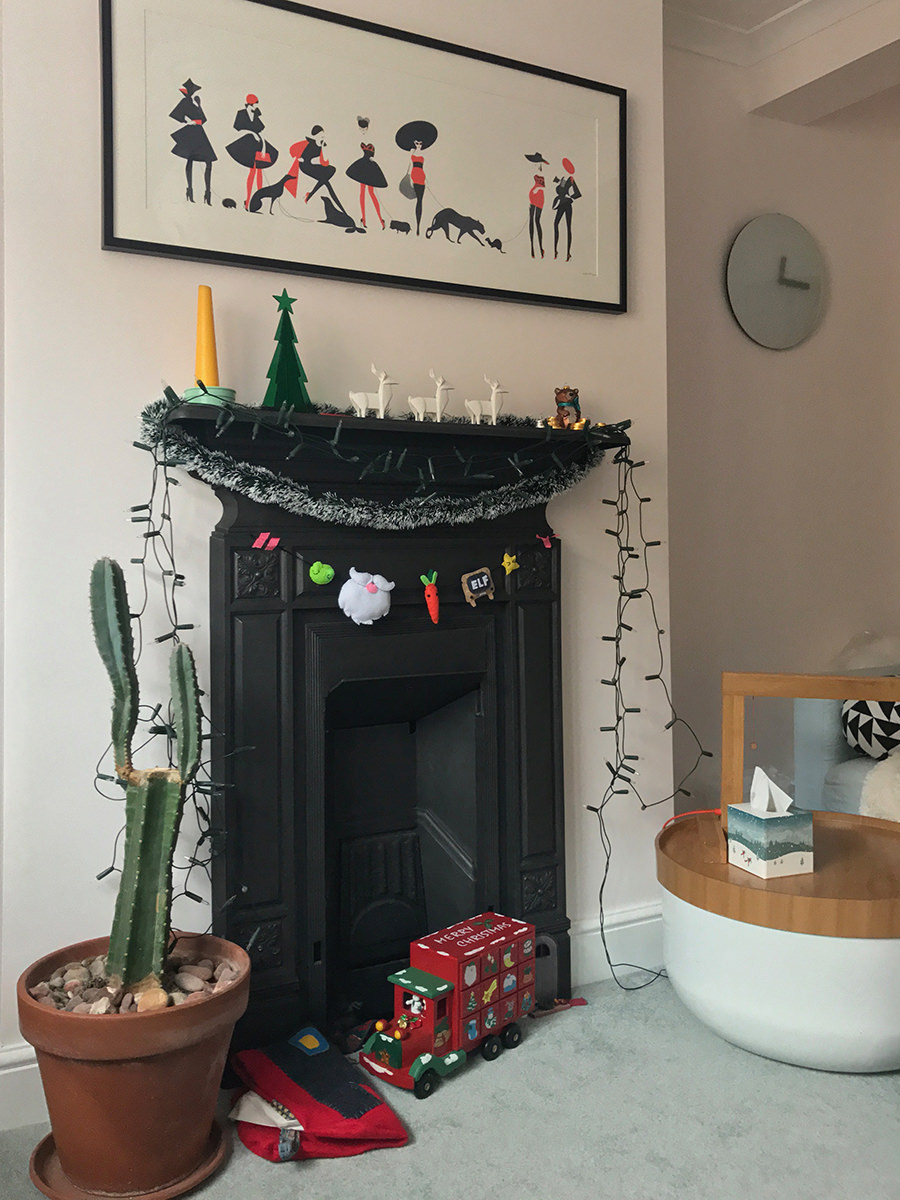
Finishing up in the lounge.
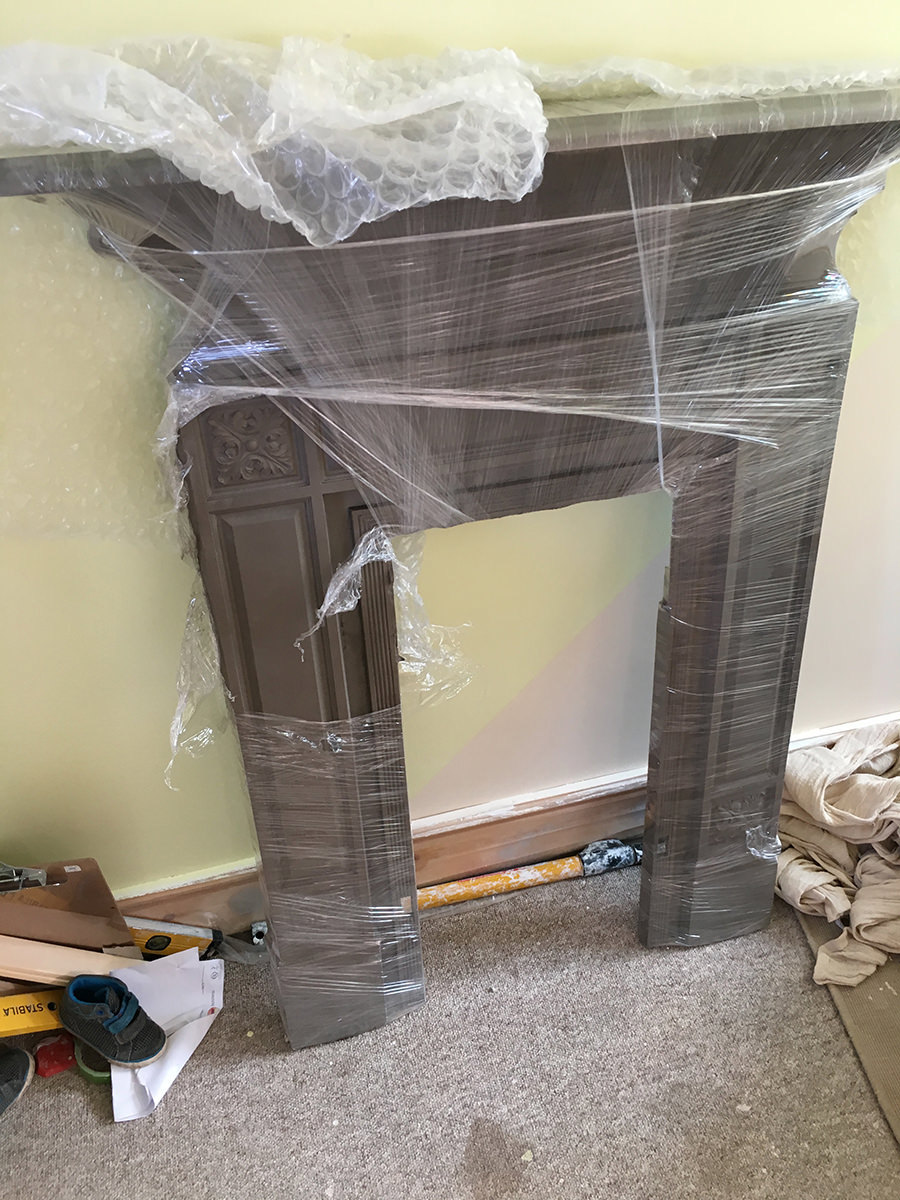
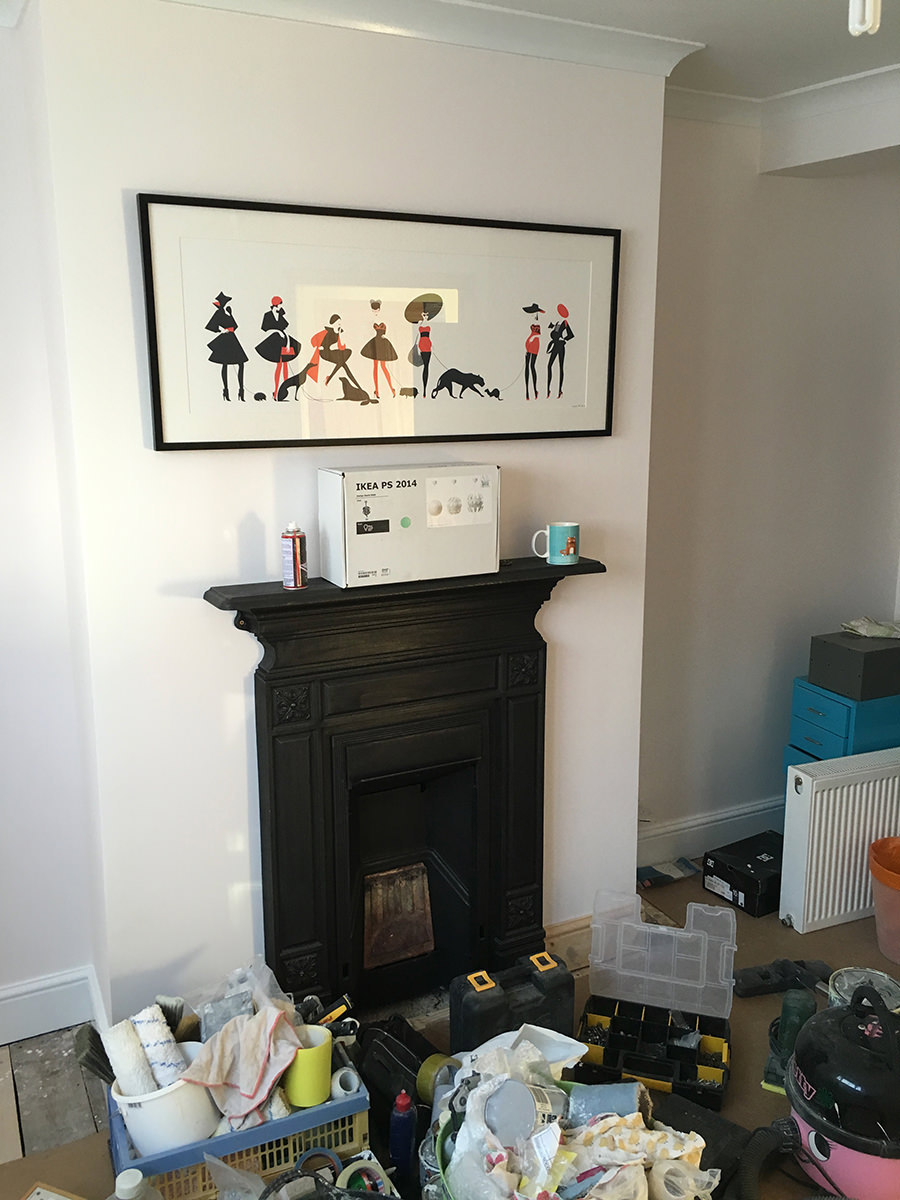
For the lounge fireplace I snatched a cast iron Victorian fireplace off Gumtree for a bargain £15, hand it sandblasted for another £40 and coated with Iron paste, was a great finishing touch. I sealed the flue with a piece of plasterboard and an air vent, and screwed the fireplace in to position - we still need to pick up a hearth.
Almost everything was complete with two weeks to go before Uma was due to be born and the house was pretty presentable in time for the valuation for the mortgage application, so we hit the deadlines.
Finishing up
Some bits dragged on - I didn't tile the bathroom floor for a few weeks and I didn't lay the hallway laminate for months. We had the stairs carpeted as one of the last jobs on the list, way later in November. After completing all the work I went on a binge of slobby TV evenings. It was the most exhausting project which ultimately took up about 6 months of time and some significant disruption. But it feels so good to have a lounge and bathroom we love. Both Naomi and I still feel like our bathroom isn't ours or we're in a hotel somewhere, we absolutely love it. All of the fittings are Aqualisa which are top notch and come with a 5 year guarantee (really good for hard water areas like ours as parts can suffer with limescale build up). Further notes on our purchases at the bottom of the page.
Both the plumber and plasterer offered me a job as tiler, "if you ever get bored of your job, I need a decent tiler", the plumber said. Nice to know that I didn't do a terrible job at first time I've ever tiled, perhaps its just as boring for everyone who does tiling?
It's going to be a while before the next home DIY project. Next year we will be doing our small patio and have some ideas for what we'd like - but the DIY batteries were well and truly drained at the end of this year so they're in for a long recharge.

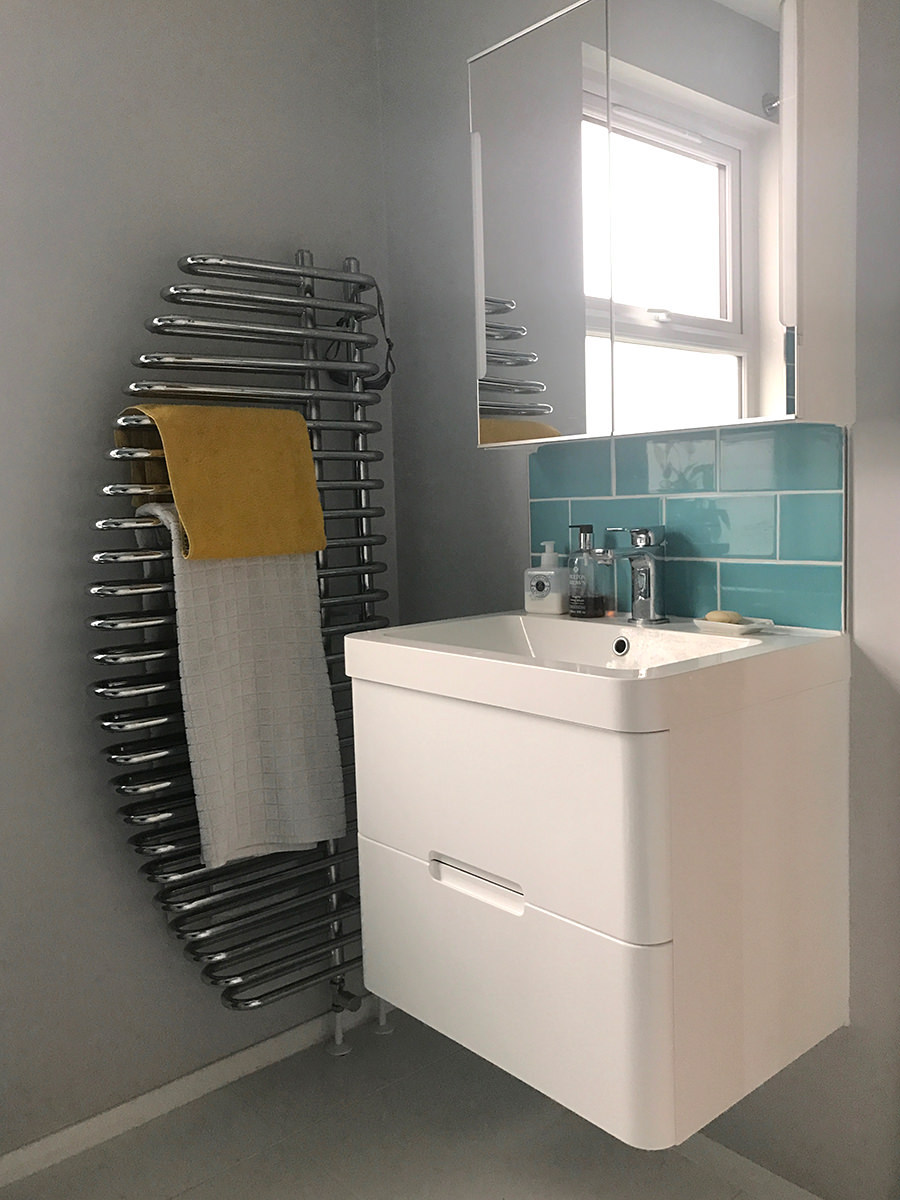
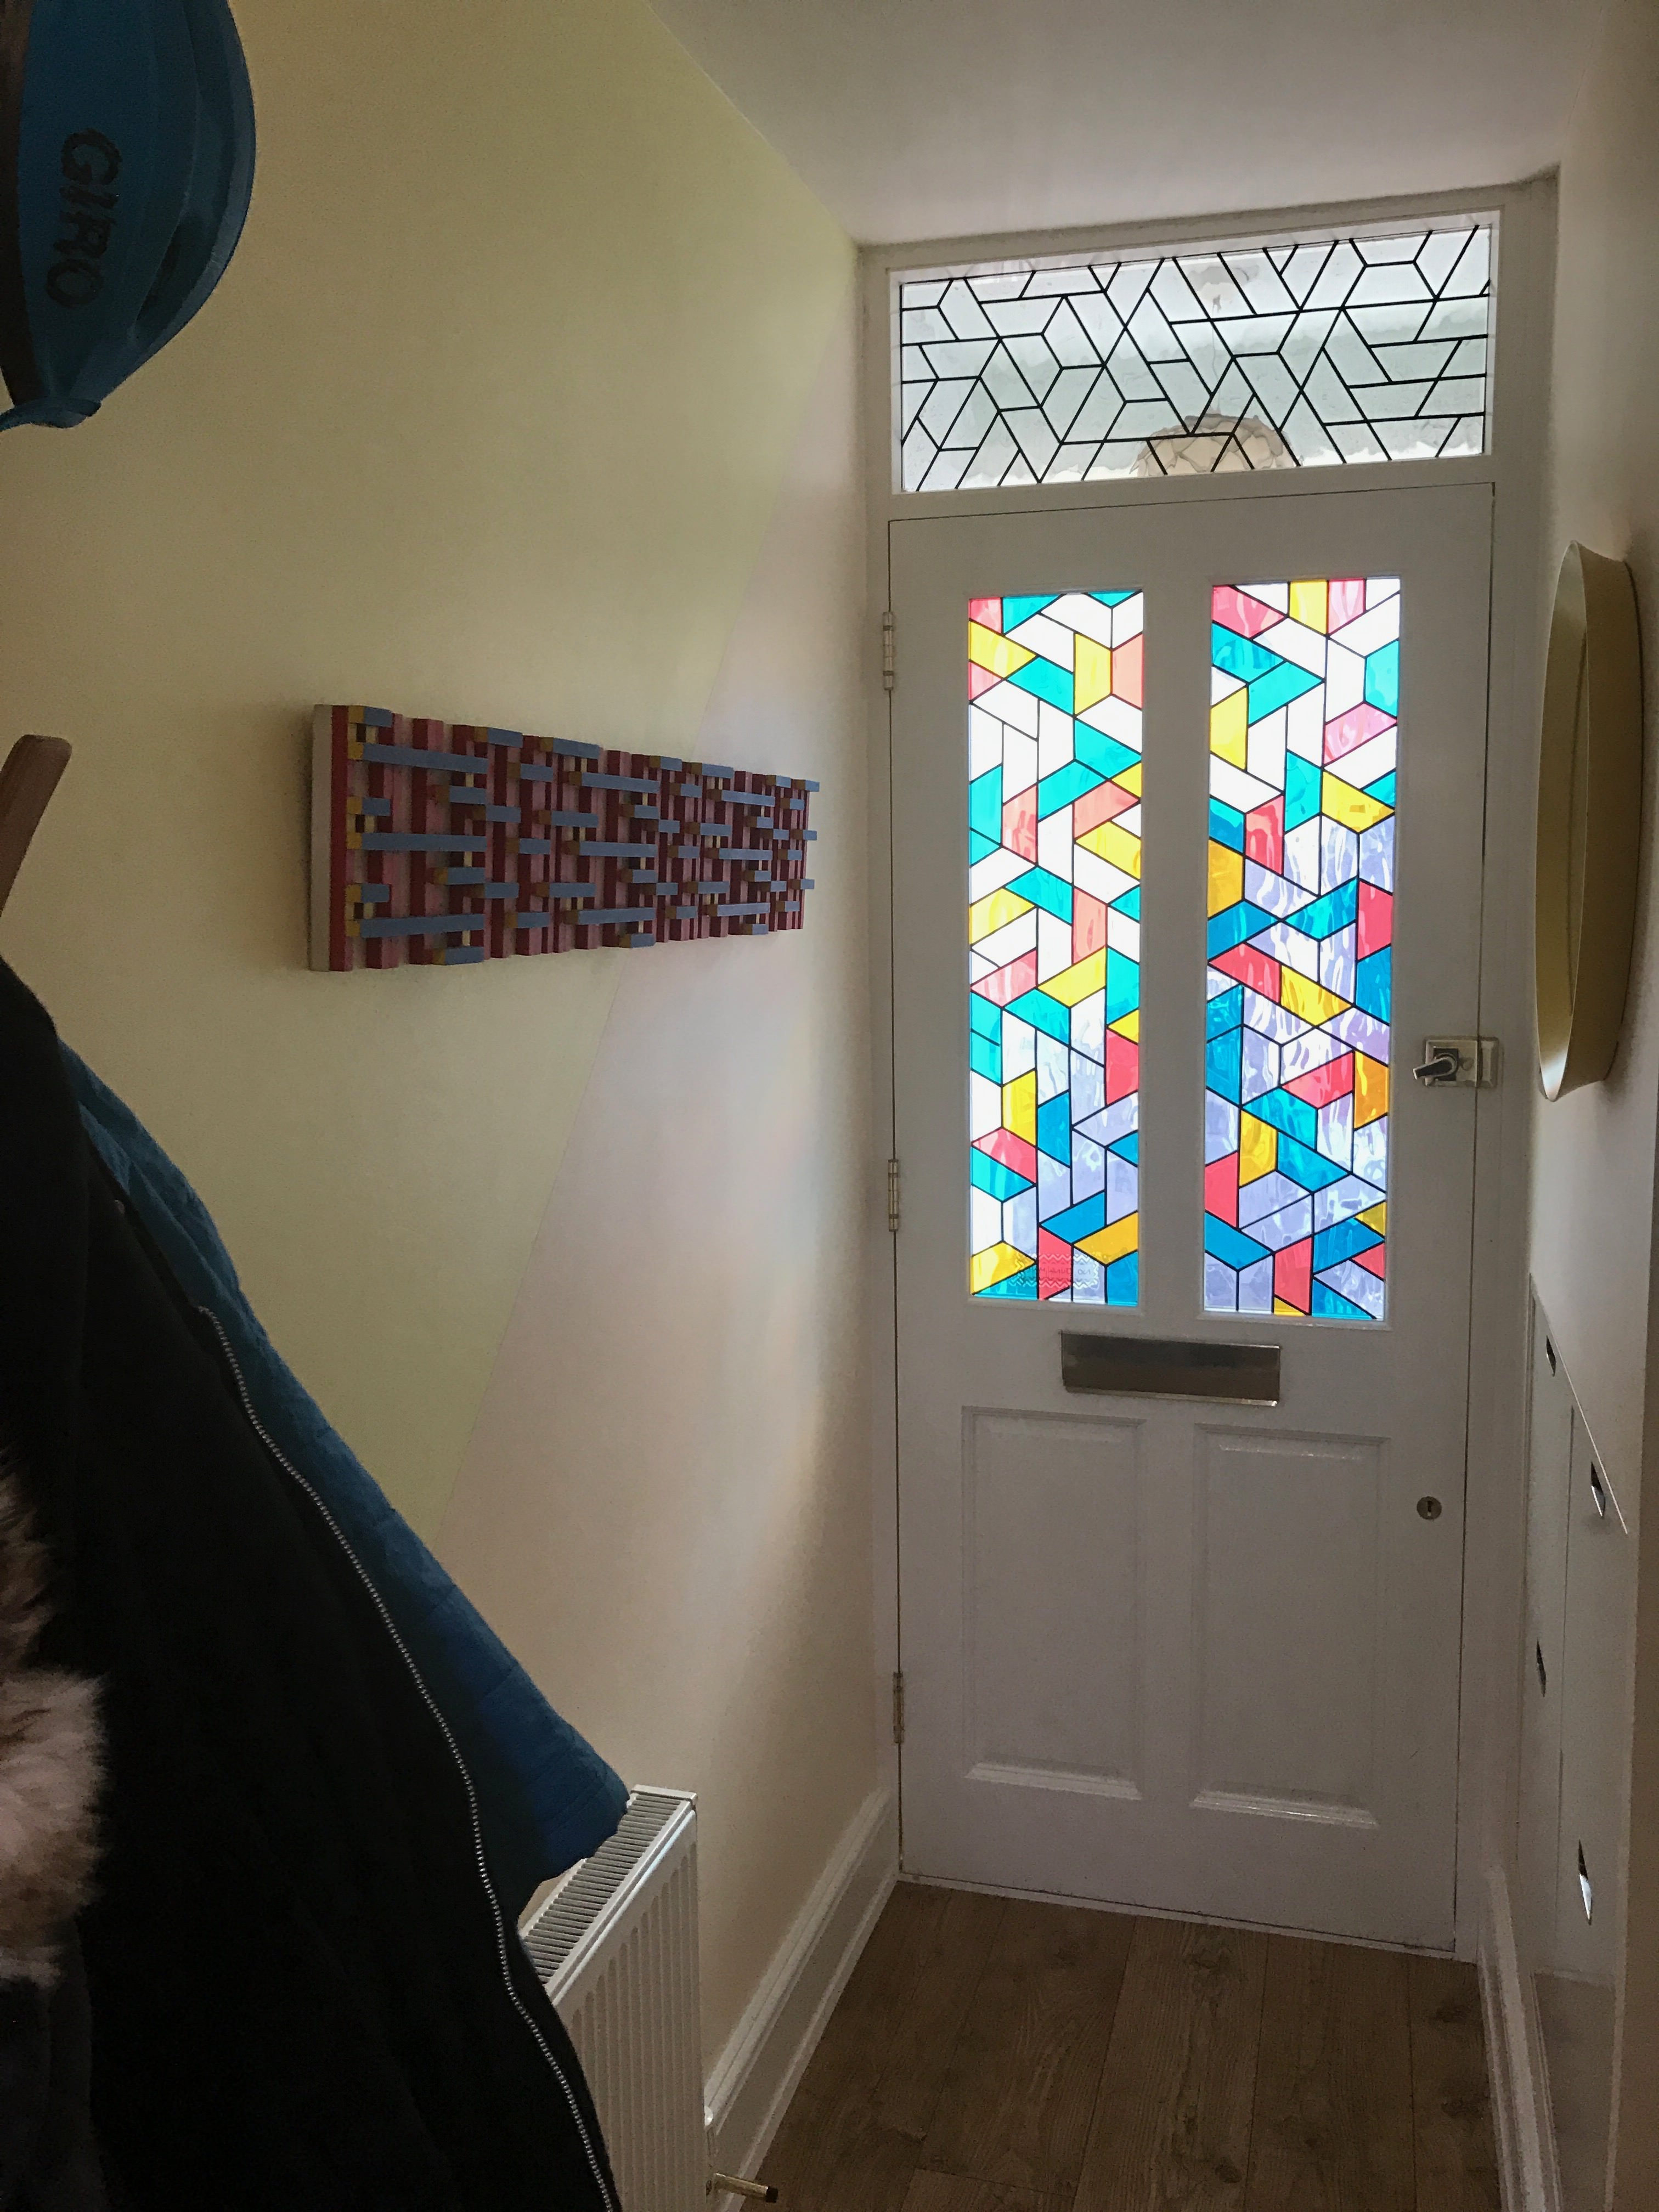
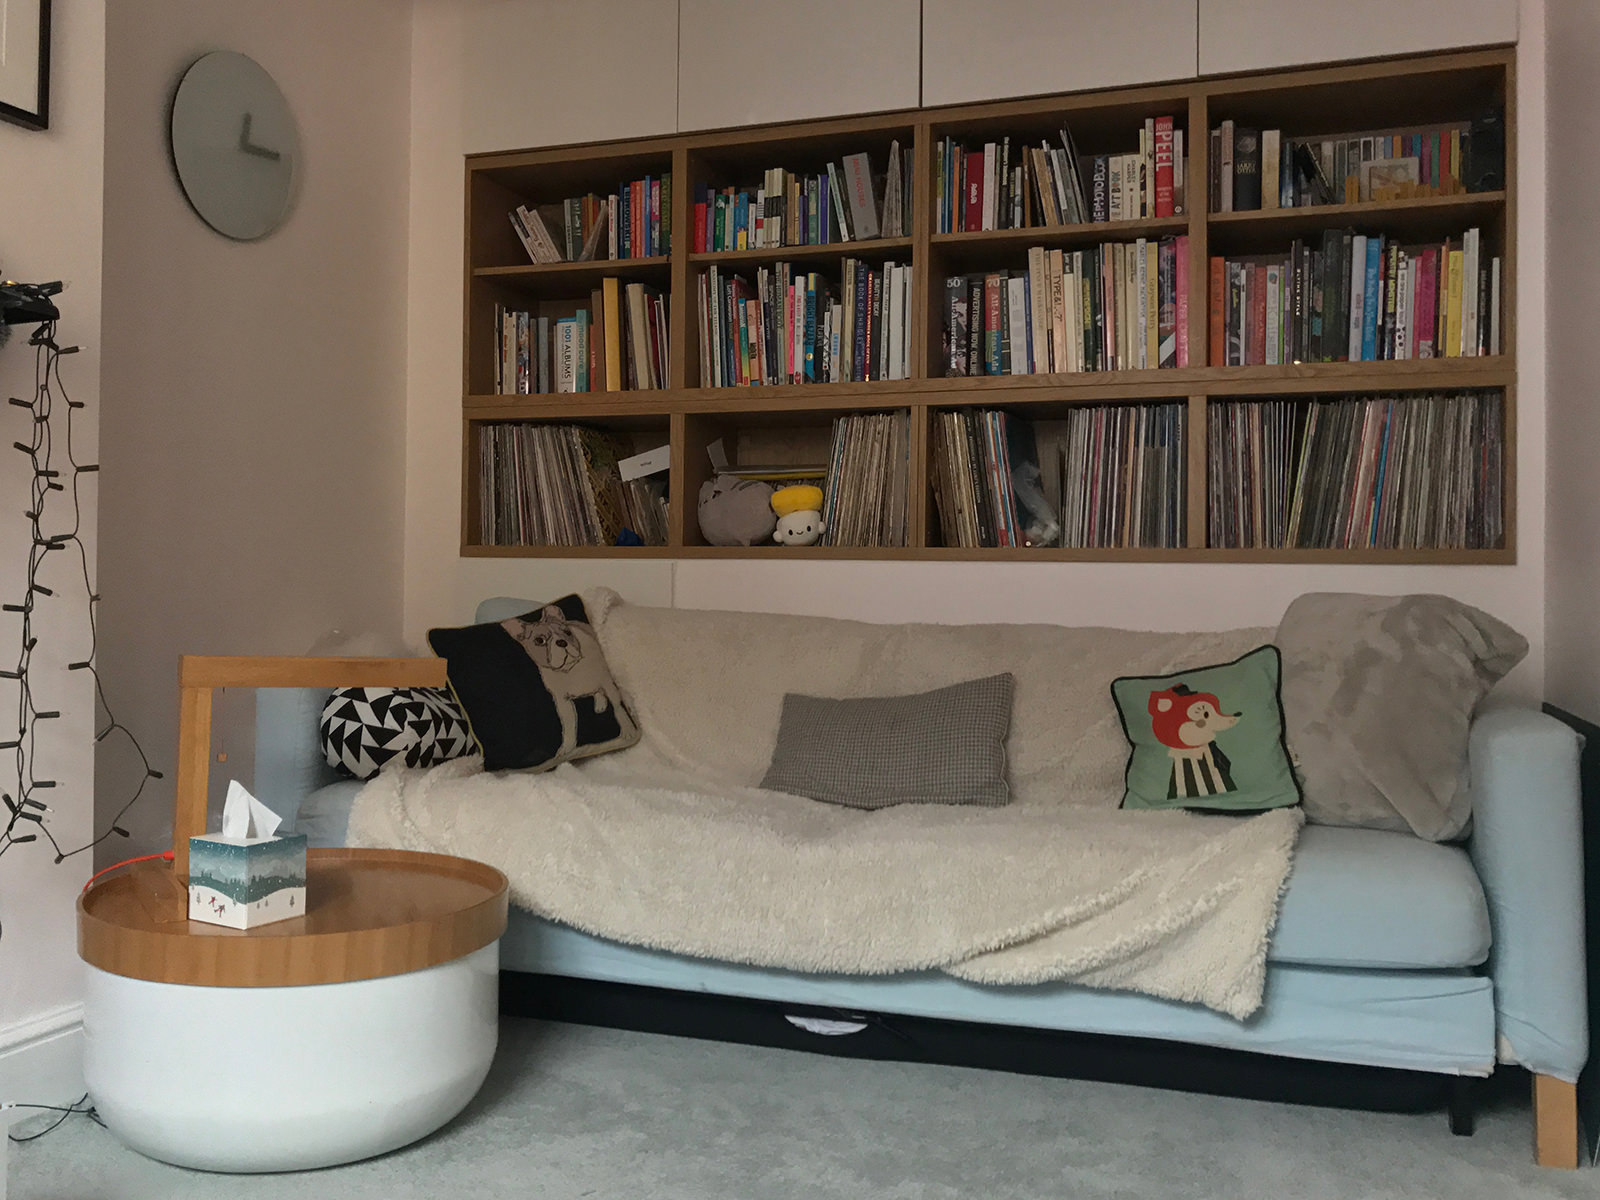
The finished rooms, being messy and lived in.
Bathroom bits:
- Qualitex Eton 60 two drawer base unit
- Oxford 60 basin
- Bette Starlet Bath 180x75x42cm
- Aqualisa Lightweight 200mm Wall Mounted Drencher Head
- Aqualisa Rise DCV 3 Way Mixer Shower
- Aqualisa Rise Bath Overflow Filler (this means that there are no taps on the bath! Just an overflow unit where the water also comes out of)
- Aqualisa Shower Head Slim Metal Handshower
- Aqualisa Smooth 1.5m Shower Hose
- Aqualisa Round Wall Outlet With Combined Shower Holder
- IKEA STORJORM bathroom cabinet with lighting
- IKEA METOD wall cabinet with Voxtorp white doors
Bathroom & lounge bits:
- Futon Company oak ladder shelving unit
- "Hat Tree" by Ben Fowler, coat rack
- Habitat MAX large oak av unit
- IKEA BESTÅ shelving cabinets
- IKEA SELSVIKEN shelving doors
- IKEA STÄLL shoe cabinet in hallway