Bedroom renovation
I was lying on our bed staring at the ceiling when Naomi and I had the conversation about when we would start work on the bedroom. I remember this moment very clearly, because I think, it was the last moment of normality before we started what would be months of upheaval, months of sleeping on the (basement) lounge sofa. Not something either of us were looking forward to - but we had to begin somewhere. Naomi and Rocco were off to Yorkshire for the weekend so starting tomorrow morning seemed like the best thing to do.
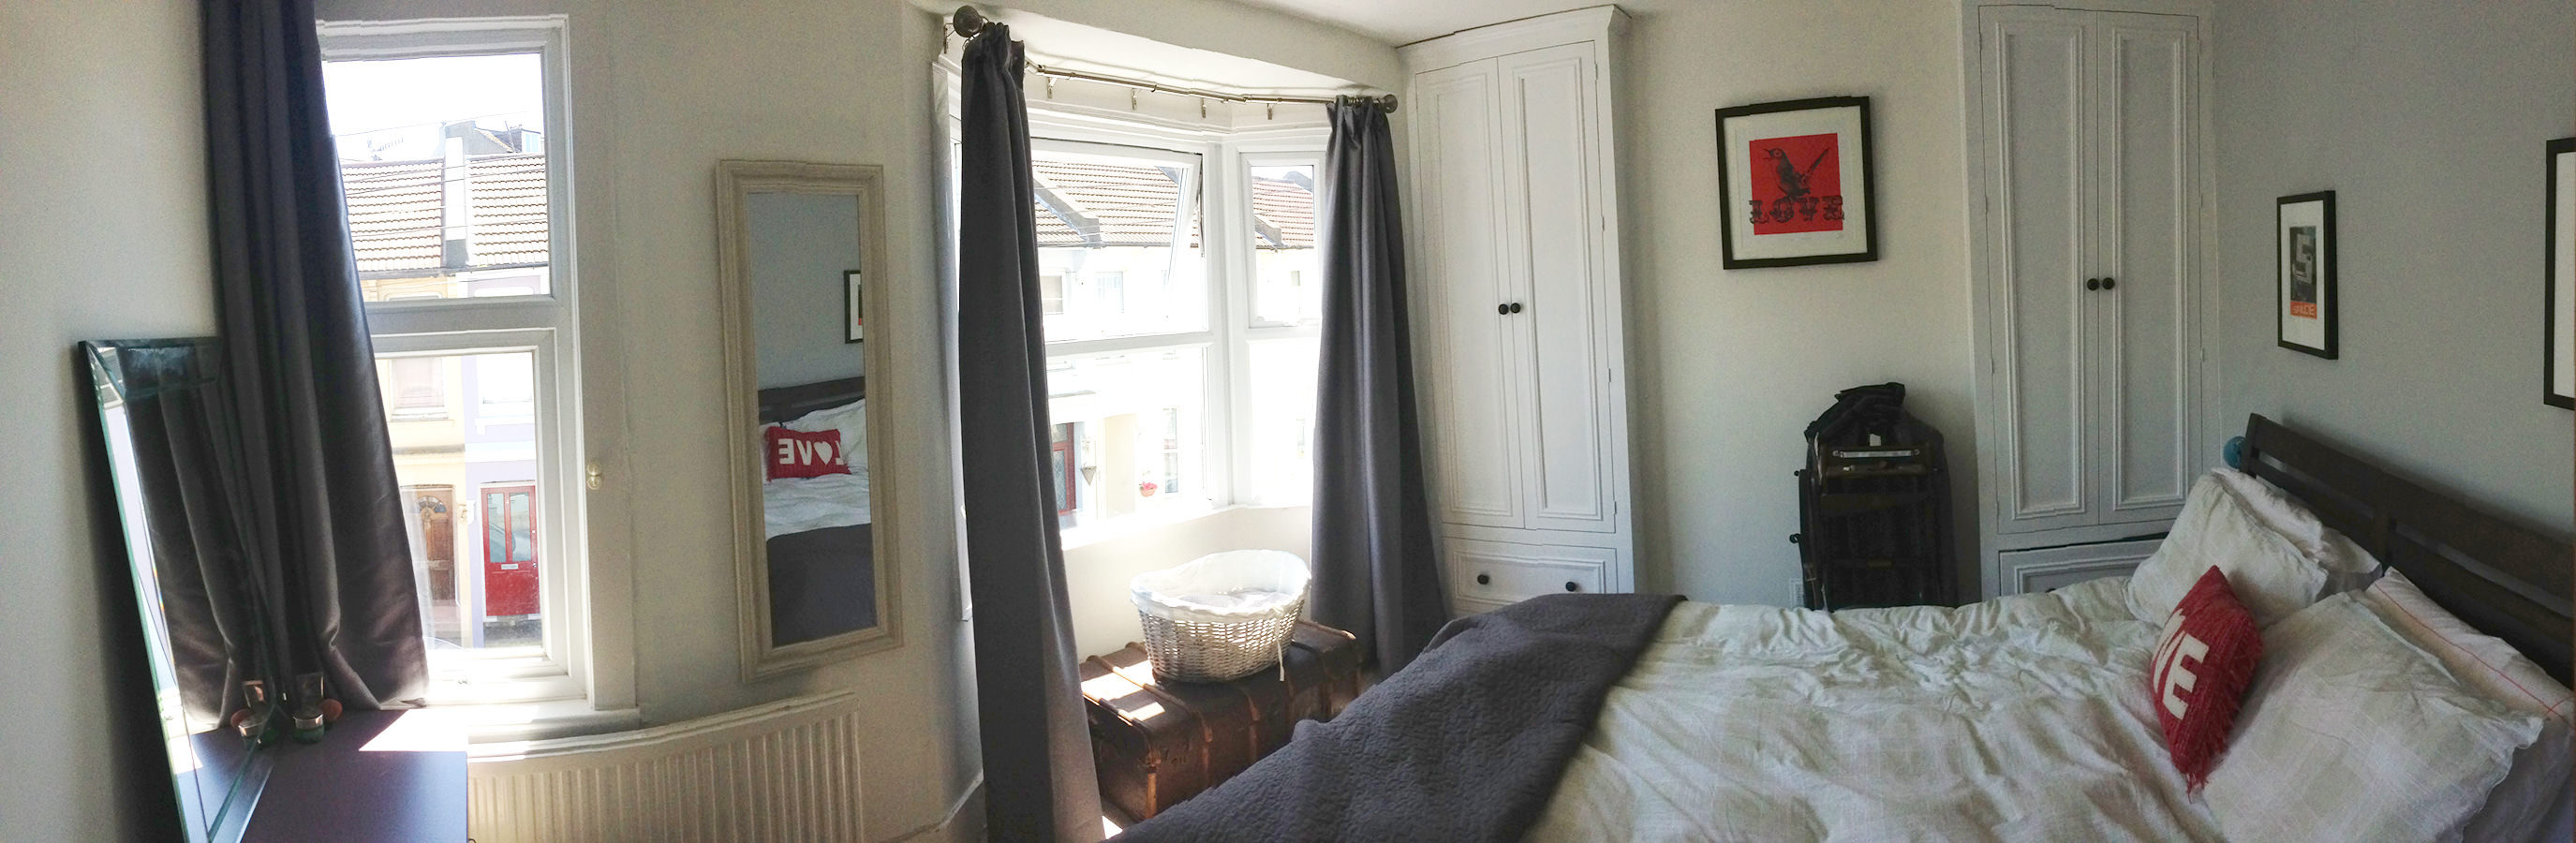
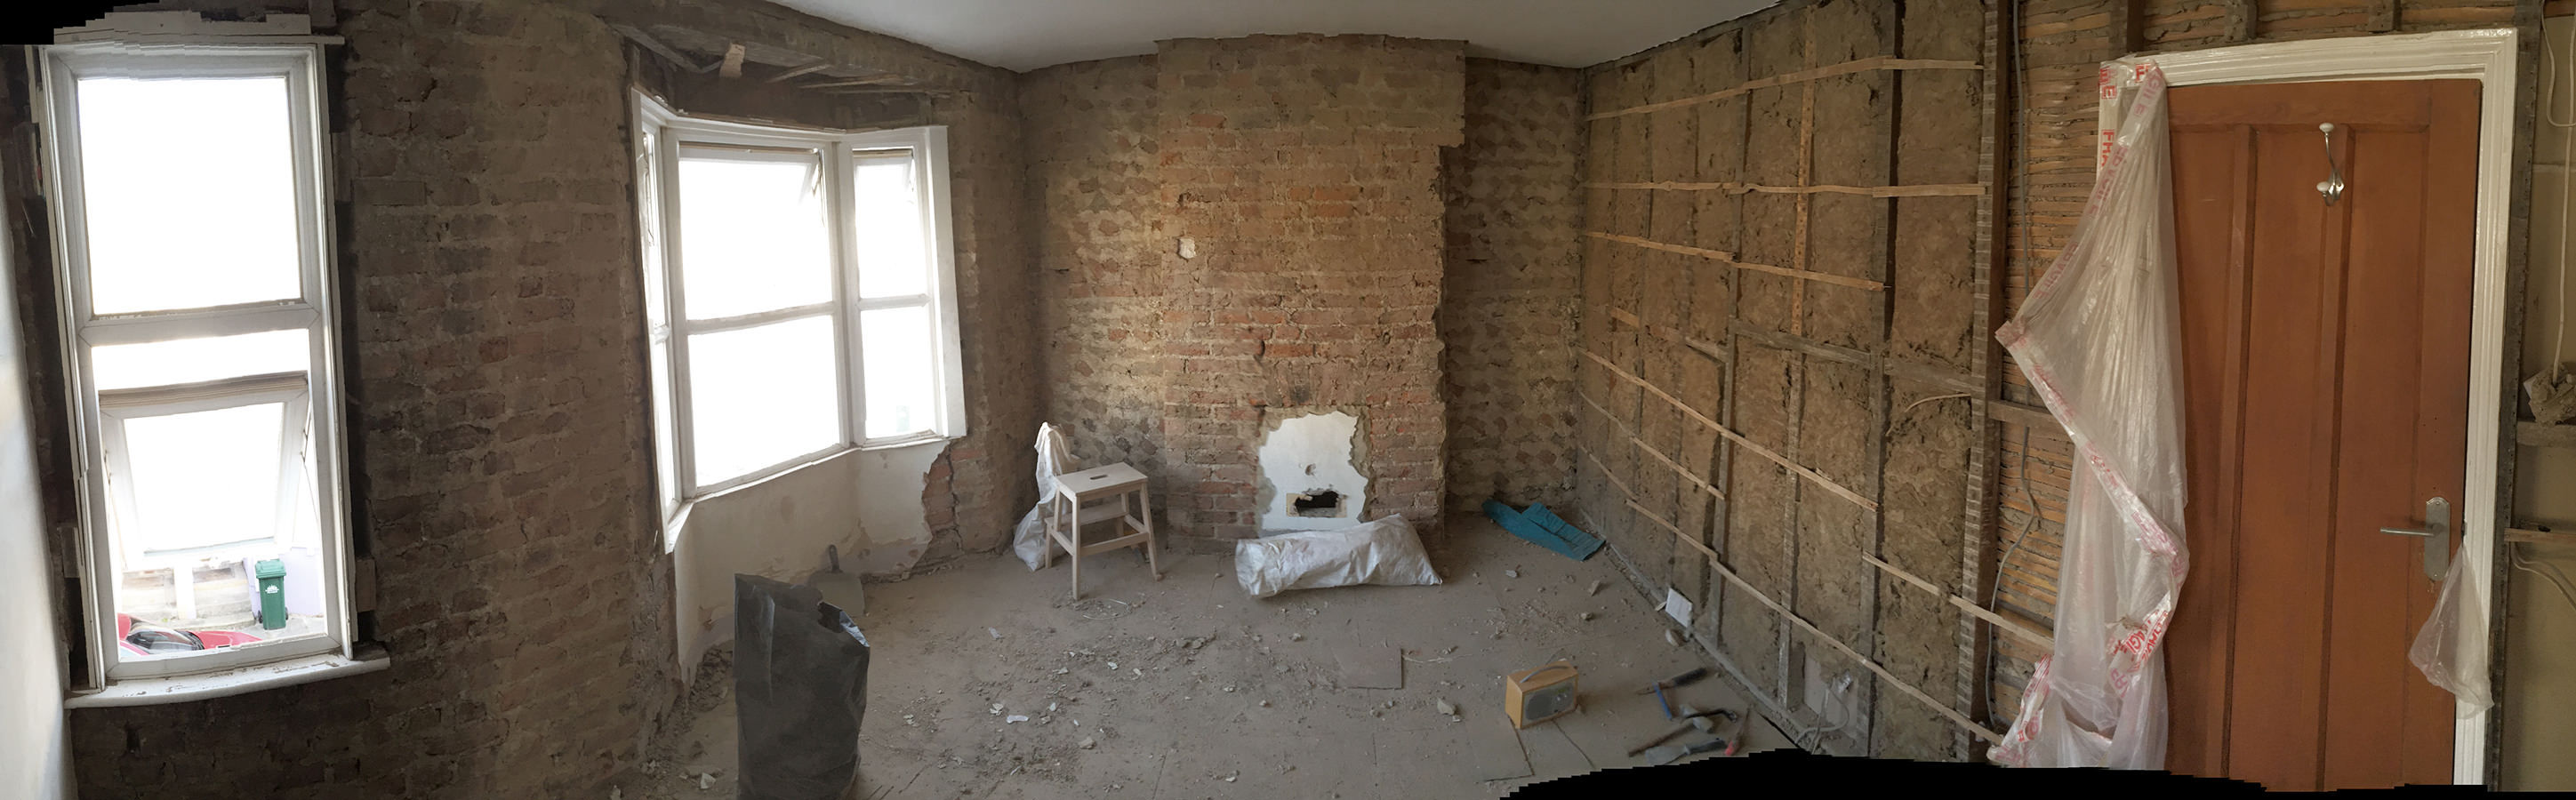
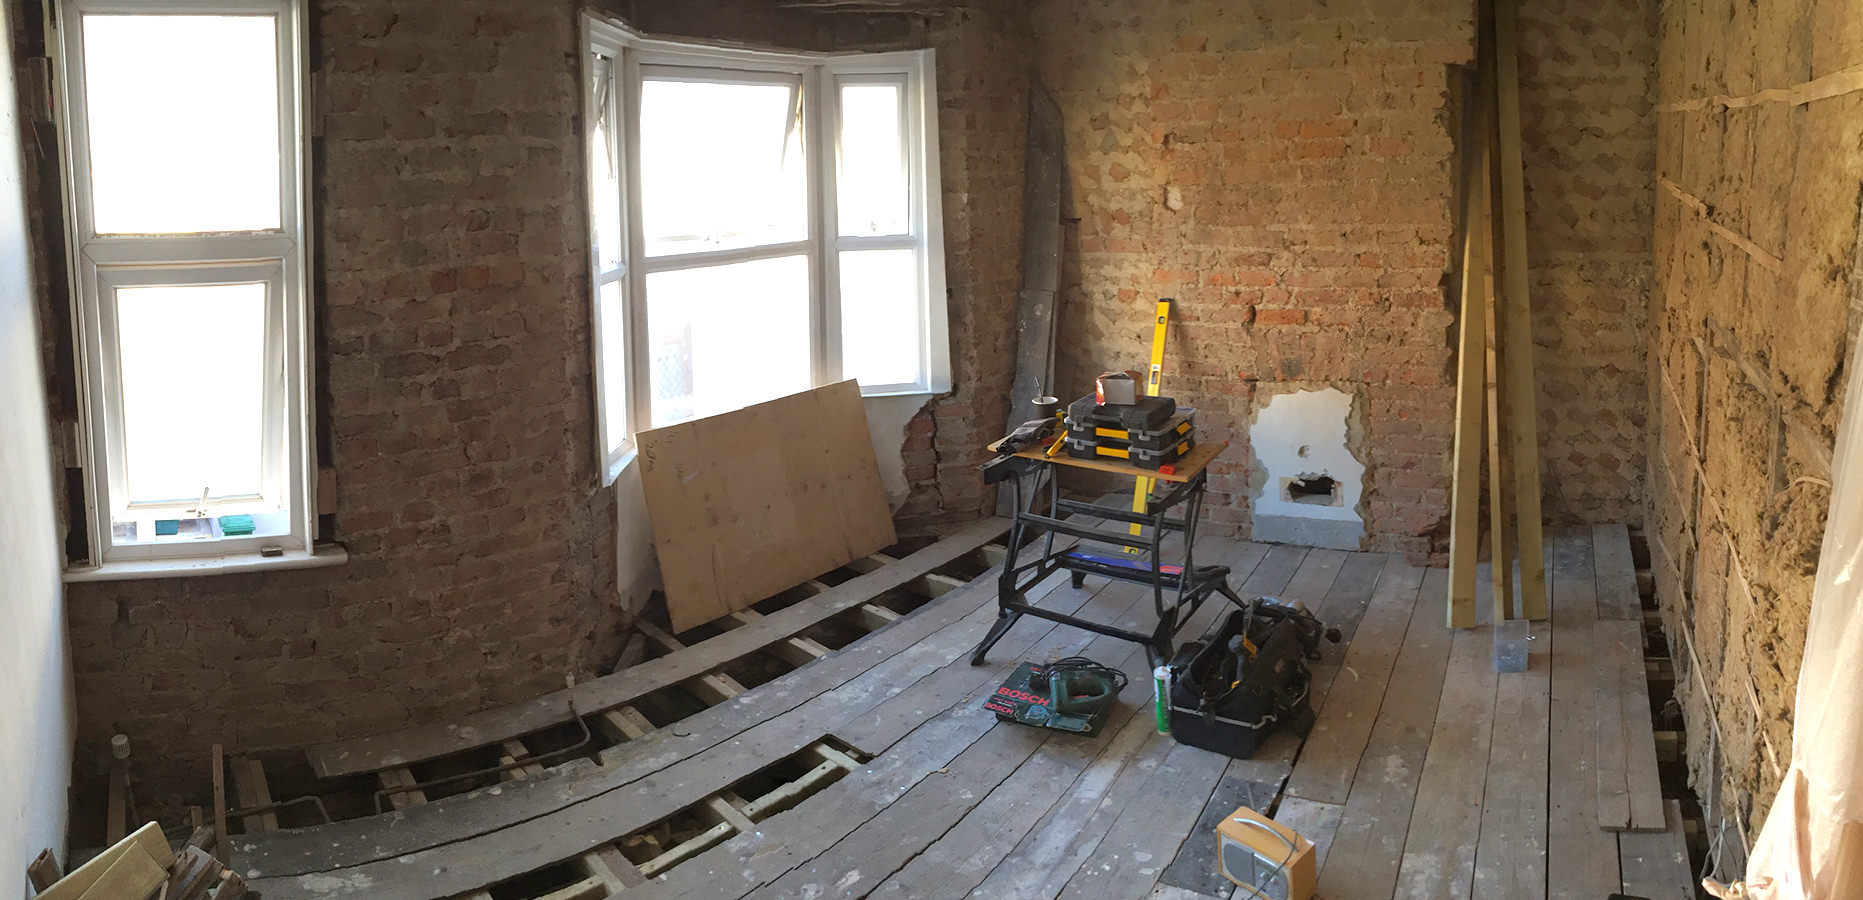
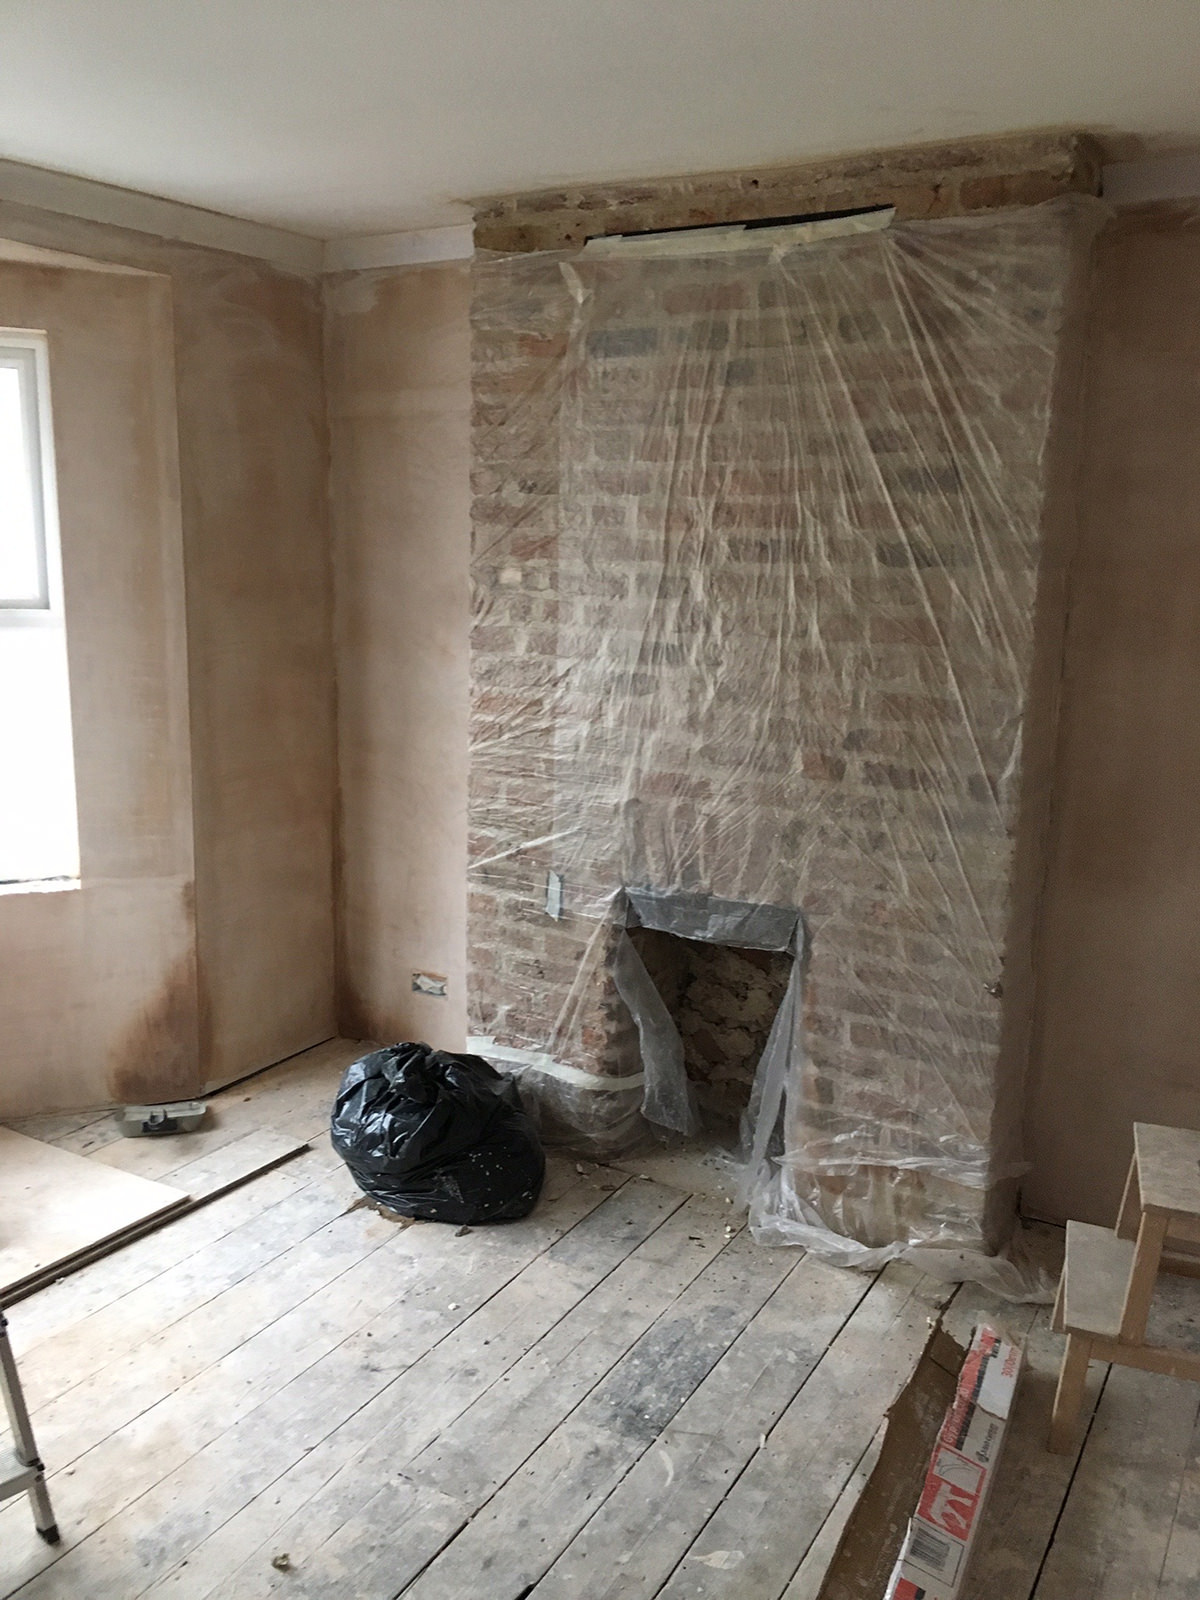
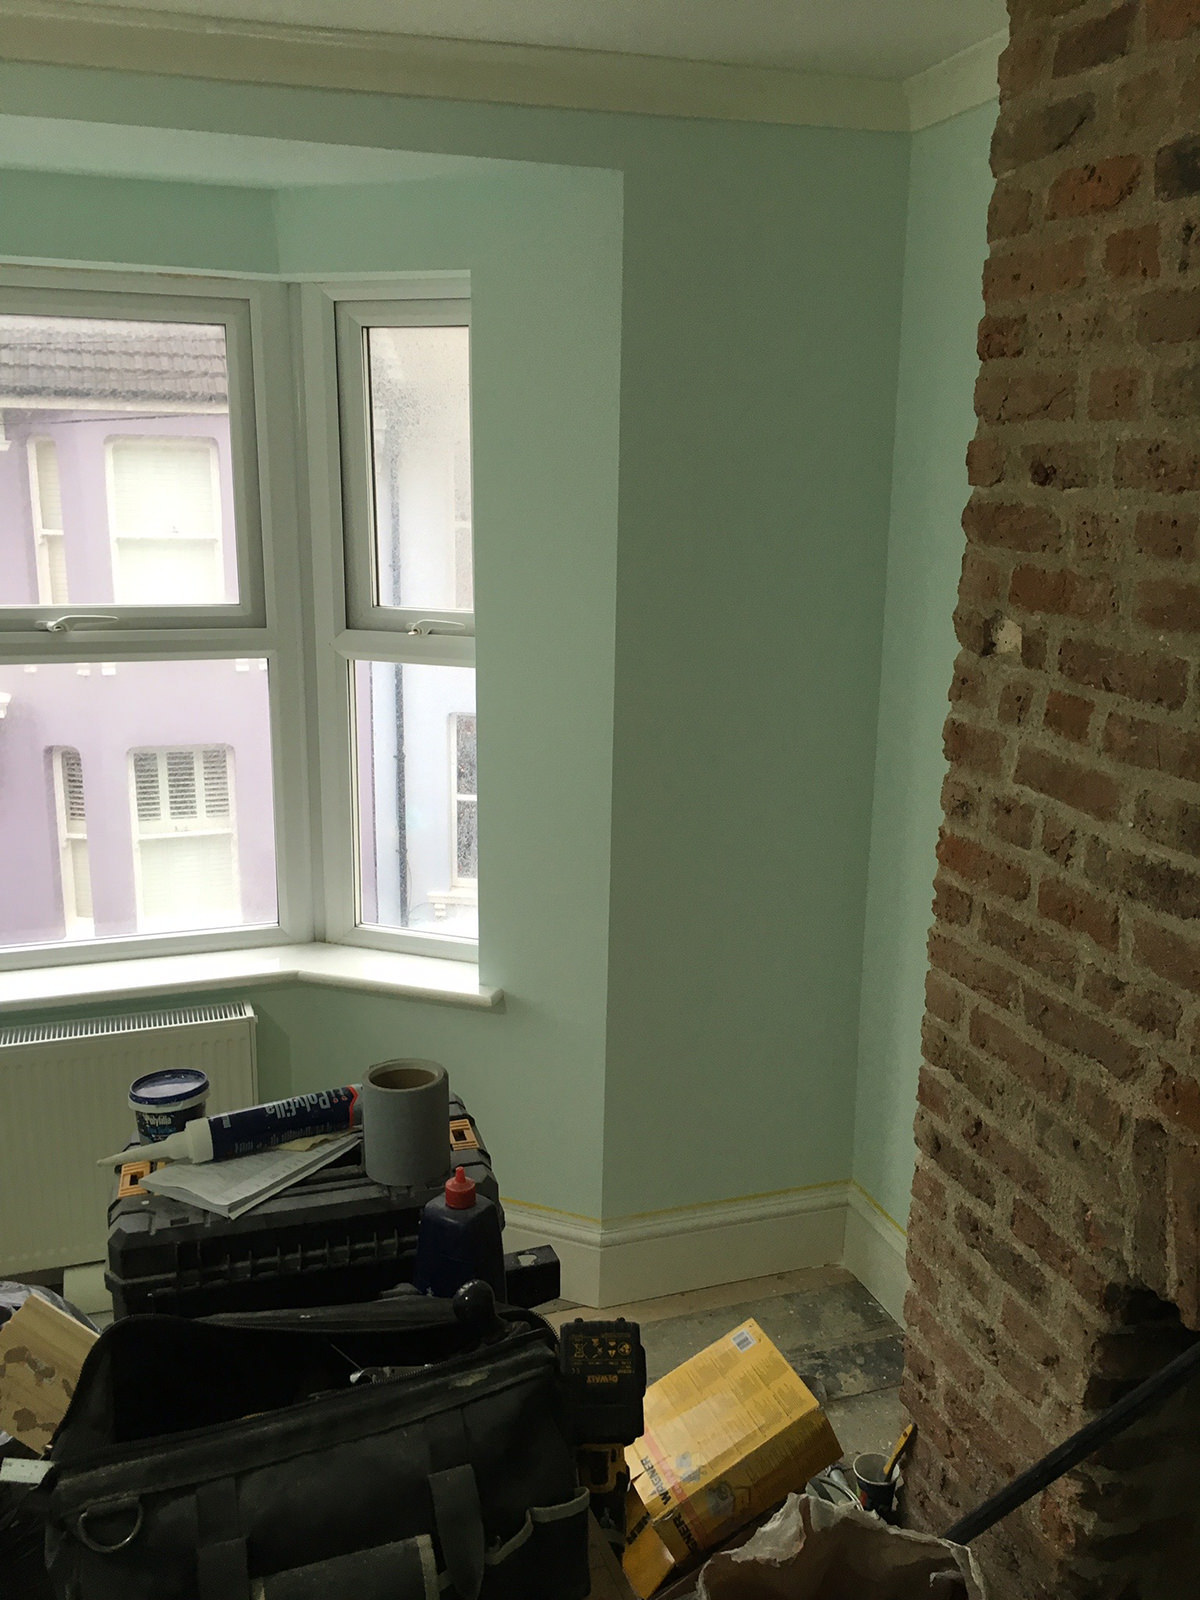
This was the bedroom as we saw it when we visited the house with the estate agent, ignoring the furniture, it was roughly how it looked before starting work.
The next thing I know, it's 9am and I am dismantling the bed. I've already removed the other furniture and taken the radiator off, so I'm almost ready to start ripping down the plaster that's been bothering me for the 9 months since we moved in.
There were a few problems with the bedroom that we wanted to fix. Firstly, as with Rocco's bedroom, all the floors were uneven. So much so, that the drawers we put our clothes in would open by themselves thanks to gravity, unless they were propped up with about 3cm of wood at the front of them. The plaster on the interior walls was so loose you could push a finger through the surface in some places. And lastly, the layout of the room was governed somewhat by where you could or couldn't put a wardrobe and a bed, something smart needed to happen to make better use of the space.
So, once the furniture was out, the first thing to do was to remove the built in MDF wardrobes. Despite only being installed only around 3 years earlier by the previous owner, they had to go. The one on the left made all our shoes and some clothes mouldy, because of it being on a cold outside wall with poor ventilation. They also protruded from the chimney breast untidily on either side.
Ripping them down had it's surprises - the "carpenter" who put them together had used No More Nails for it's construction, including to bind the wood against the wall. This doesn't strike me as a very good idea. If you use no more nails on plaster - it will rip the plaster off when you move whatever it is that you've stuck it to.
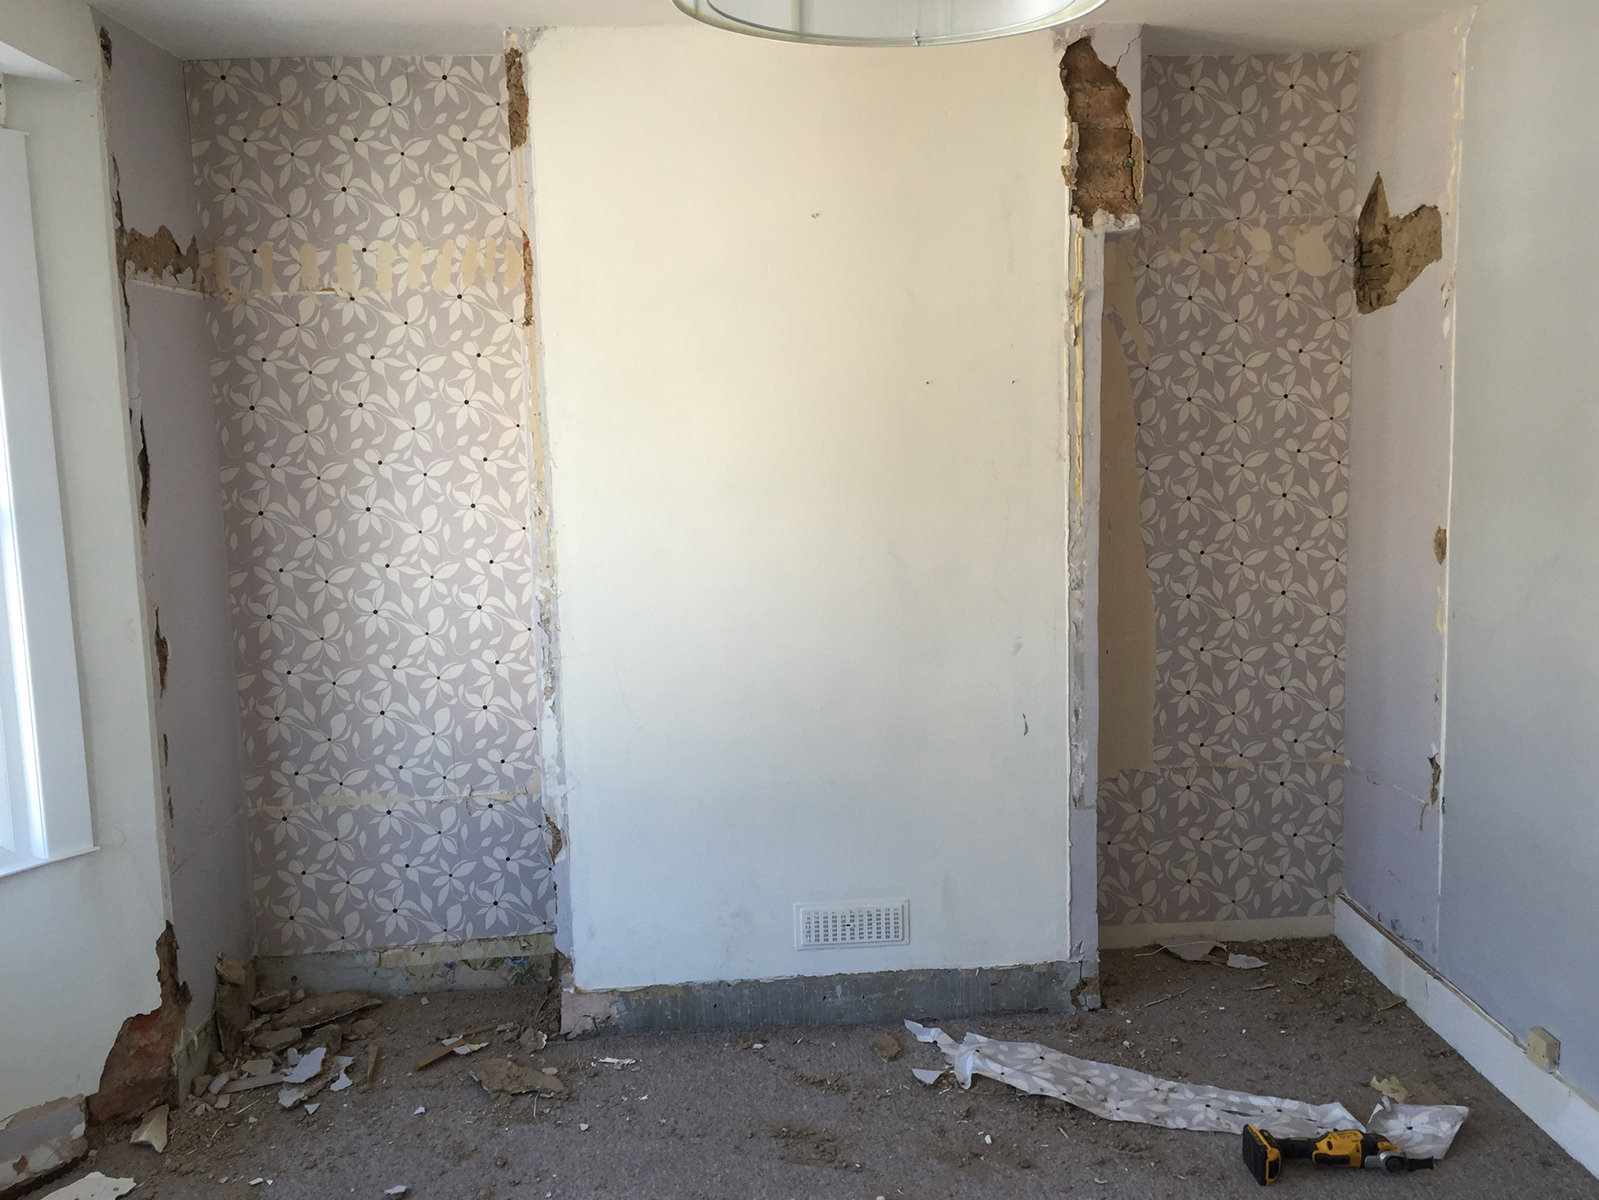
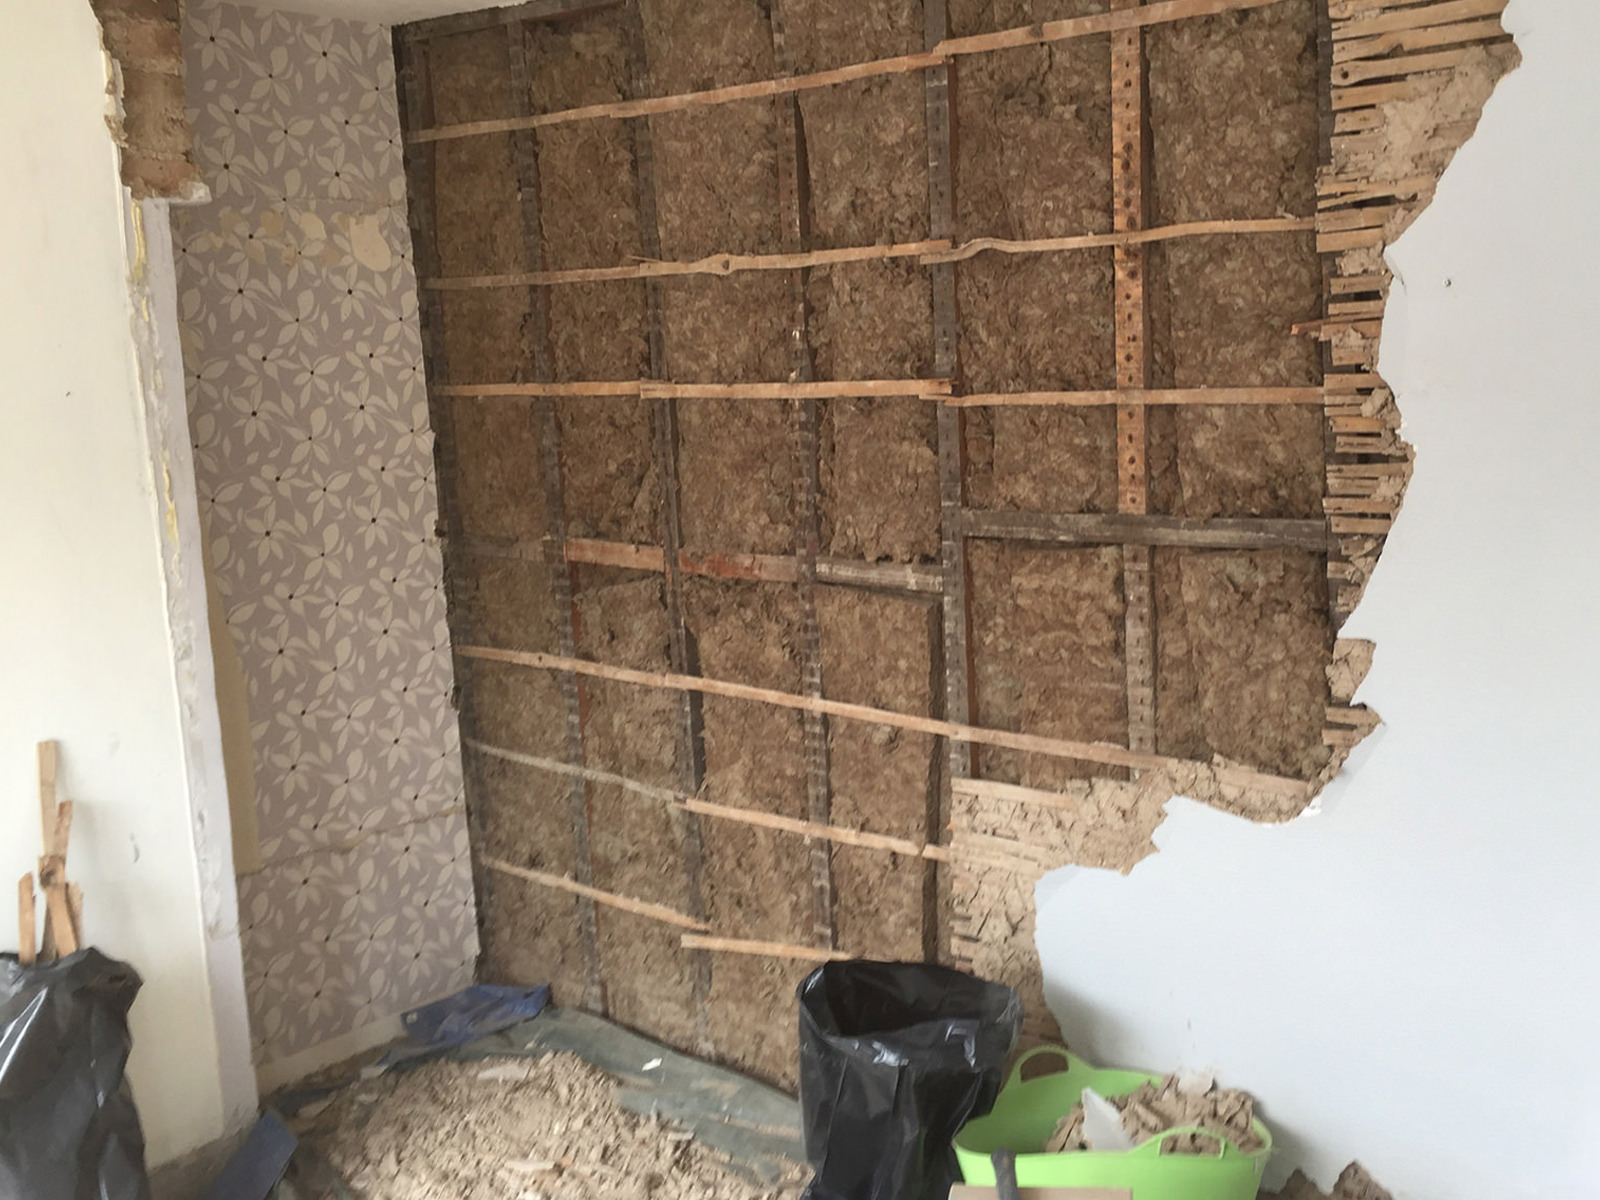
Once the cupboards were removed, things picked up pace. The weird looking stuff in the interior walls is the Ecowool which I put in the walls from the other side when working on Rocco's bedroom.

Plaster dust is horrible and gets everywhere. Wear a dust mask!
Taking down the plaster
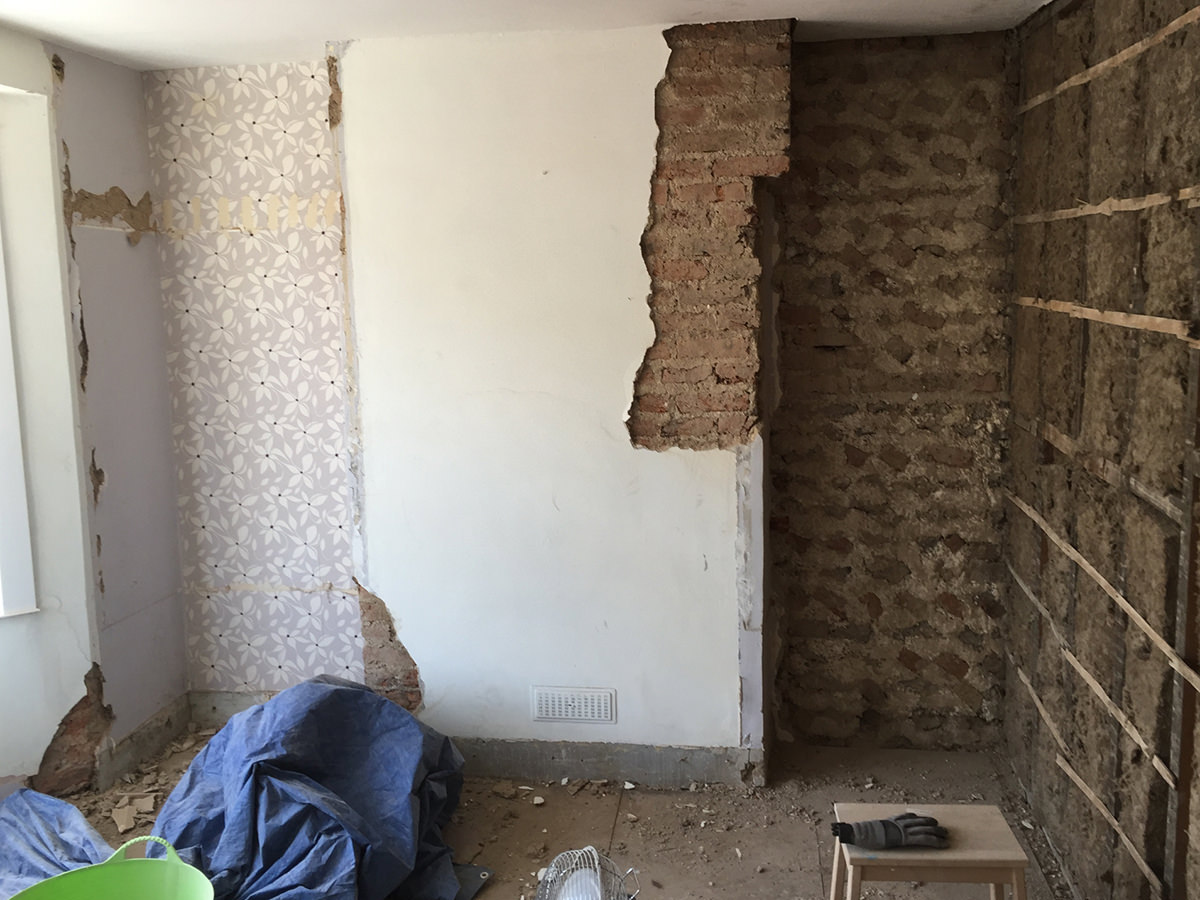
With the wardrobes dismantled and removed, the plaster could start coming off the interior walls. The rest of the first day was spent lugging heavy sacks of plaster outside, and bag loads of the original Victorian lathes from the walls. This is one of the messiest jobs I've ever had to do - I don't recommend it, but at least having done it before with Rocco's room, I knew what to expect. Most of it came down pretty easily, it was old plaster. I worked my way around the room with a claw hammer and rubble sacks, shovelling the debris away at regular intervals. The dust was just horrible.
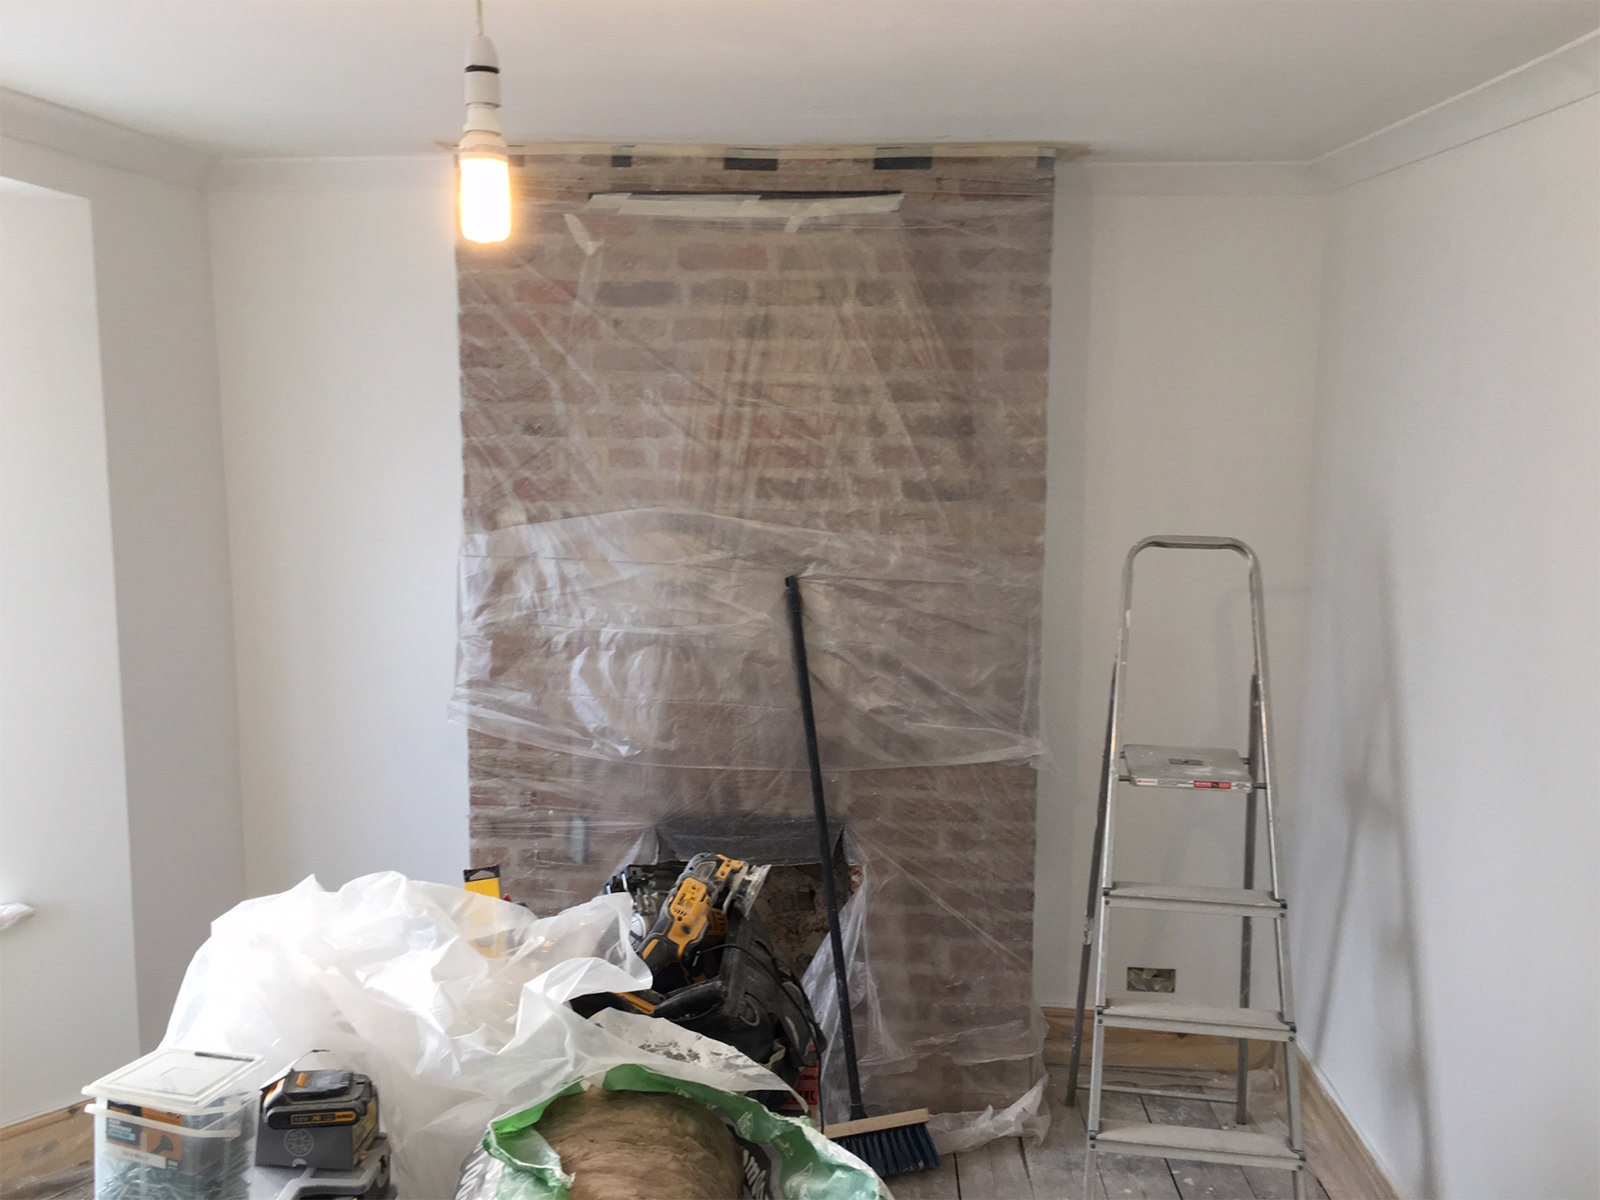
Once I'd cleared the plaster away from the chimney breast and surrounding area - I could see the brick work. Hey - surprise surprise the chimney breast brickwork looked pretty good! Although there was an odd step-in on the right hand side. At some point in the past, a line of bricks had been removed, breeze blocks had been used to fill the gap on the chimney flue, but it left an odd shape. It had probably been done to fit a wardrobe in. I began to wonder that perhaps if I could get that sorted out, we could have an exposed brick chimney breast.
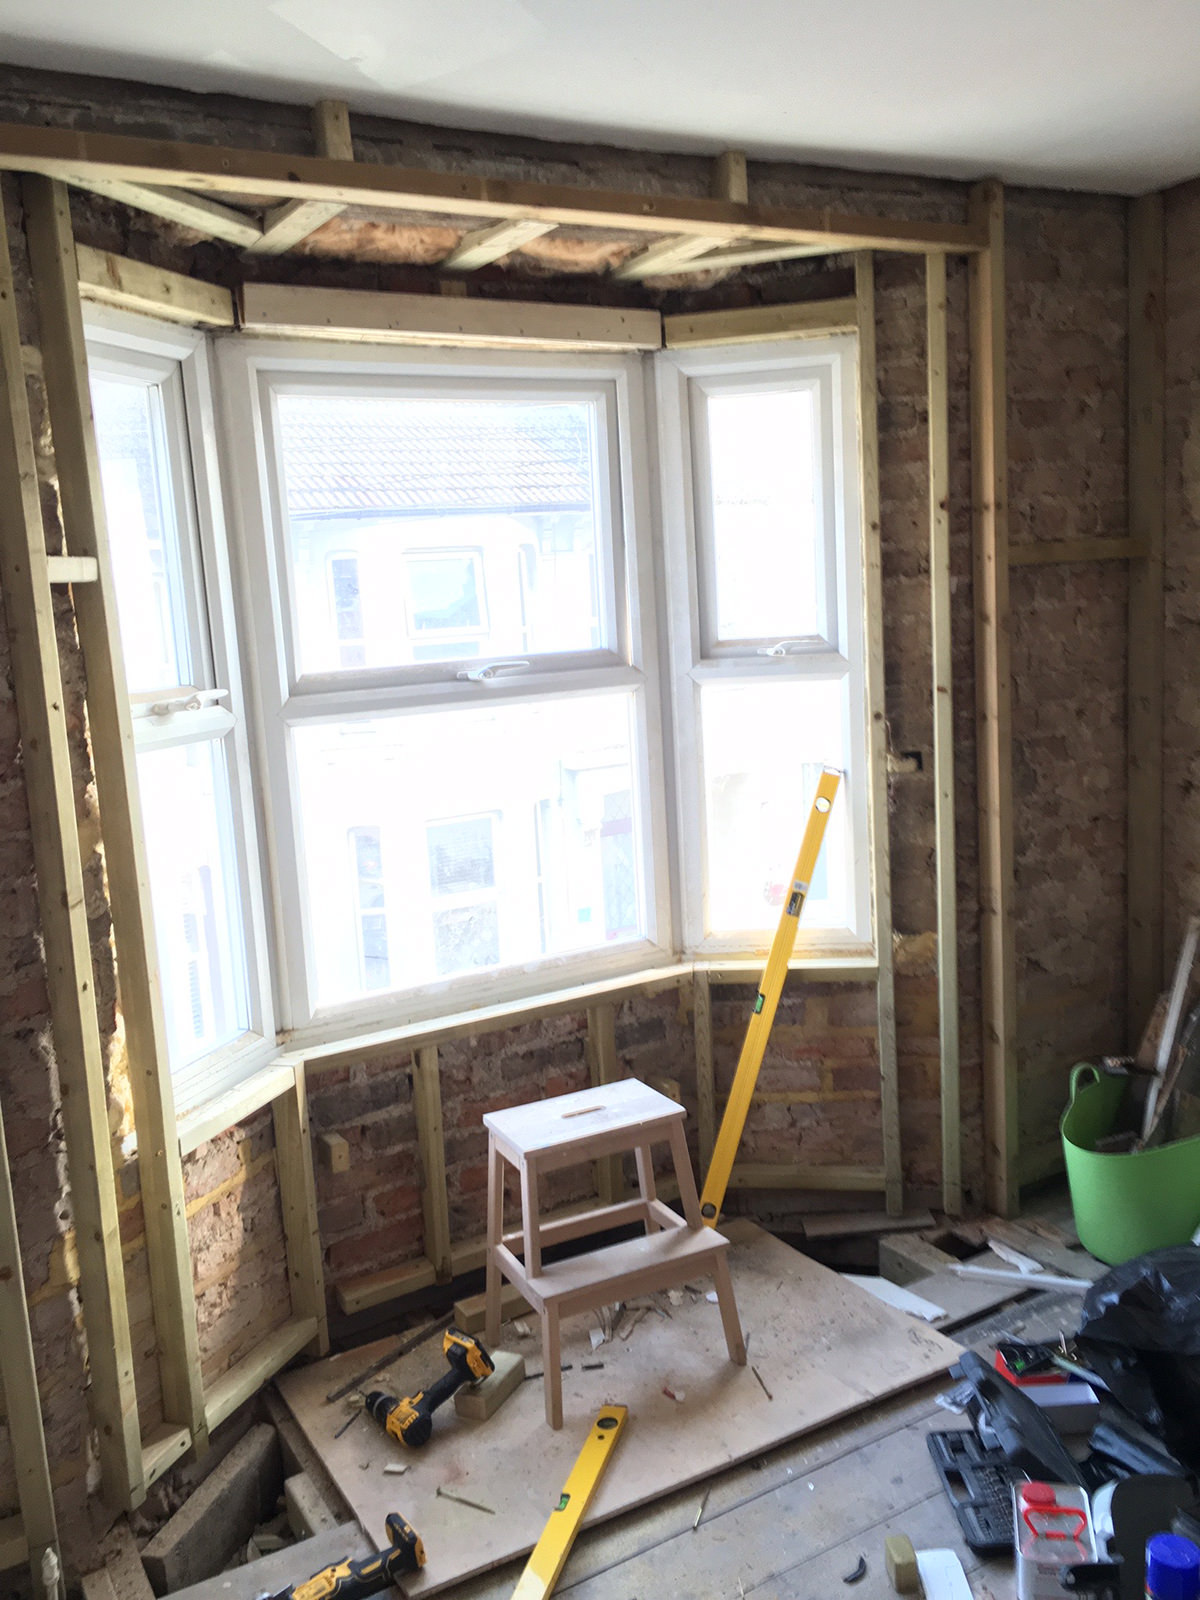
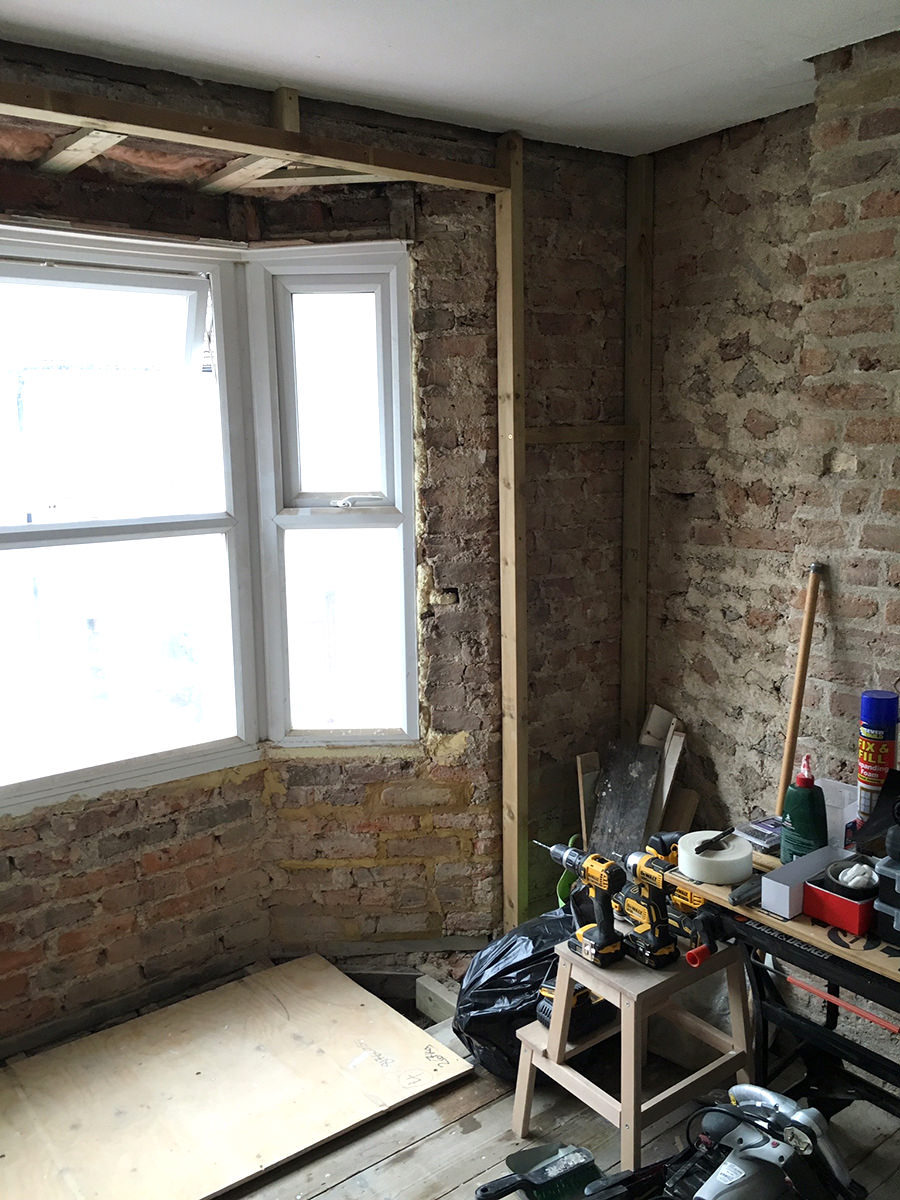
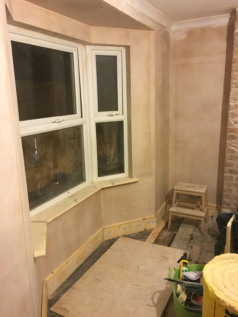
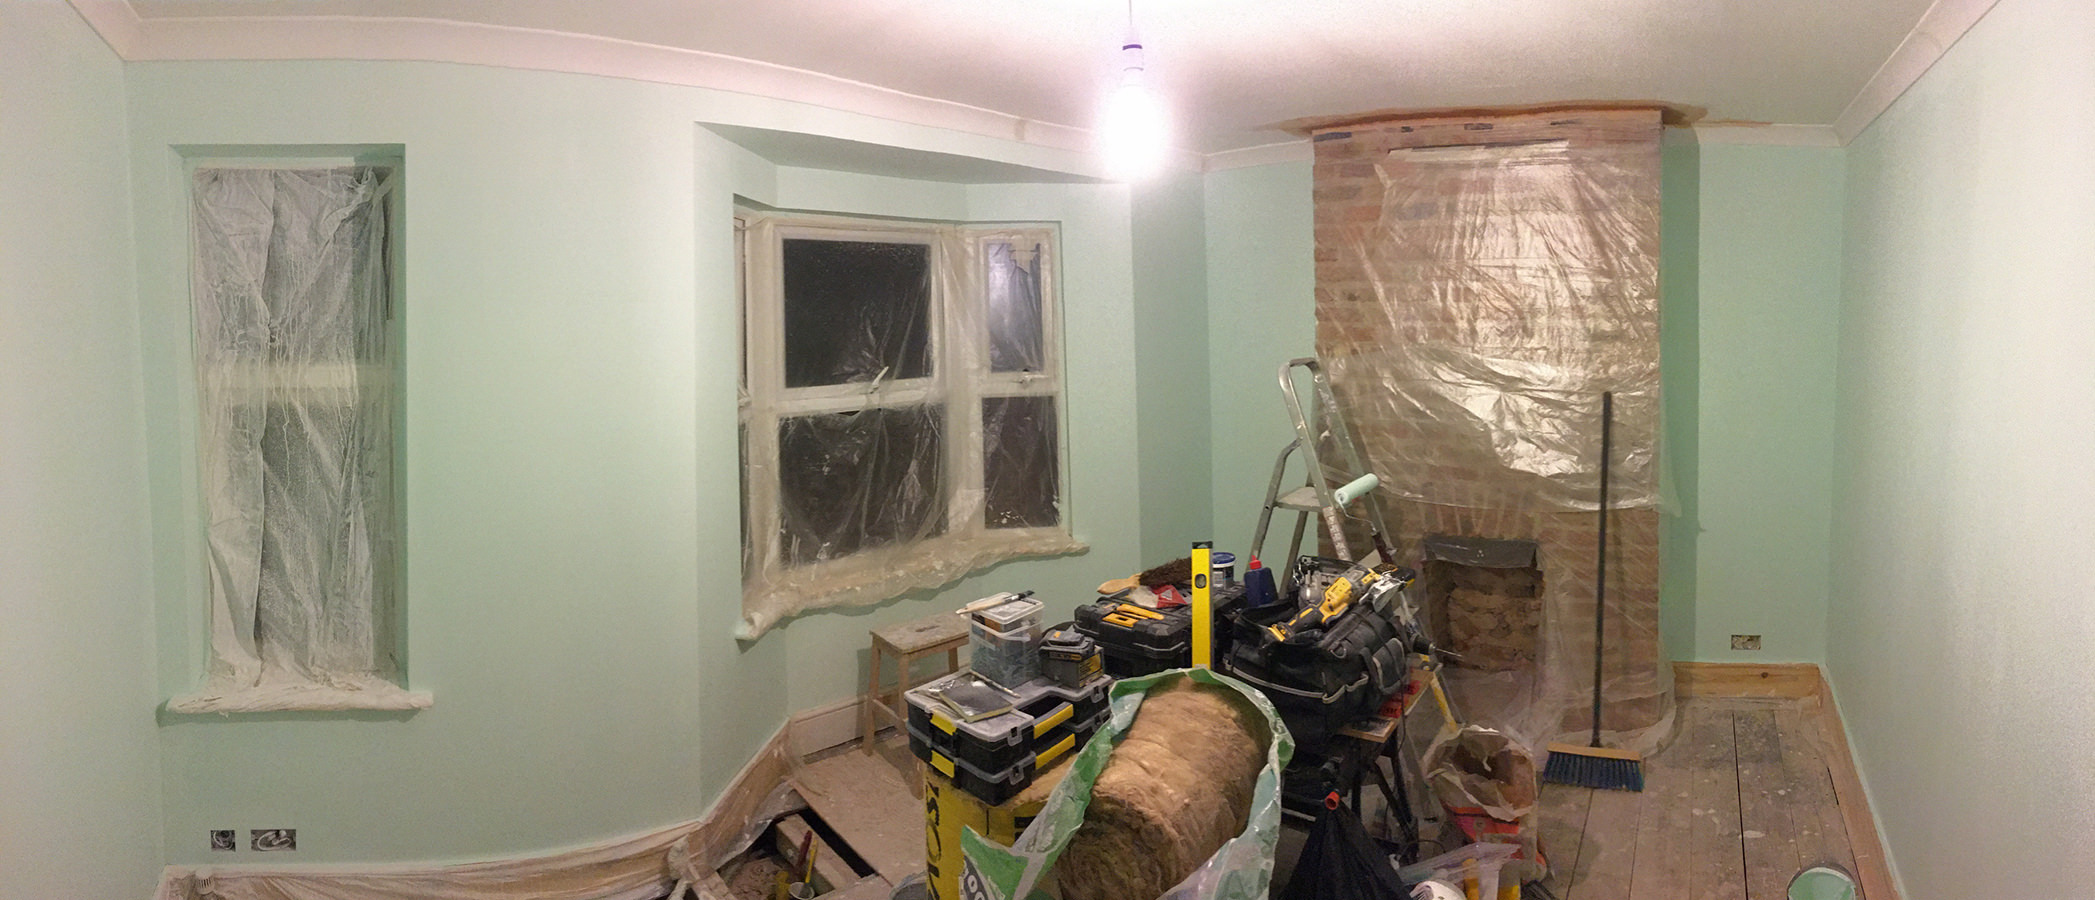
At the bay window I found a problem - large cracks running under the window. This was going to need repairing, maybe I could find a builder who could fix the chimney breast and bay window at the same time...
Day 1 ended with a good amount of work done.
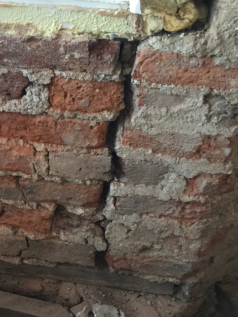
Rut-roh! These were going to need fixing.
I worked my way around to the bay window. Here I found a problem - large cracks running under the window. This was going to need repairing, maybe I could find a builder who could fix the chimney breast and bay window at the same time...
The next day I continued the plaster removal. I only had one more wall to do, so I continued around the room, removing the plaster. Once it was all down I arranged for a waste firm to take it away. The local council tip has monthly limits on the amount of hardcore you can get rid of, £50 saw all the sacks taken away in one go which was definitely worth it.
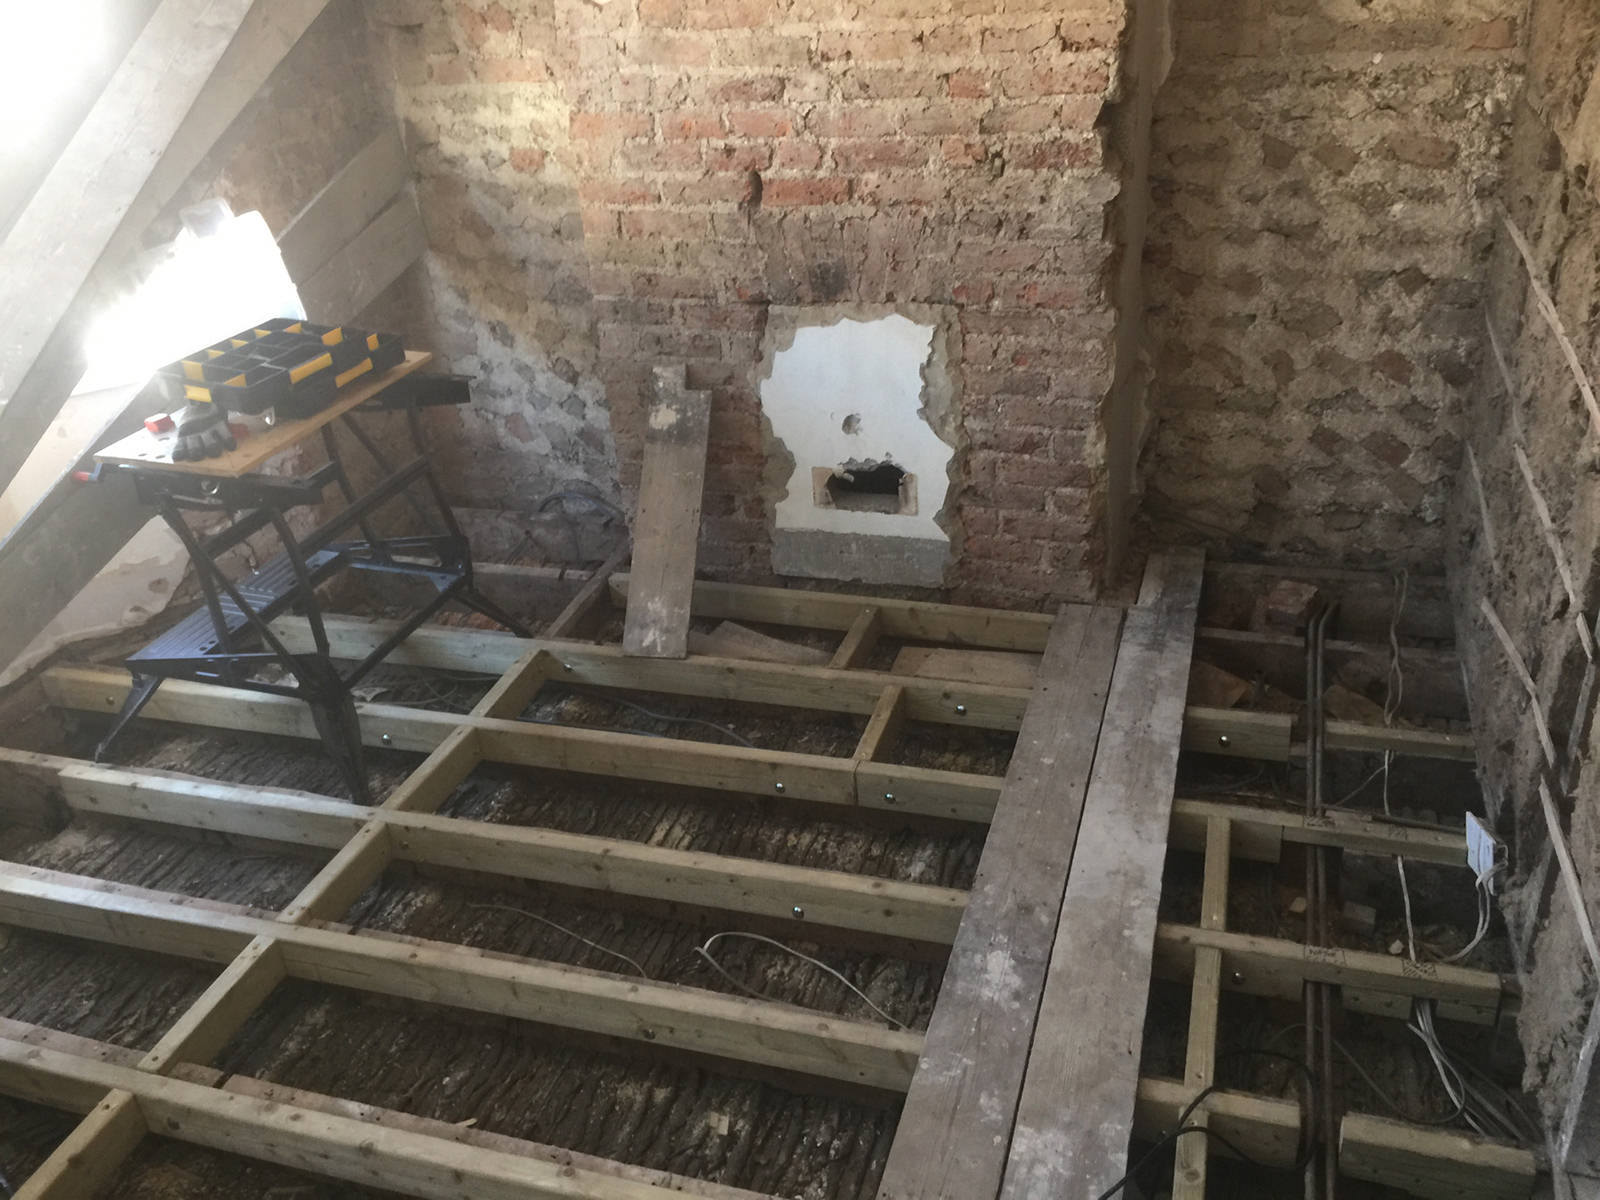
Levelling the floor
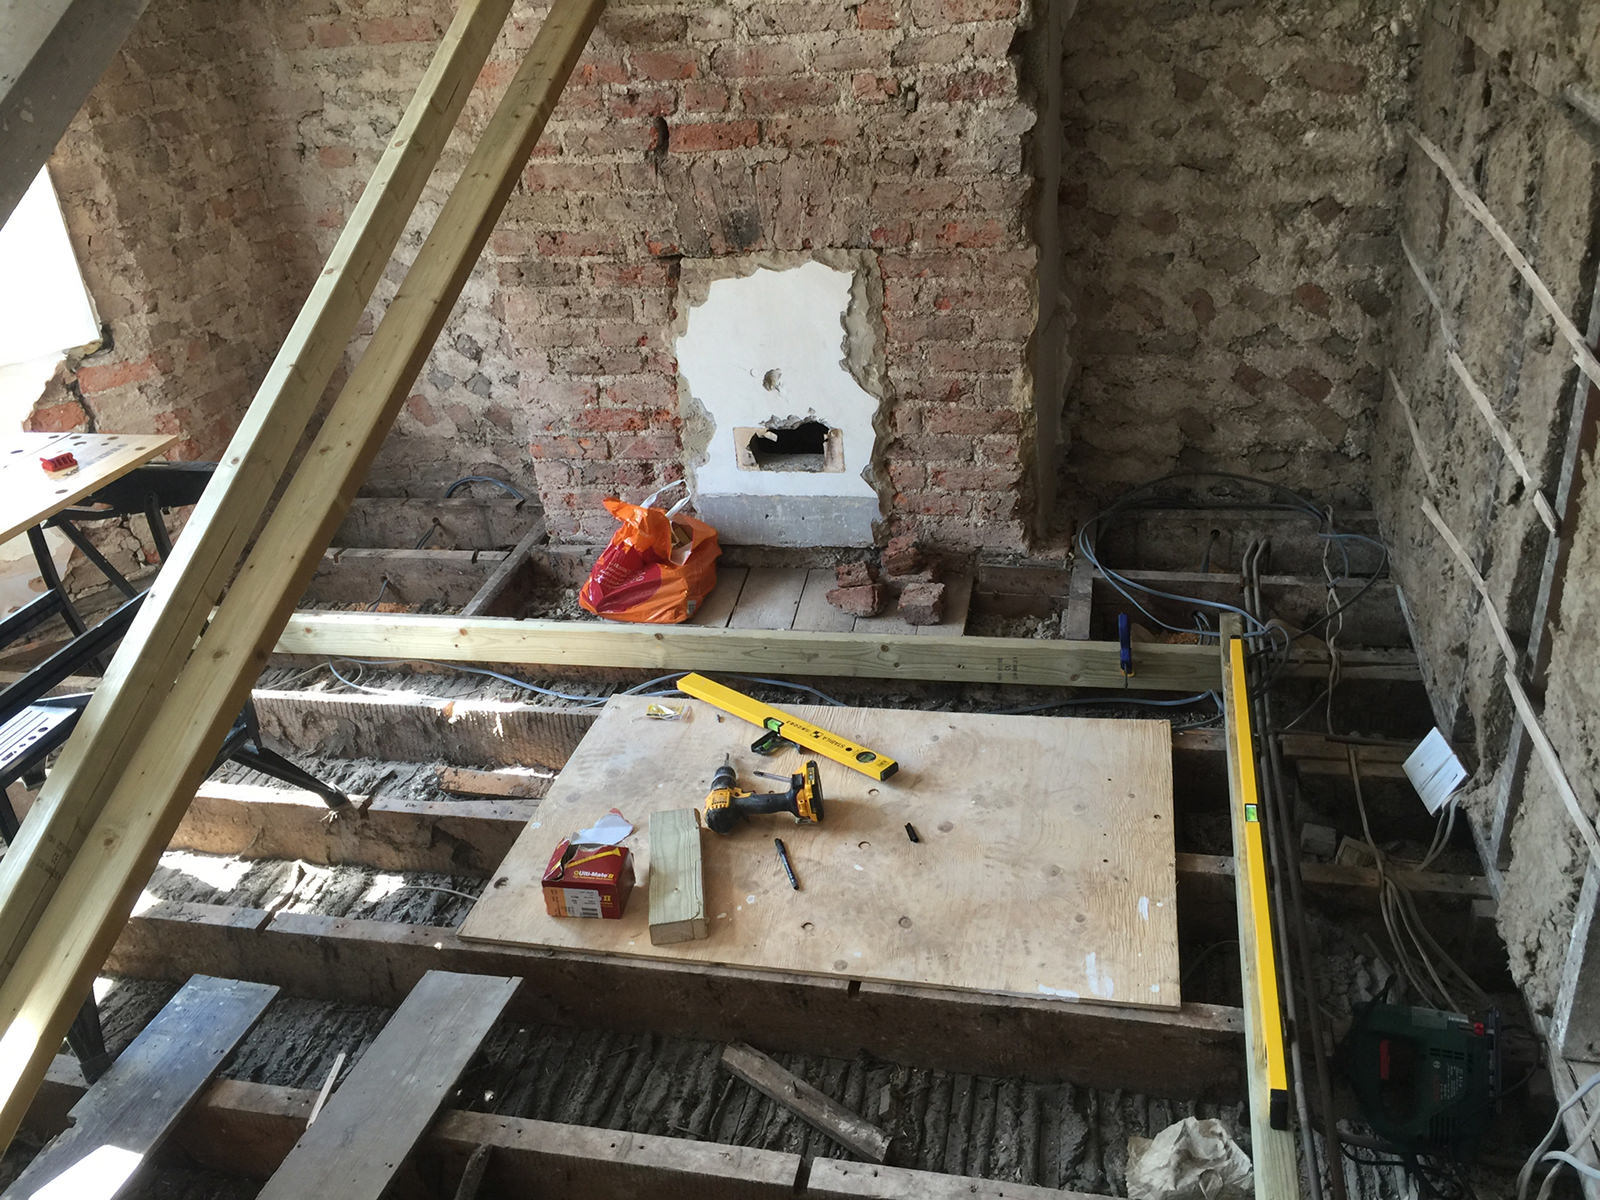
With all the plaster removed it was time to start thinking about levelling the floor. I had done some reading up on methods for doing this but what seemed to be the easiest method was to sister new joists on to the old ones. That is, to bolt new 2x4 joists on to the existing ones ("sistering"), strengthening the existing floor whilst also ensuring they're attached level across the room. Tommy's Trade Secrets on YouTube has a great run down of this method in their video walkthrough.
So, the new joists towards the edge of the room are pretty much the same level as the original joists, but the ones near the centre of the room, where the floor is sagging, are perhaps a few centimetres higher, creating a level floor.
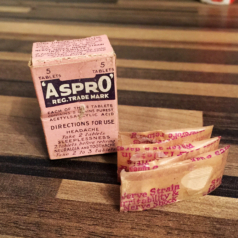
One can always hope to find treasure under the floorboards. I didn't find much but I did find this unopened box of 1930's (?) Apsirin, Aspro. I didn't take any!
First the boards have to come up and this was tricky because I didn't have anywhere else to put them, so I had to just work around them. Worth keeping gloves on for old floorboards because they're brittle and splinter very easily, even with gloves I still managed to bury some nasty splinters in me. I laid the new tanalised joists on to the existing ones. Each joist is laid down, levelled out, held in place before being drilled and bolted in to position. I picked up some Irwin Quick Grip Clamps for holding the joists in place - these are a really useful tool, easy to use one-handed. Another vital tool is an Auger drill bit, matching the size of the bolts being used (I was using M10 130mm coach bolts with plate washers). Auger drill bits are amazing. They slice through wood like butter, it's extremely satisfying.
Laying down the new joists across the room, plus the noggins for support between joists took around two days. I also had to remove the hearth (a huge lump of ugly concrete) from the fireplace which wasn't a nice job.

I managed to not put my foot through the floor which at times, wasn't easy.
Once levelled out, the floorboards could go back down. The easy option here would be to buy sheets of structural plywood and lay them straight down on the floor, most builders would have done this. I didn't want to throw away the floorboards though - most of them were still usable. But there were damages when lifting them up, so some needed replacing. This presents a problem because older floorboards come in thicknesses that are no longer available. You can't buy 15cm wide 14mm thick floorboards - so I had to make up the missing boards with narrower boards, not great. I saved this job until the end, leaving missing boards where the radiator pipes were for the plumber.
Phew - a level floor! This felt so good to walk on once the boards went back down.

Taking a brick with me to the reclaim yard so that I could colour match really paid off - you can't tell the new bricks from old.
Getting the builder in
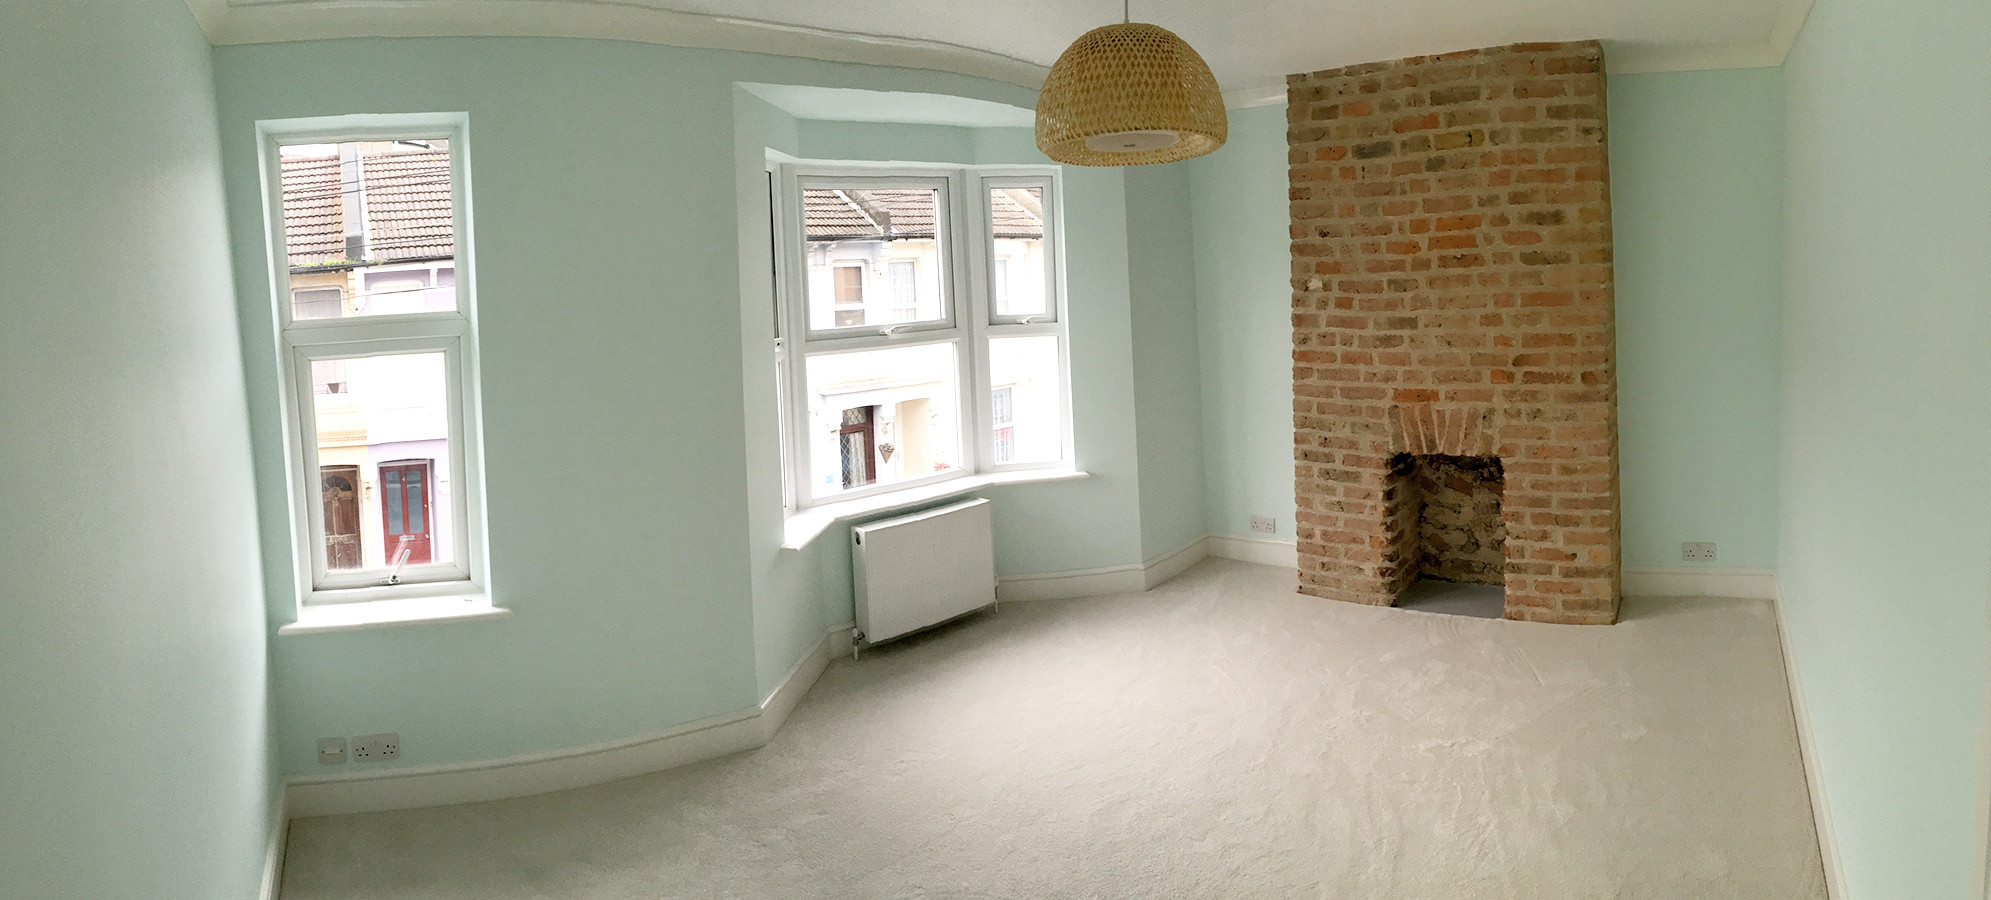
The plaster removal had revealed two large cracks in the bay window and before I could proceed with the rest of the work these needed fixing. This was the first blocker in the project - I hadn't contacted the builder soon enough, so there was a 6 week wait before I could get him in to work on it (and he was the most available builder I tried). By the time he was free, we had decided to keep the chimney breast exposed, so there was some more work for him to do there. That meant finding some replacement bricks that matched the existing ones. I'd love to say that I got the bricks in a skip, but I paid for them up at Burgess Hill reclaim yard (Of course, a few weeks later I saw loads of Victorian bricks that would have done the job, in a skip just around the corner).
The builder was only in for a couple of days, repairing the bay window with Helibars, opening up the fireplace, plus repairing and repointing the brickwork on the chimney breast.
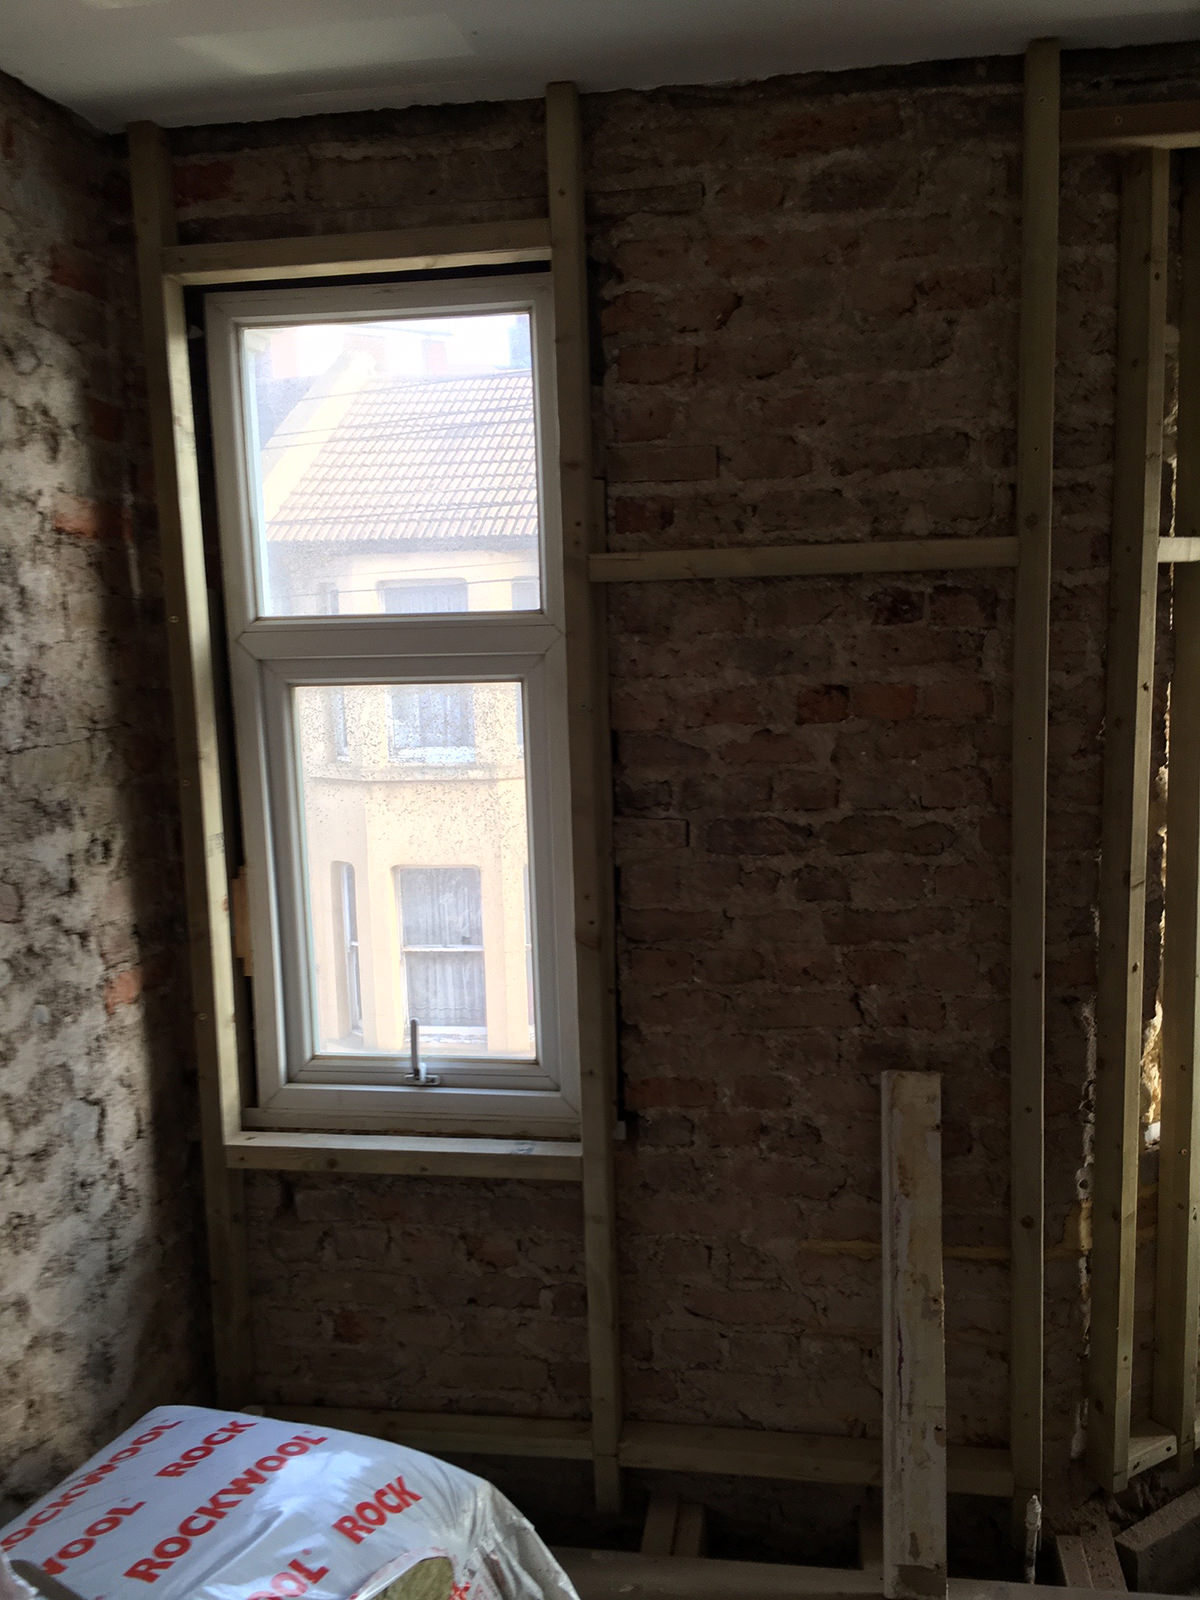
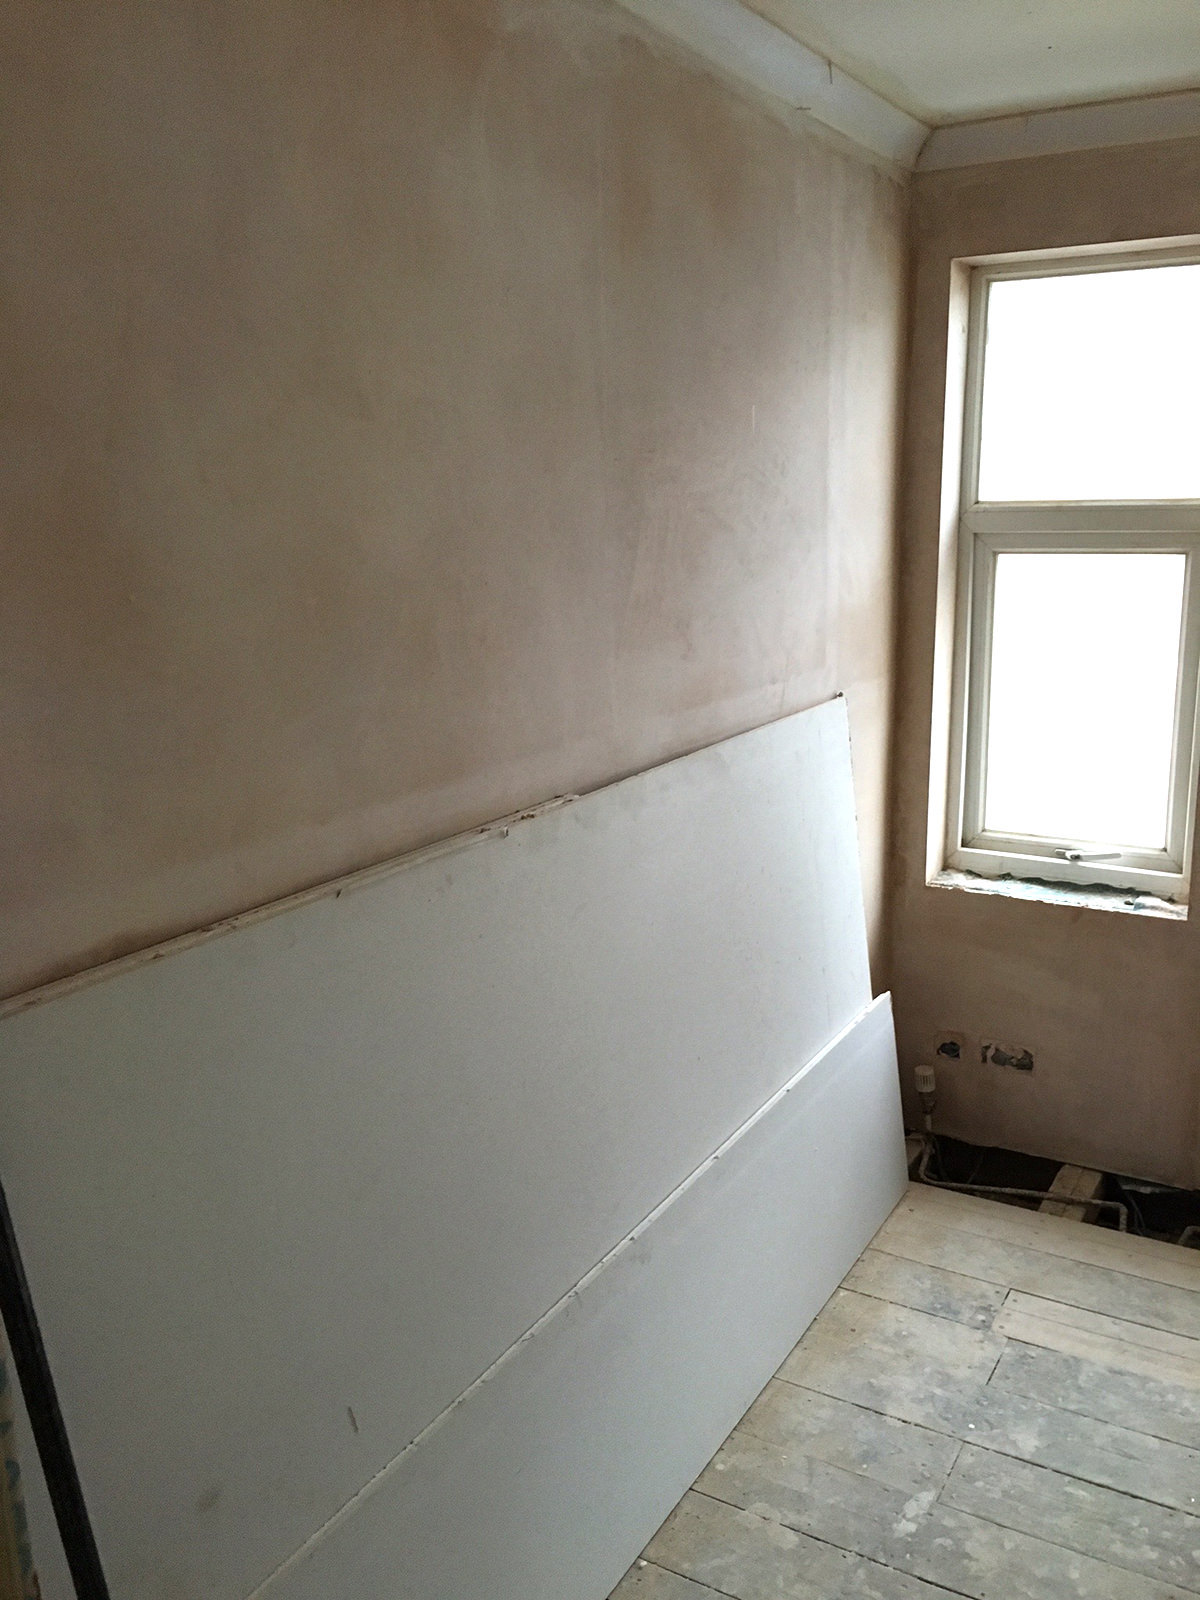
Insulating the walls
Now I could jump up and down on the nice flat level floor, I started thinking about the exterior walls. They had been very cold during our first winter in the house and there was plenty of condensation on them, plus the problem with mould growing where the wardrobes were. I'd started to think about insulating the walls to prevent this and also make the room warmer. Insulating the wall would mean adding a lot of thickness to the wall, but at least we could then have window shelves (windows without shelves to put things on just seem weird to me). The first step was to get a quote for a plasterer to do the work. We got quoted £2200 from a local firm for plastering the whole room and adding interior wall insulation the exterior-facing walls. There was no way we were going to pay that much! I picked up a copy of Haynes Home Insulation manual which had plenty of information about how to add internal wall insulation. It all seemed pretty straightforward so I decided to do the work myself, worked out the materials we would need and put the order in.
I opted for (75mm) timber stud wall with Ecowool insulation and insulated plasterboard, this setup would provide an insulating u-value of around 28 - which is within the recommended building regulation standard for existing domestic properties. Building the stud wall was mainly a case of getting everything straight and level. I had to remember that the radiator would need some timber to fix the brackets in to, and I also wanted wood to screw the skirting board to the wall, so I kept a low level noggin at the base of the wall for this.
With the stud work built, I put the Ecowool in to the recesses, fixed the vapour barrier to the studs and set about plaster boarding. Incidentally, when plaster boarding make sure you use plasterboard jointing tape - it really does help to prevent cracks in the plaster over time.

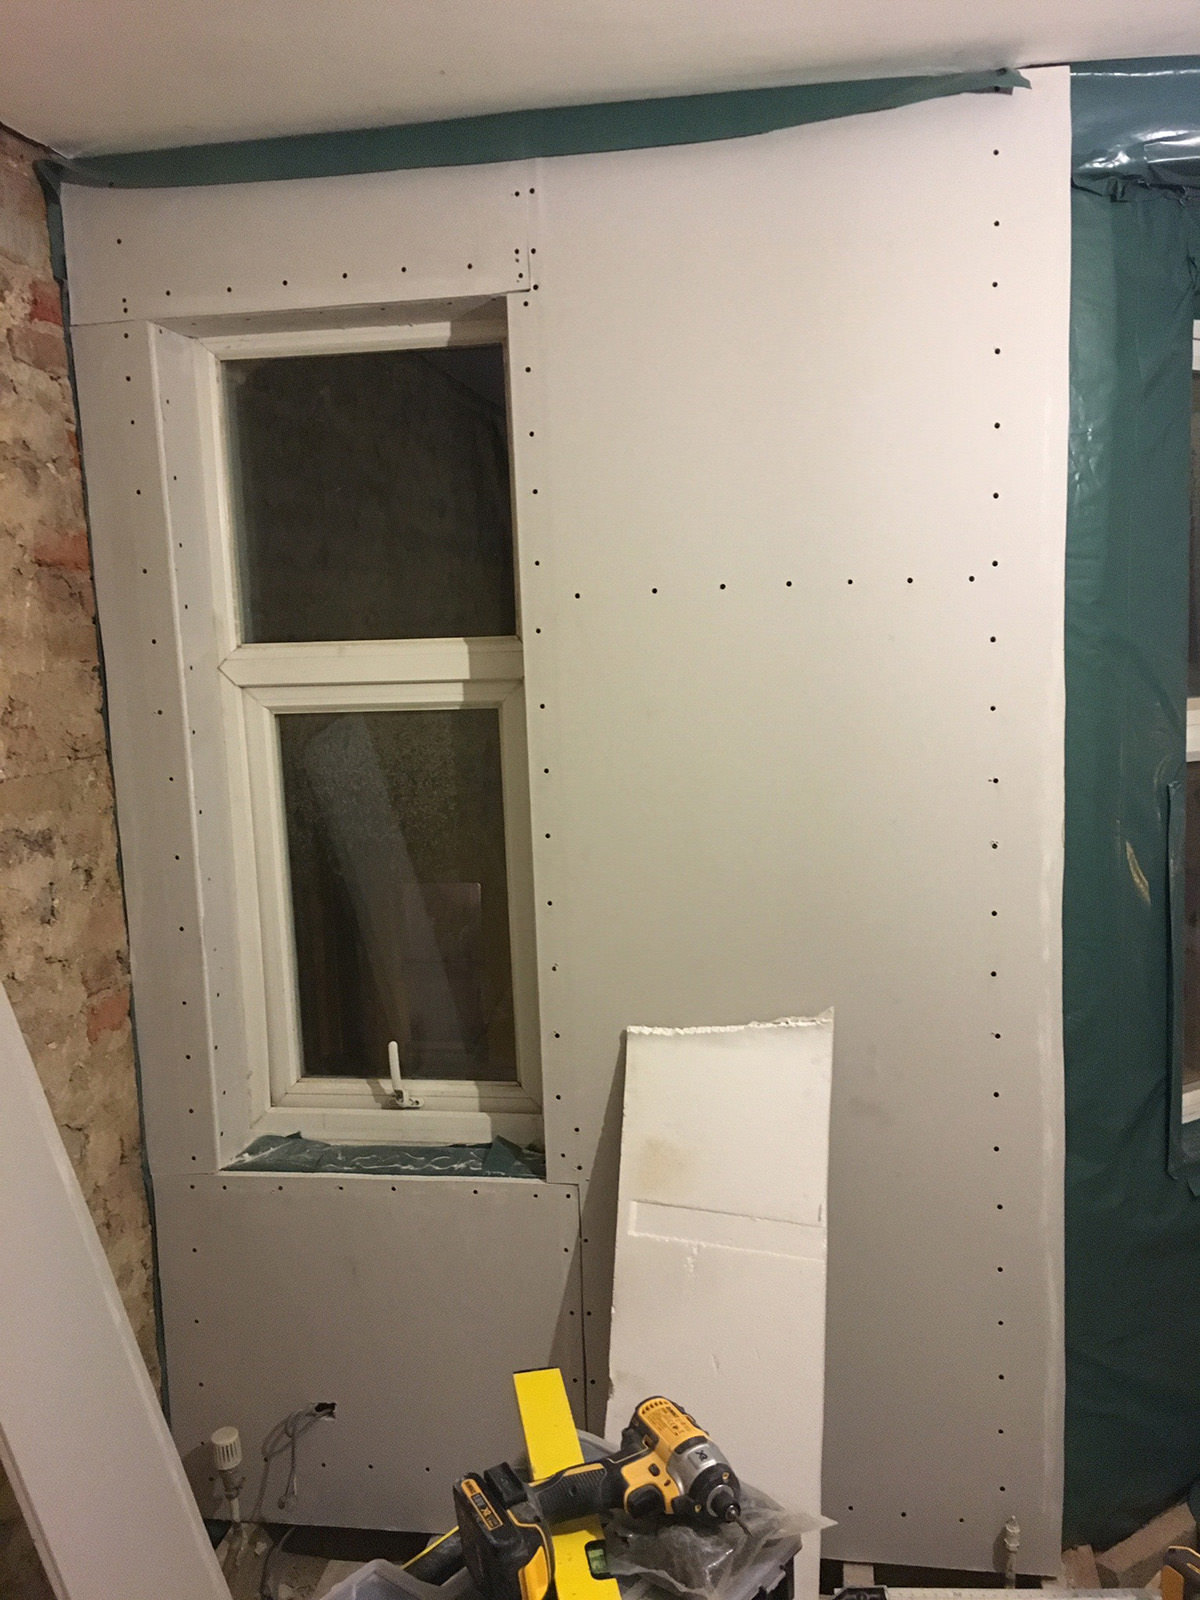
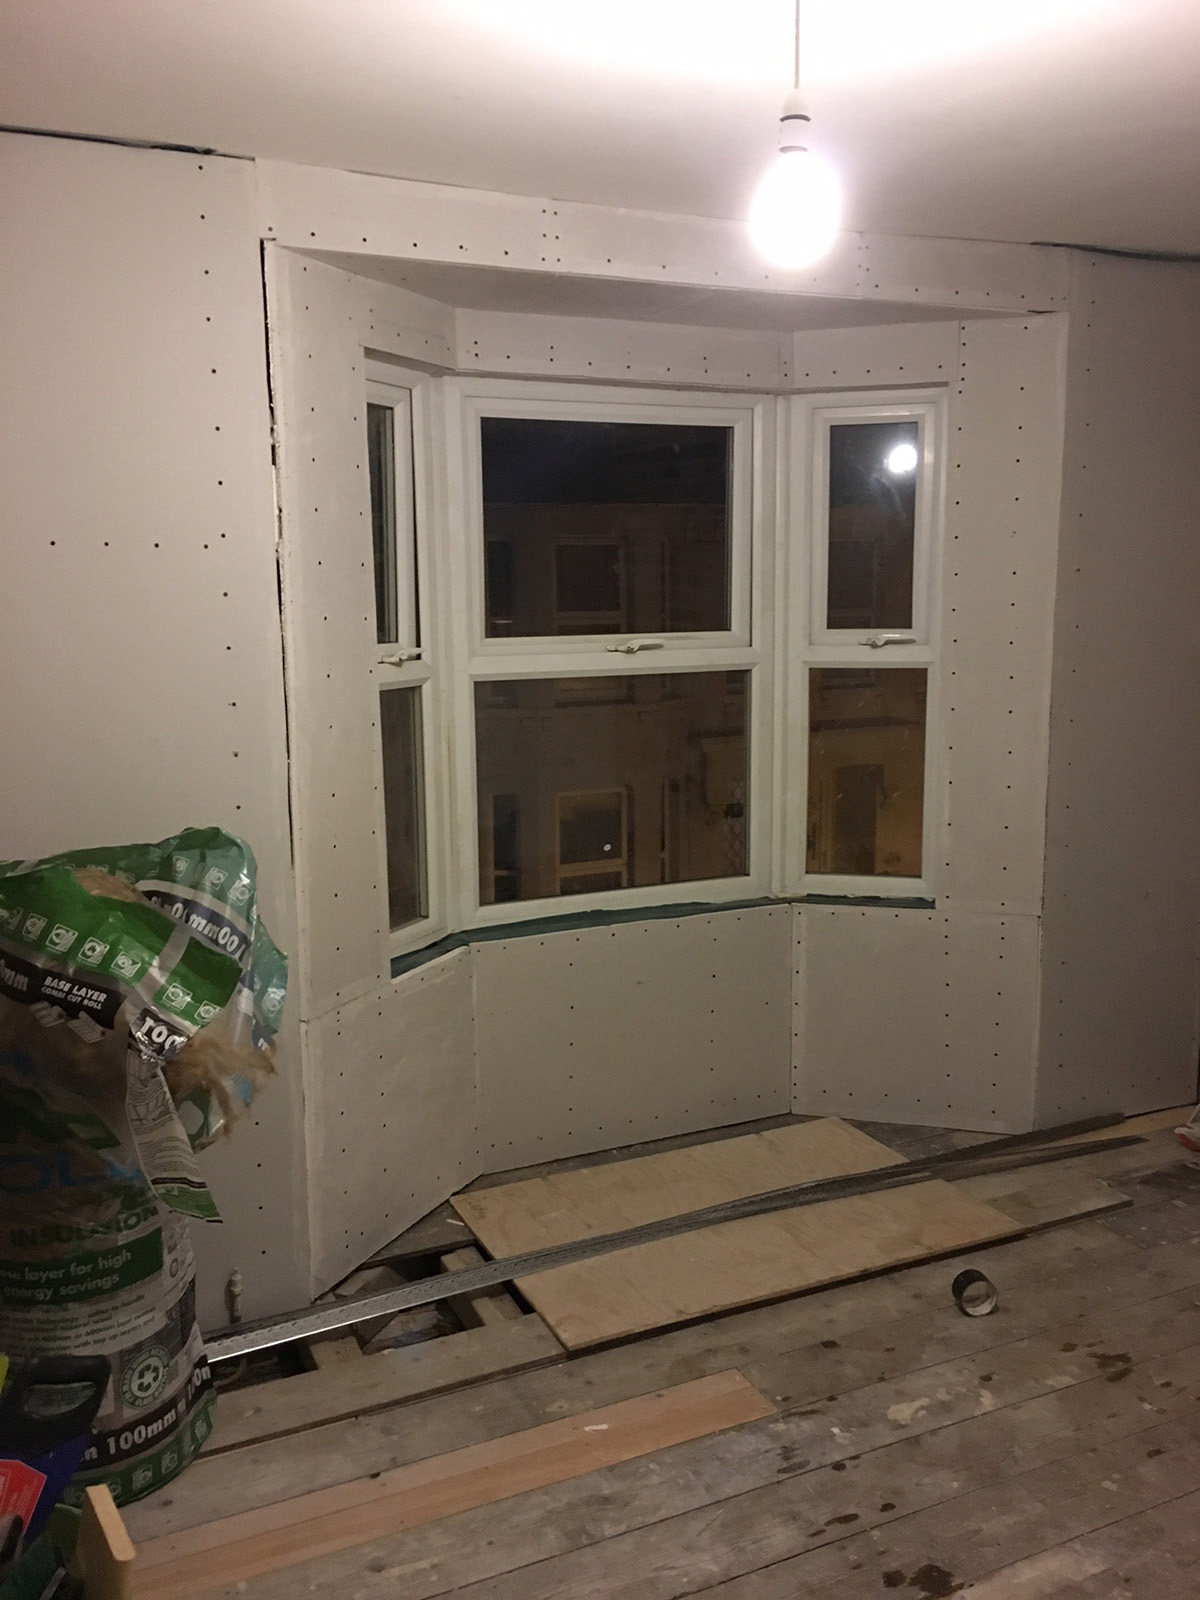
The only thing more satisfying than finishing the plaster boarding is seeing it plastered!
This room must've been really quite cold before because the difference in temperature was almost immediately noticeable once the insulation was done.
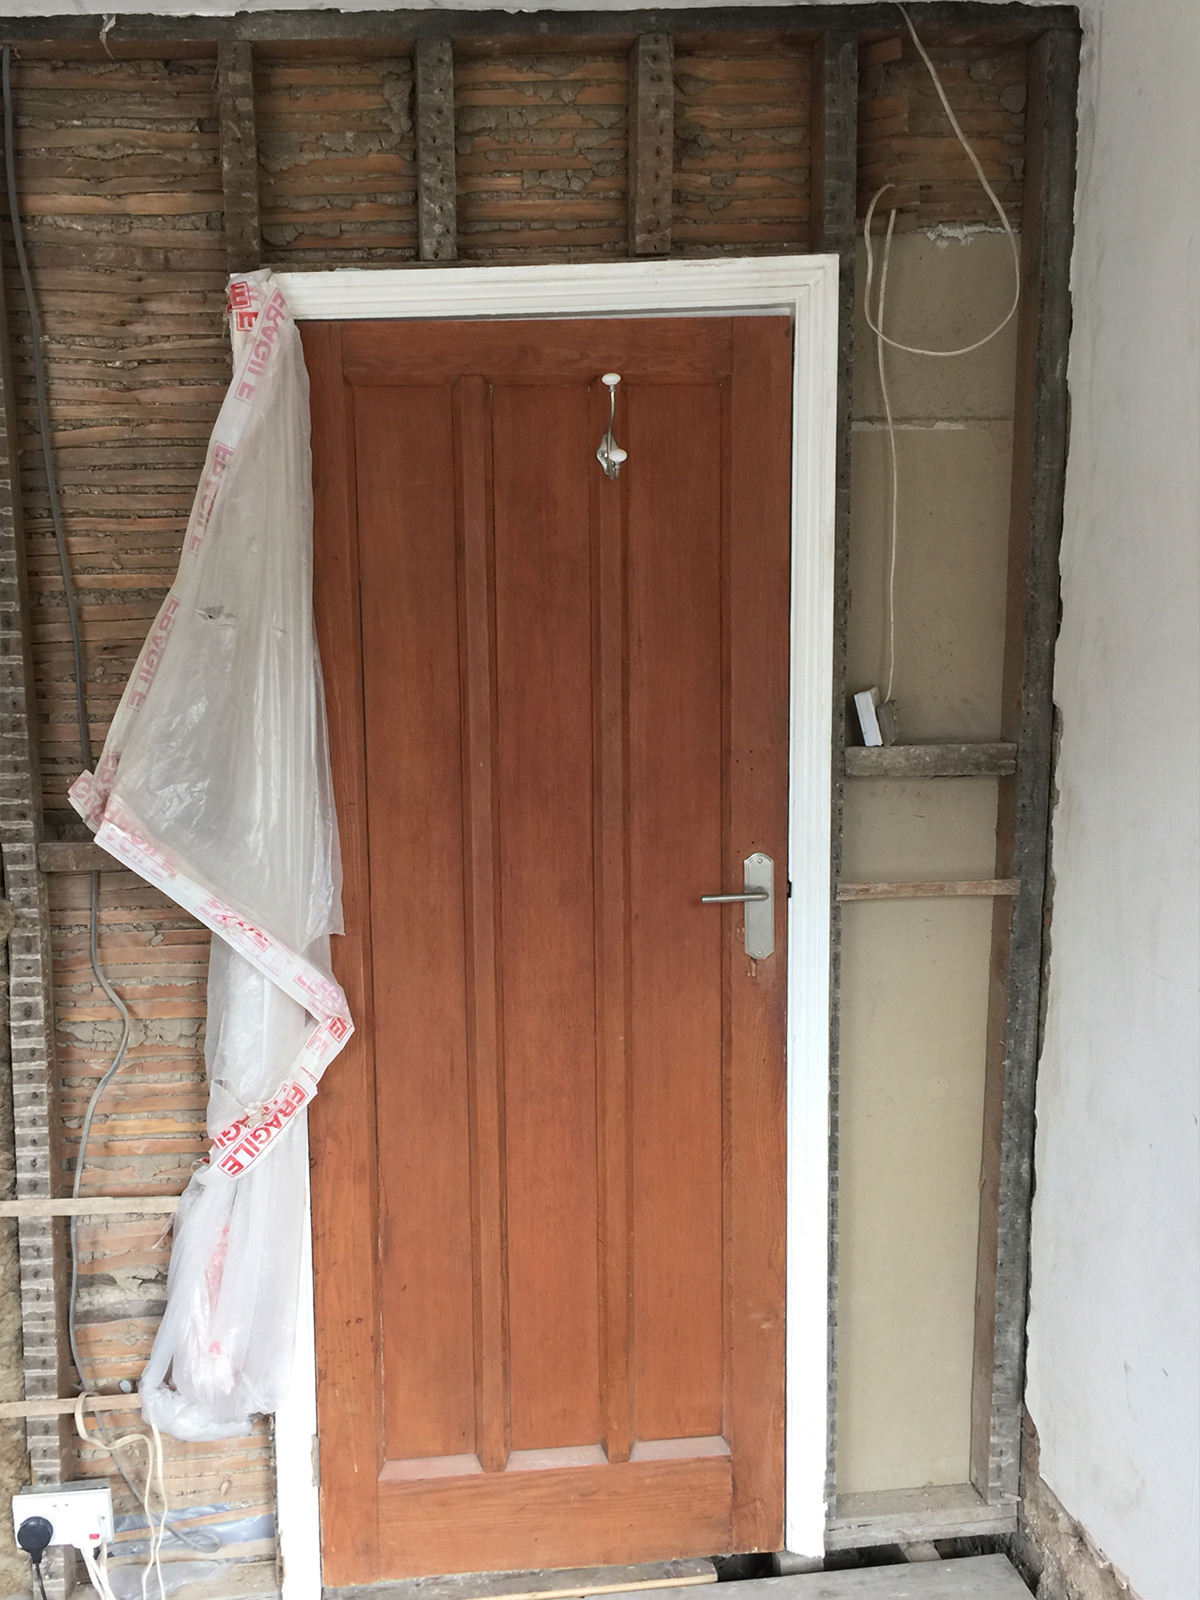
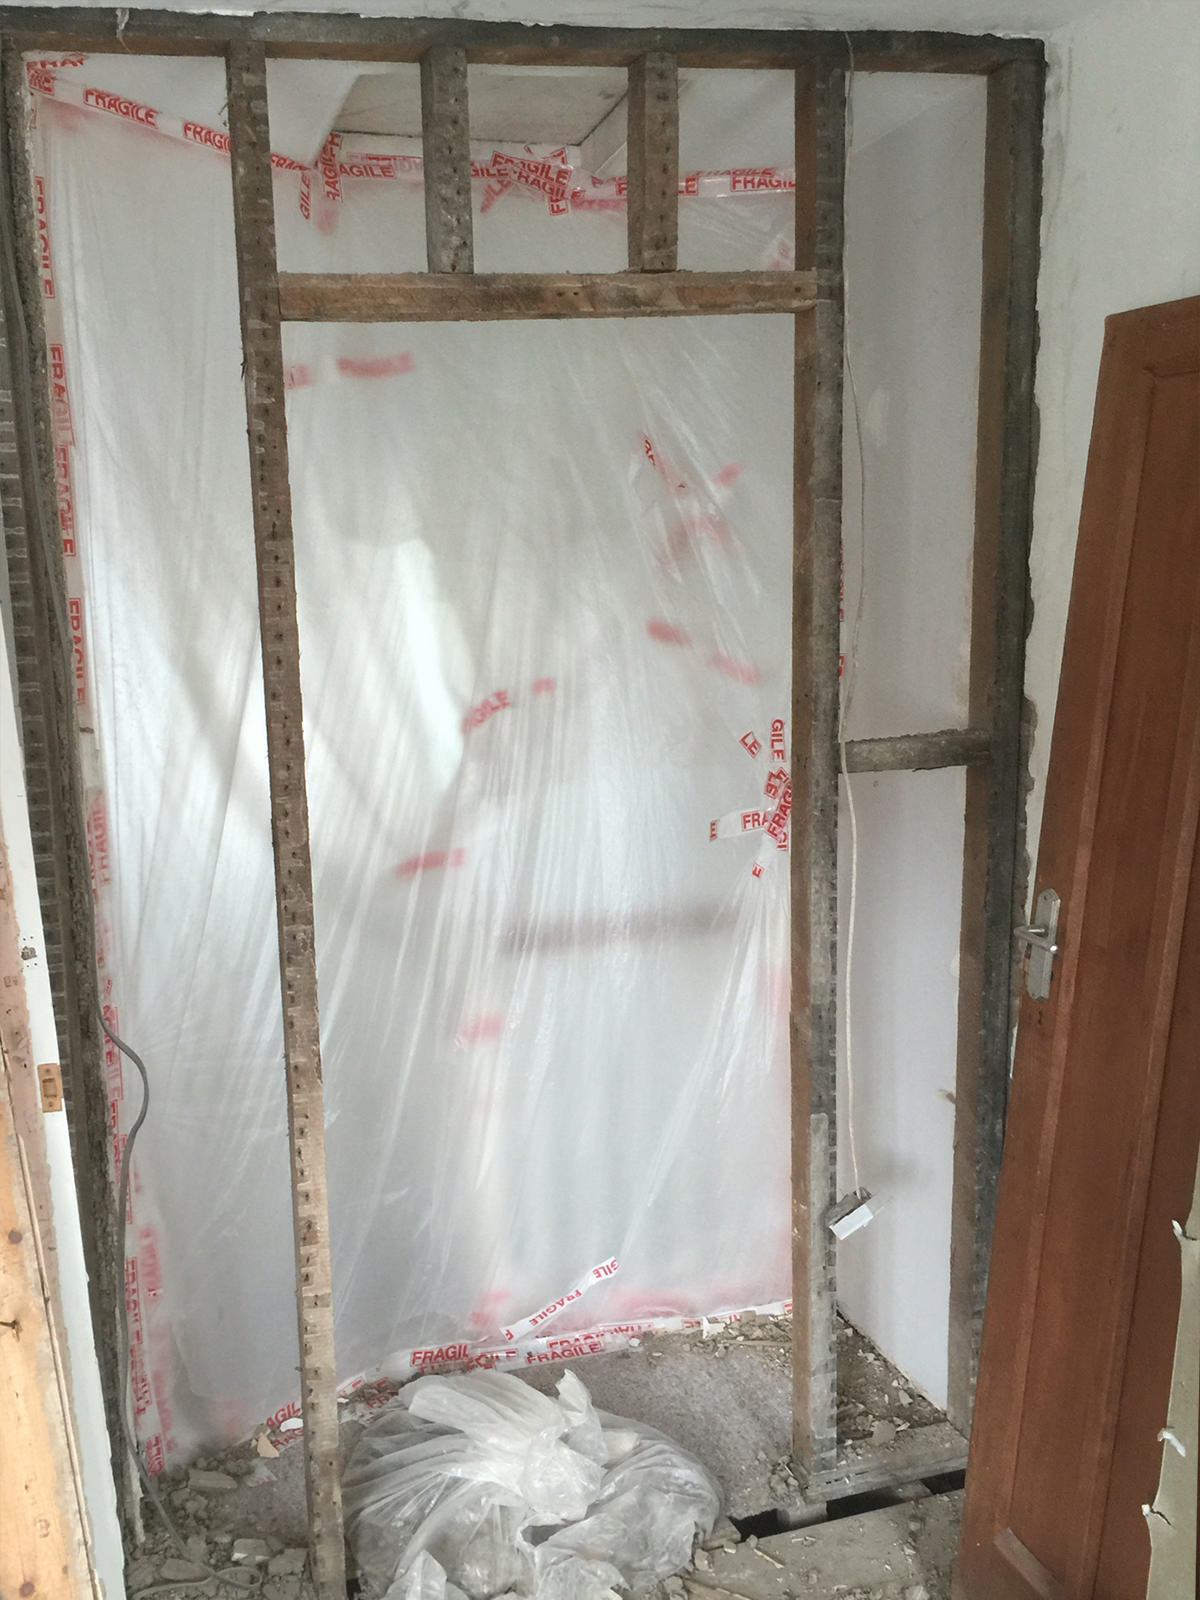
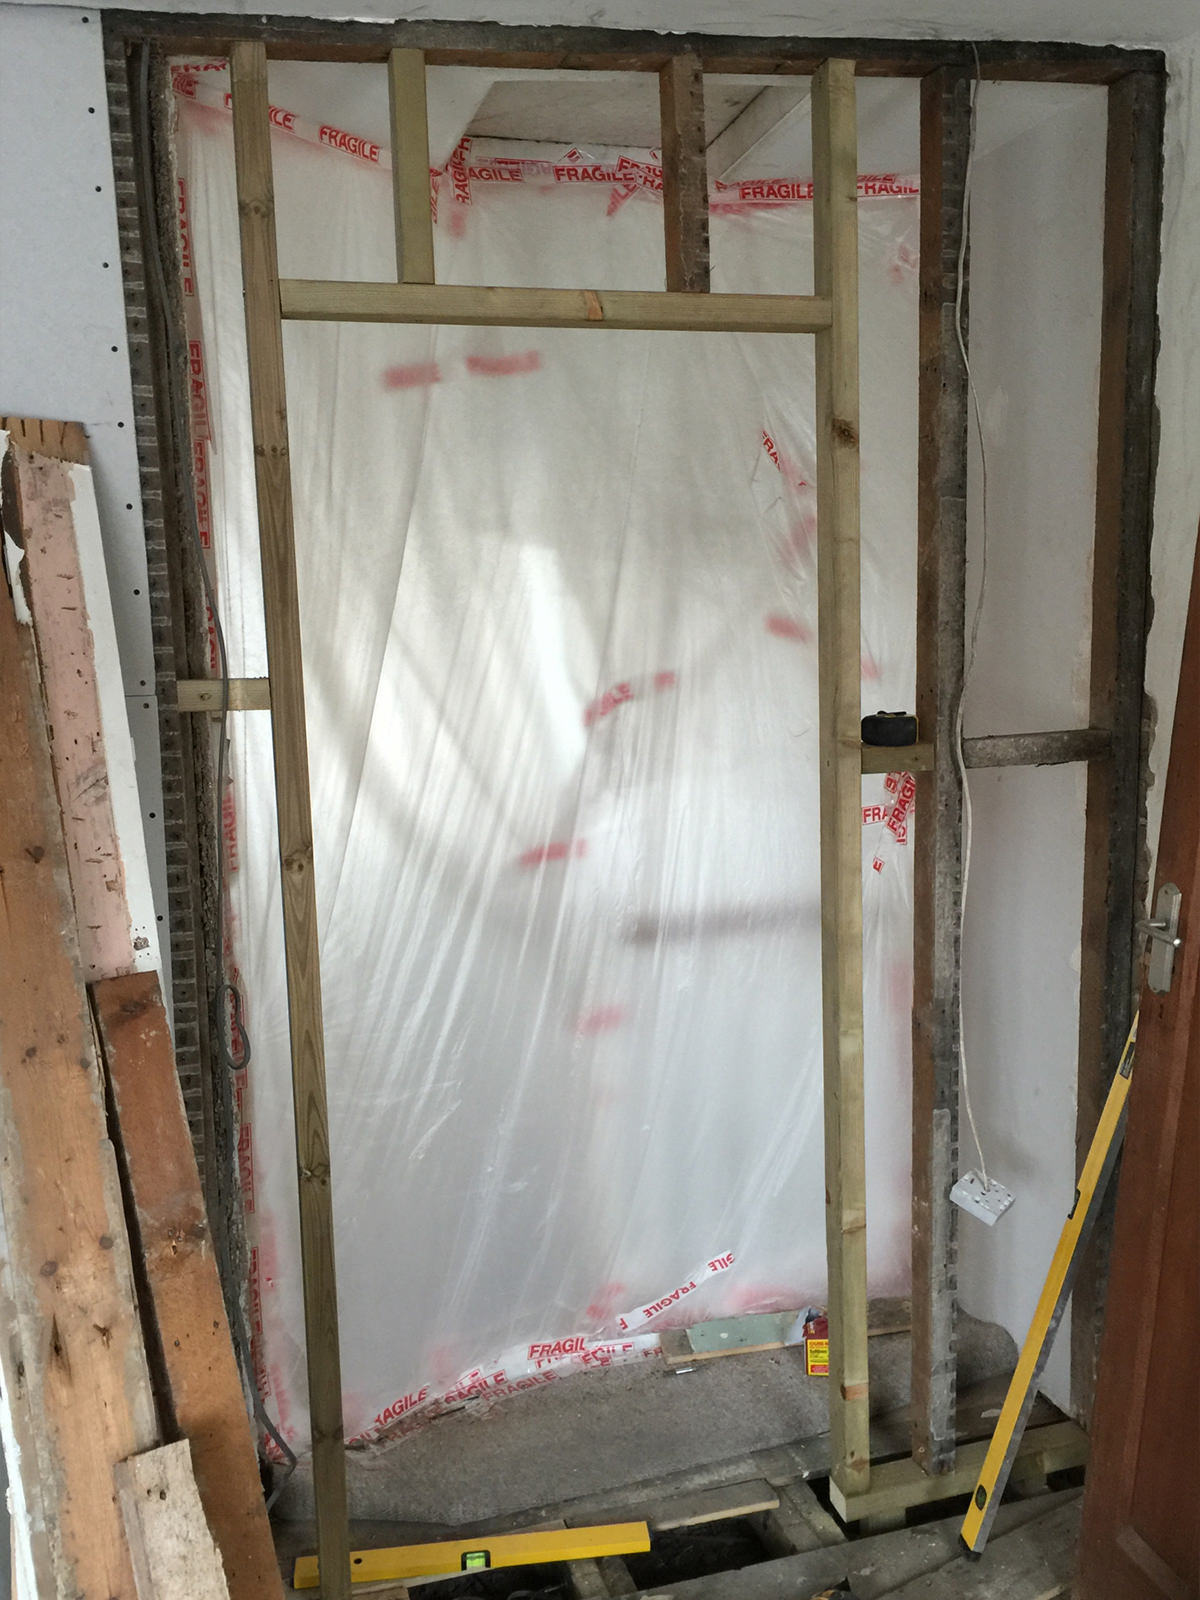
Moving the door
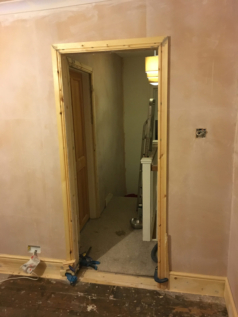
By this time we'd worked out where our furniture was going to go. Because we wanted the bed to be positioned behind the door, preferably in front of the chimney breast, there was only one wall left for the wardrobe to live on comfortably. Unfortunately the doorway opened in to that space, so we would need a smaller wardrobe. But when we stopped to think about it, the doorway wasn't in the best position. Although it was in the corner of the room, if it were brought further in to the room, it would then line up with the hallway landing, creating a more usable space in the hallway, and also make room for a shallow wardrobe on that side of the room. It was already a wonky doorway which needed rebuilding, so moving it was a no-brainer.
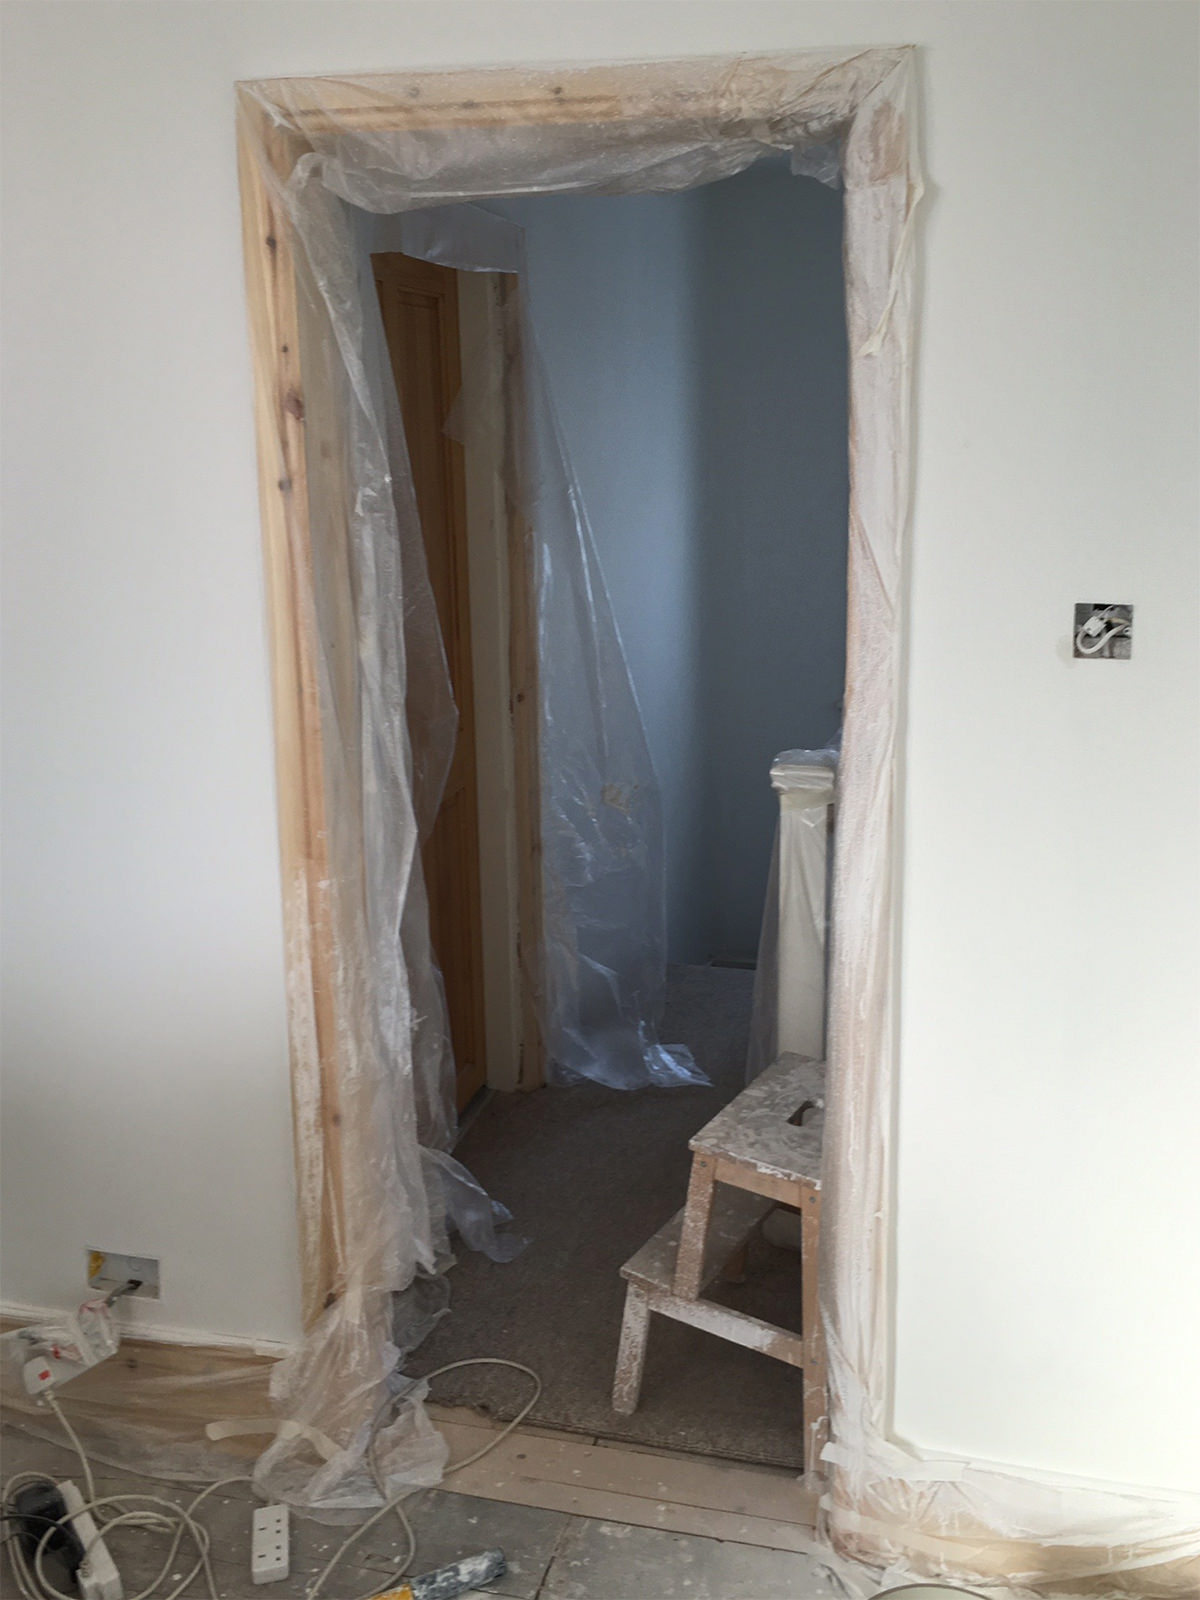
I had to do some more plaster removal in the hallway and after that I set about moving the door frame. Taking down the existing one was easy, then it was just a case of making the new one, and plaster boarding the wall. Rather pleasingly it was also a chance to make sure that the door frame was the same size as on the other bedroom.

After moving the door frame, only the ceiling is left as a final reminder of the how wonky everything below it once was.
Pipes and cabling
With the plaster boarding done it was nearly time to call our now favourite plasterer, Dougie aka "Uncle Doug" to come and make everything look amazing. First though, a few things had to be finished up. The room only had a single 2-gang switch in the whole room (!), so when the electrician came round we had him install 3 more sets of sockets. One either side of where the bed would be, and one over in the corner of the room by the window. On the brick based walls I fitted the steel back-boxes and on the plaster boarded walls I did the same for the drywall boxes, all ready for the sparky to wire up. The advantage with this is that I got to ensure the light switch and all the power sockets were the same height from the floor (as they are in the other bedroom, and eventually the whole house). /twitch
With the floor still accessible, I also took my chance to install a gigabit ethernet cable under the floor, so I could later hook it up to a router in the lower ground floor. Fitting cabled internet might seem a bit old-fashioned in 2016 but wifi reception across 3 floors in a terraced victorian house isn't that great. Having a wired port in the room would allow me to fit a wifi repeater upstairs and have no signal problems. Whilst the electrician was in, I also got some wires put in for replacing the hallway lighting on the floor below. Thinking ahead!
Plastering
With all the plaster boarding done and sockets ready, I gave Uncle Doug a call to arrange to get the plastering done and it took a couple of weeks to to fit in to his schedule. By now the project was really dragging and we just wanted to get our bedroom back. It would be a few more weeks yet but we were on the home straight.
The plastering and coving was done in around 4 days.
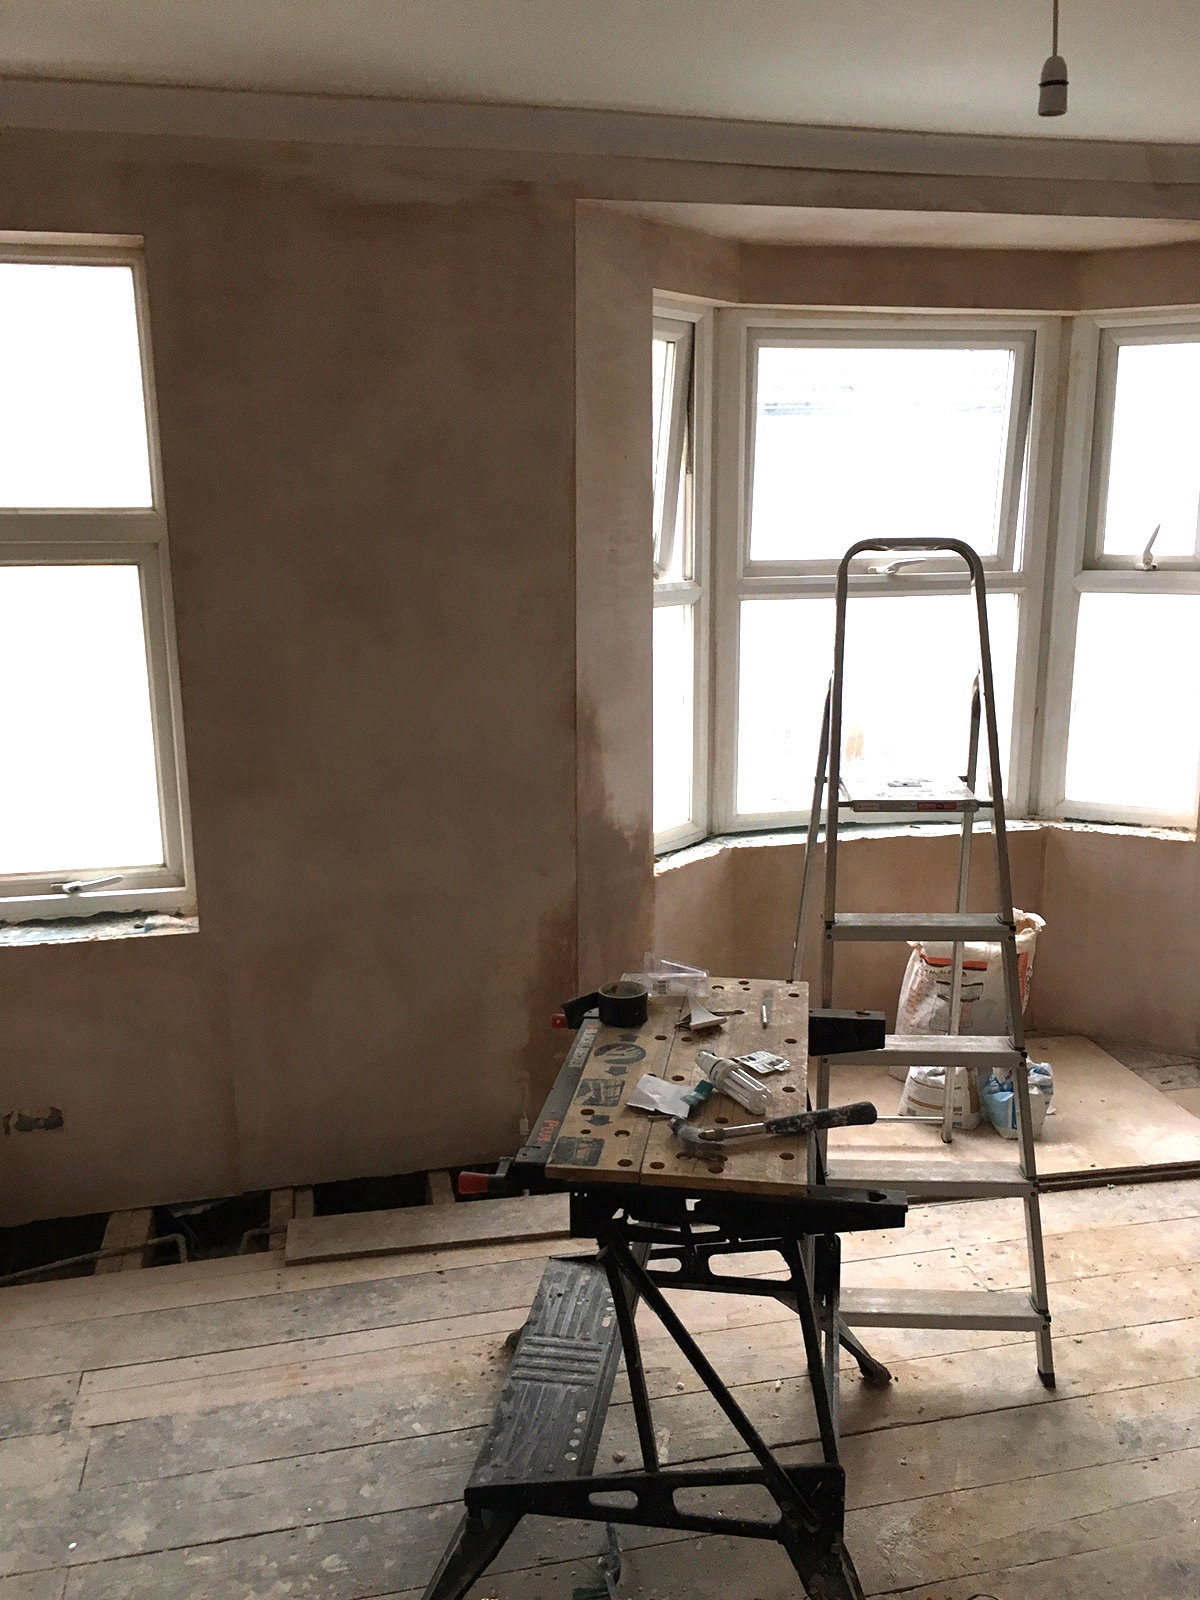
I love the sight of fresh plaster in the morning.
Woodwork
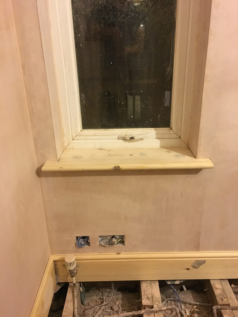
With the plastering done I could start on the skirting, architrave and the window shelves. The window shelves I did first, I got the pine wood from North Road Timber then cut them down to size. I picked up a BOSCH POF-1200-AE plunge router to help with rounding the edges on the pieces I'd cut. I found it a bit awkward to use but it was cheap and it did the job. I fitted the window shelves to the studs with screws, filled the holes and sanded.
The skirting and architrave took a bit longer, but I had some experience of doing this already. Because of the bay window and scale of the room I decided to get a compound mitre saw and picked up an Evolution Fury 3 for a good price. I wouldn't have been able to do the work without it! Dissecting the angles to get them just right for the bay window was quite satisfying. Each skirting board is screwed and stuck to the wall with Gripfill, all joining pieces of wood are wood-glued (Evostick) together and protruding corners also have a few supporting nails. The architrave is nailed and Gripfill'ed to the door frame.
Nothing's quite perfect with my woodwork so I made good use wood filler to cover my tracks - I found Polyfilla Woodflex to be great. It dries hard and sands down well, and I've not had any cracks with it, ever. With everything dry I was almost ready for decorating.
Woodwork is harder than it looks, and I am no carpenter.
Decorating
My mum has always said "Decorating is 80% preparation", and she's not wrong. To do a good paint job you really do need to prepare. I prepped the coving and some of the plaster with a light rub-down, reoving any splash and wipe marks. I taped off all the windows, pine skirting and the chimney breast.
First painting was a mist-coat on the fresh plaster walls with a 50:50 paint/water solution (Wickes Contract Matt for the paint), then started on the ceiling. Once the ceiling had received its two coats of white, I undercoated the walls. For this I used a Wagner paint sprayer which really was great at getting the painting done quickly. The trouble with a sprayer though is that it clogs very quickly, and if it clogs whilst spraying, it stops spraying and starts splattering. Because if this, I chose to use it for the undercoat as I didn't want to risk my top coat going wrong.
Undercoating. Staring at white for hours makes your eyes go funny.
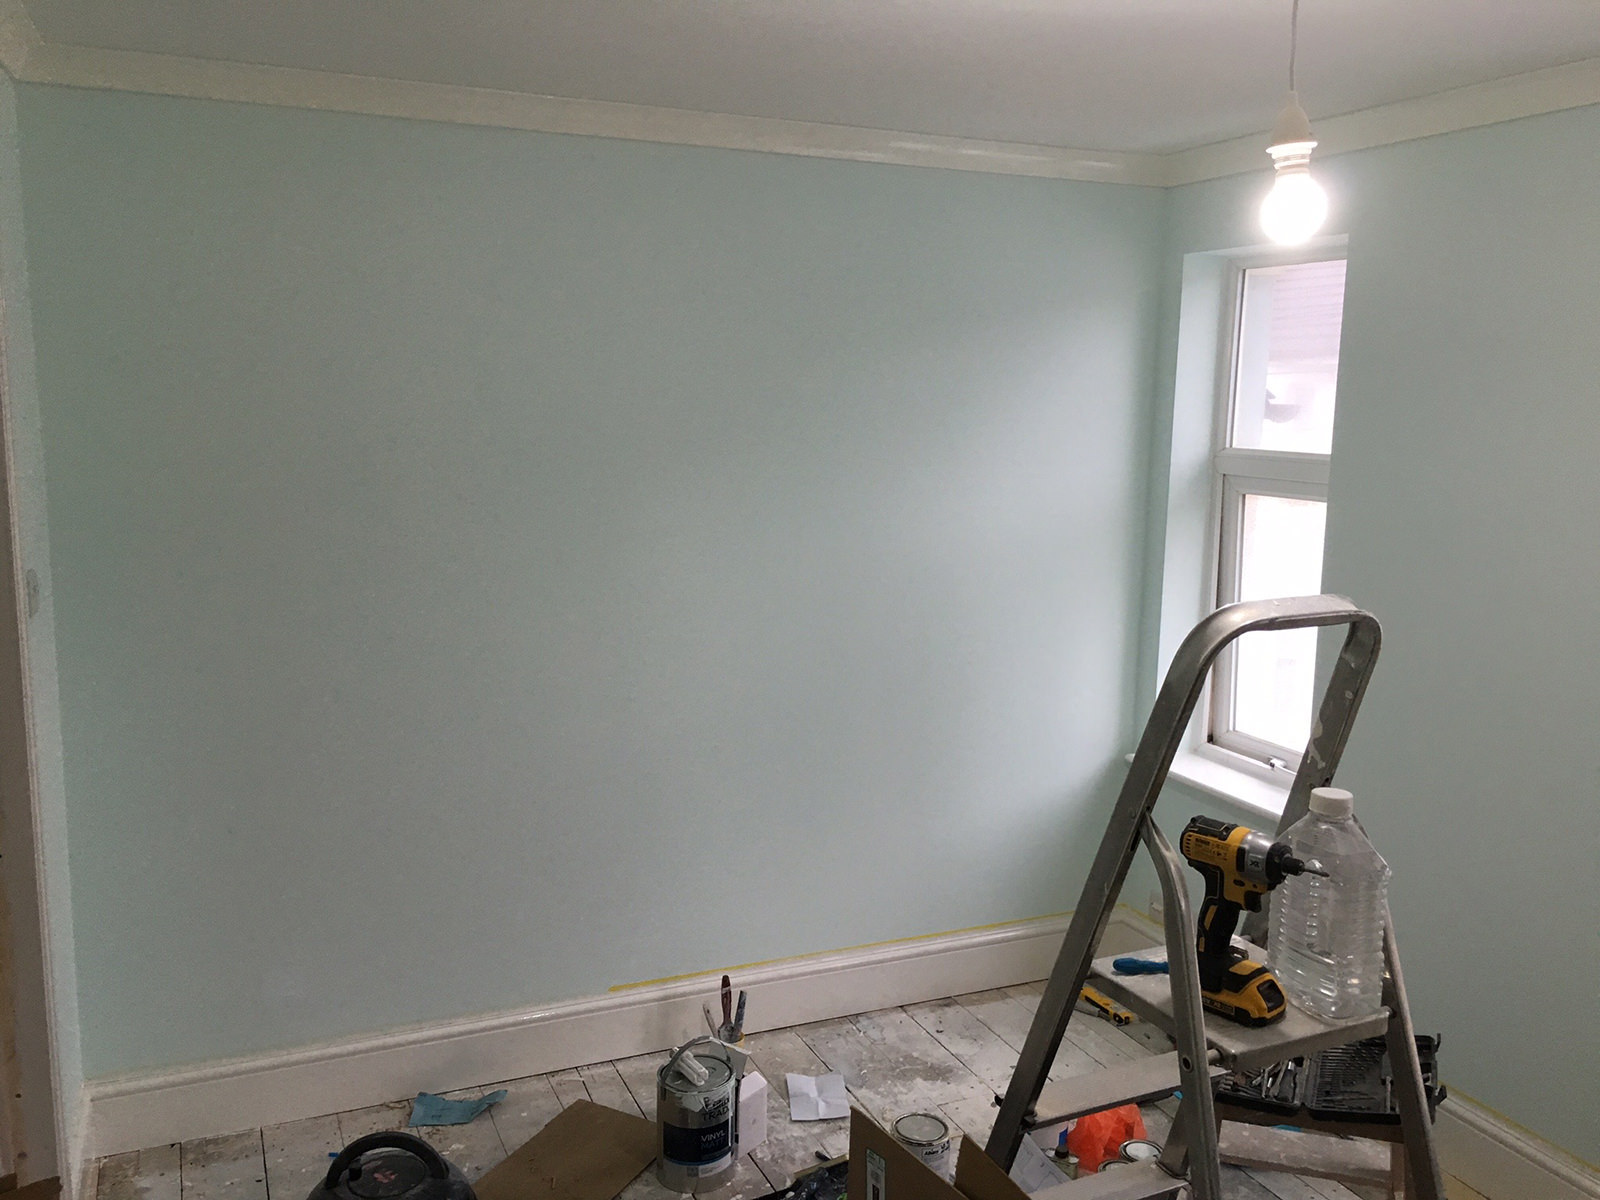
Our top coat was Dulux Trade Light & Space, Ocean Ripple. The Light & Space range almost feels a bit like the "Emperor's New Clothes" but it really does do something special with the light that hits it. The colour itself seems to change quite a lot depending on the time of day and type of light. We were so impressed with it, we ended up using the Dulux Light & Space range throughout the entire house.
Once the top coat went on everything started to feel a bit closer to finally finishing.
The coving and skirting board had one primer coat and two coats of top coat - oil based. At this time I hadn't yet discovered Dulux Satinwood, the quick-drying water based paint. Satinwood is amazing and I can't go back, but I had just purchased two large tins of oil based and I wanted to use them. I waited 24+hrs between coats and lightly sanded between them. It's painstaking and time consuming but the end result was fine.
Painting the skirting and coving took ages as I used oil based paint. Learn as you go!
A few kit recommendations: Purdy brushes, they're really good, I also got an excellent roller from them; and I tried lots of masking tapes but 3M's Scotch Blue was definitely the best. Dulux 320 Grit Ultra Fine Silicon Carbide Paper is a really good, very light sanding paper which I found excellent for rubbing down paint between coats. Various areas needed filling and sanding, and one filler I loved using was Polyfilla Trade Fine Surface Filler - it is extremely fine and it's possible to fill small imperfections and dints easily with, as it says on the label, a glass smooth finish. For deeper holes I used Polyfilla deep fill, otherwise it was any standard filler.
Final bits
Whilst finishing the last bits of painting, the plumber came, moved the pipes and installed the radiator. After that I could finish the last bit of flooring. After cleaning the brick work on the chimney, I used Thomson's brick sealant on the chimney breast to seal the bricks and help prevent them giving off dust. Managed to use up some old grey masonry paint on the floor of the fireplace. Sealed up the chimney with a piece of plasterboard and added a ventilation panel to ensure a good amount of air movement up the flue. I hard-boarded the floor to remove any draughts and give a nice fresh clean floor for the carpet to go down on. Installed a Habitat pendant light with IKEA bamboo light shade. The windows had a bloody good clean inside and out. I put up the curtain rails, wired in the ethernet socket, ready for plugging in the ASUS RT-N19 WiFi repeater I'd picked up.
The door was the last job on the list - I bought one from Wickes, hinges and handles from Dockerills. Then sanded, varnished, rubbed down and varnished again. I hung it but took it down again - it's much easier for the carpet layers if there isn't a door, and because it's likely it might need shortening again if the carpet is thicker than you expect, it's sensible to hang it afterwards.
And then I waited for the carpet fitters to arrive.
Just after the carpet fitters left. Finished!
*So* happy
I had a flat-pack assembling day, 5 of the slimline mega tall IKEA PAX wardrobes. We had shopped around for wardrobes but the PAX ones with mirrored doors fitted the space perfectly and they're really good value. Plus, the IKEA PAX room planner is a really helpful tool for figuring out what works in the space. The wardrobes have about 5cm clearance at the top so they're pretty much a perfect fit, floor to ceiling. They are screwed to the wall and rock solid.
That first night in the new bedroom was amazing (and encouraged us to get on with our next project, ahem). It felt warm, cosy, had a sort of stillness but most importantly if felt like our room now. With the exception of the windows, not a single thing in the room was from it's previous life, it was a completely new room. We spent a good week saying to ourselves "I can't believe this is ours!".
Later we picked up two Habitat Fleur bedside tables and a slimline Futon Store dressing table completed the room.
This turned out to be a pretty big project and there's a few things I learned from renovating the bedroom.
- It took a total of four months - everyone always says this, but it will always take longer and cost more than you expect. I did nearly all this work at evenings and weekends, plus the occasional day off work.
- Book builders early. Especially in summer, in cities like Brighton they are all super busy over the summer as people get their homes done during the holidays. This wasn't something I'd thought about and I couldn't have foreseen the work that would need doing but I could have booked a builder sooner.
- I have a rule of thumb for booking in work: Always get three quotes. More if needed, but 3 should give a good idea of the going rate, or if anyone is taking the piss.
- When picking tradespeople, a positive and eager recommendation from someone you trust is invaluable (many people will give a "yeah they're alright" sort of recommendation, but you want ones that are really excited about how good they are!). Failing that, sites like Check-a-Trade are the best place to start. But also search elsewhere for other references. And when meeting for a quote, always trust your gut instinct. You need to have a rapport with this person, you don't want a personality clash or any awkwardness - you need to be able to talk frankly and comfortably about any area of the project. So, go with your gut - if the price is good but they don't "feel right" it may be worth trying again.
- Compromise on things. Admittedly, we didn't compromise much, but we did compromise on the windows. We would have loved to replace the windows with new, double glazed sash windows to fit the period of the property. But you have to draw the line somewhere - and for us it was the sash windows, they're expertly hand made and accordingly expensive. We got many quotes but in the end it just wasn't within budget.
- Use Top Cashback for money back on places like Power Tools Direct, Screwfix and Wickes. It saved around ~4% on purchases, which isn't much but when you're spending hundreds it's better than nothing. Some places also do trade discount which can be much better - you may be able to get this through tradespeople you know, or just blagging it.
- Keep a record of expenditure. I kept every receipt and know the exact cost of everything. Timber is expensive.
- After doing this myself I have a new found understanding and respect for tradespeople. They may clock off at 3 or 4 but that's because they're up at 6 or 7, and have a day of really hard work - having done all of the above, I just kind of get it now.
- The internet was a huge help - there is so much information, help and advice on how to do things, that doing it yourself really is a lot easier than it used to be.
DIY is hard work and it's not for everyone. But it's a sliding scale, and I think there's always something you can do which is right for you. When it's all finished, seeing all the hard work you put in and enjoying the end result - it's truly rewarding.
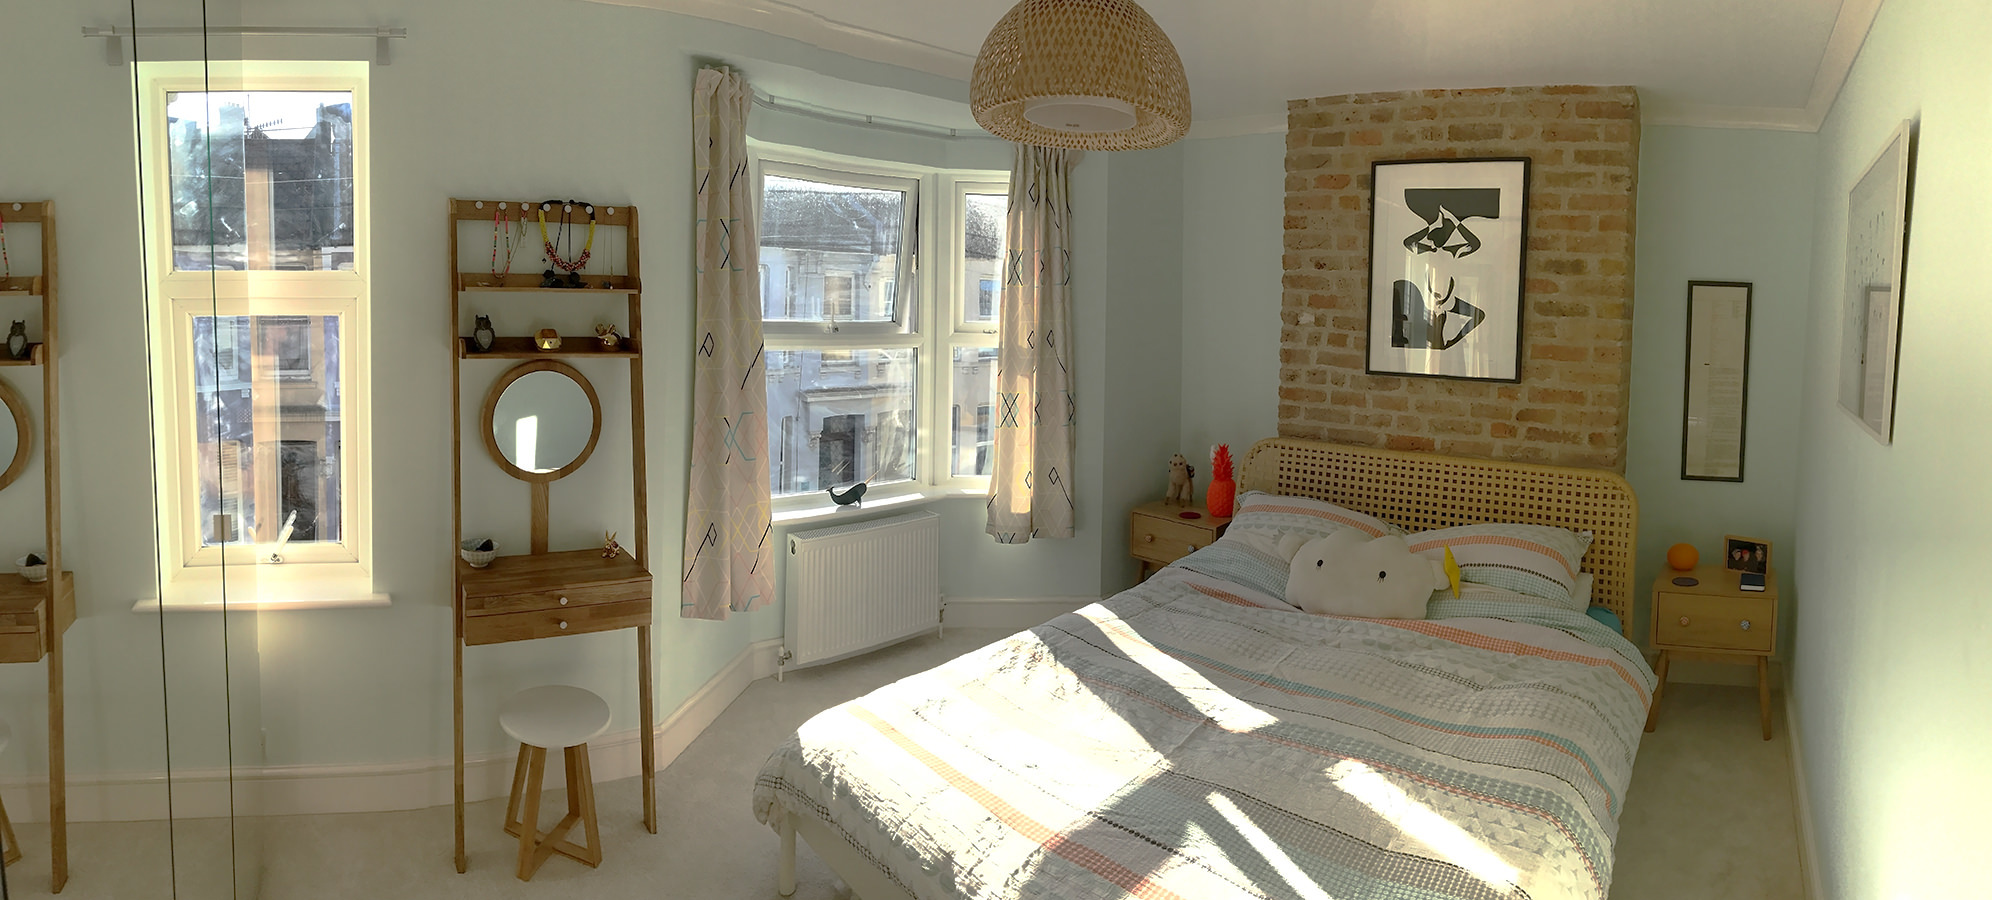
Our bedroom as it is now, just slightly tidier than usual.